Tennant 5680 (S/N 000000-029999) Operator Manual
FaST is discontinued. FaST cartridges and FaST parts are no longer available from Tennant.
5680 (Electric) (000000-029999) Walk-Behind Scrubber Operator Manual
North America / International
330450
Rev. 08 (09-2006)
This manual is furnished with each new model. It provides necessary operation and maintenance instructions.
Read this manual completely and understand the machine before operating or servicing it.
This machine will provide excellent service. However, the best results will be obtained at minimum costs if:
- The machine is operated with reasonable care.
- The machine is maintained regularly - per the machine maintenance instructions provided.
- The machine is maintained with manufacturer supplied or equivalent parts.
Always remember to recycle.
MACHINE DATA
Please fill out at time of installation for future reference.
- Model No. -
- Serial No. -
- Machine Options -
- Sales Rep. -
- Sales Rep. phone no. -
- Customer Number -
- Installation Date -
Tennant Company
PO Box 1452
Minneapolis, MN 55440
Phone: (800) 553-8033 or (763) 513-2850
www.tennantco.com
FaST-PAK is a US registered and unregistered trademark of Tennant Company.
Specifications and parts are subject to change without notice.
Copyright © 2000, 2002, 2004, 2005, 2006 TENNANT Company, Printed in U.S.A.
CONTENTS
| Topic | Page |
|---|---|
| SAFETY PRECAUTIONS | 2 |
| OPERATION | 4 |
| OPERATOR RESPONSIBILITY | 4 |
| MACHINE COMPONENTS | 5 |
| CONTROL PANEL SYMBOLS | 6 |
| CONTROLS AND INSTRUMENTS | 7 |
| STEERING HANDLES | 8 |
| ON-OFF KEY SWITCH | 9 |
| SCRUB SWITCH | 10 |
| SCRUB HEAD STRAP (DISC HEAD) | 10 |
| SQUEEGEE LEVER | 10 |
| HOURMETER | 11 |
| BATTERY DISCHARGE INDICATOR | 11 |
| FaST SWITCH (OPTION) | 11 |
| SOLUTION FLOW LEVER | 12 |
| CIRCUIT BREAKERS | 12 |
| SOLUTION TANK HOSE | 13 |
| RECOVERY TANK DRAIN HOSE | 13 |
| SUPPORT ARM | 13 |
| STOP ARM | 14 |
| SQUEEGEE DOWN PRESSURE CAMS | 14 |
| HOW THE MACHINE WORKS | 15 |
| FaST SCRUBBING SYSTEM (OPTION) | 16 |
| PRE-OPERATION CHECKLIST | 17 |
| INSTALLING FaST PAK AGENT (OPTION) | 18 |
| STARTING THE MACHINE | 20 |
| FILLING THE TANKS | 20 |
| NORMAL SCRUBBING | 22 |
| DOUBLE SCRUBBING | 26 |
| STOP SCRUBBING | 27 |
| DRAINING AND CLEANING THE TANKS | 28 |
| OPERATION ON INCLINES | 32 |
| STOP THE MACHINE | 32 |
| POST-OPERATION CHECKLIST | 33 |
| MACHINE TROUBLESHOOTING | 34 |
| MAINTENANCE | 36 |
| MAINTENANCE CHART | 36 |
| LUBRICATION | 38 |
| REAR CASTERS | 38 |
| TRANSAXLE | 38 |
| BATTERIES | 38 |
| CHARGING THE BATTERIES | 40 |
| ELECTRIC MOTORS | 41 |
| SCRUB HEAD | 42 |
| DISK BRUSH SCRUB HEAD SKIRT | 42 |
| CYLINDRICAL BRUSH SCRUB HEAD SKIRTS | 42 |
| ADJUSTING THE SCRUB HEAD SKIRTS | 42 |
| REPLACING THE SCRUB HEAD SKIRTS | 42 |
| REMOVING OR REPLACING THE SCRUB HEAD | 43 |
| LEVELING THE SCRUB HEAD | 46 |
| SCRUB BRUSHES AND PADS | 47 |
| DISK BRUSHES | 47 |
| REPLACING THE DISK BRUSHES OR PADS | 47 |
| Topic | Page |
|---|---|
| CYLINDRICAL BRUSHES | 51 |
| REPLACING THE CYLINDRICAL BRUSHES | 51 |
| CHECKING AND ADJUSTING CYLINDRICAL BRUSH PATTERN | 52 |
| SOLUTION SYSTEM | 54 |
| RECOVERY TANK | 54 |
| SOLUTION TANK | 55 |
| FaST SYSTEM (OPTION) | 56 |
| FaST SYSTEM FILTER SCREEN | 56 |
| FaST SUPPLY HOSE CONNECTOR | 56 |
| FaST SYSTEM AIR PUMP FILTER | 56 |
| SQUEEGEE | 57 |
| REMOVING THE SQUEEGEE ASSEMBLY | 57 |
| INSTALLING THE SQUEEGEE ASSEMBLY | 58 |
| LEVELING THE SQUEEGEE | 58 |
| ADJUSTING SQUEEGEE BLADE DEFLECTION | 59 |
| SQUEEGEE BLADES | 60 |
| REPLACING OR ROTATING THE REAR SQUEEGEE BLADE | 60 |
| REPLACING OR ROTATING THE FRONT SQUEEGEE BLADE | 61 |
| BELTS AND CHAINS | 63 |
| BRUSH DRIVE BELT | 63 |
| STATIC DRAG CHAIN | 63 |
| TIRES | 63 |
| PUSHING AND TRANSPORTING THE MACHINE | 64 |
| PUSHING THE MACHINE | 64 |
| TRANSPORTING THE MACHINE | 64 |
| MACHINE JACKING | 67 |
| STORAGE INFORMATION | 67 |
| FREEZE PROTECTION | 67 |
| SPECIFICATIONS | 68 |
| GENERAL MACHINE DIMENSIONS/CAPACITIES | 68 |
| FaST SYSTEM (OPTION) | 69 |
| GENERAL MACHINE PERFORMANCE | 69 |
| POWER TYPE | 70 |
| TIRES | 70 |
| MACHINE DIMENSIONS | 71 |
| INDEX | 72 |
SAFETY PRECAUTIONS
The following symbols are used throughout this manual as indicated in their description:
This machine is designed solely for scrubbing dirt and dust in an indoor environment. Tennant does not recommend using this machine in any other environment.
The following information signals potentially dangerous conditions to the operator or equipment. Read this manual carefully. Know when these conditions can exist. Locate all safety devices on the machine. Then, take necessary steps to train machine operating personnel. Report machine damage or faulty operation immediately. Do not use the machine if it is not in proper operating condition.
- Do not operate machine:
- Unless trained and authorized.
- Unless operation manual is read and understood.
- In flammable or explosive areas unless designed for use in those areas.
- Before starting machine:
- Make sure all safety devices are in place and operate properly.
- Check brakes and steering for proper operation (if so equipped).
- When using machine:
- Go slow on inclines and slippery surfaces.
- Use care when backing machine.
- Follow mixing and handling instructions on chemical containers.
- Before leaving or servicing machine:
- Stop on level surface.
- Turn off machine and remove key.
- When servicing machine:
- Avoid moving parts. Do not wear loose jackets, shirts, or sleeves when working on machine.
- Block machine tires before jacking machine up.
- Jack machine up at designated locations only. Block machine up with jack stands.
- Use hoist or jack that will support the weight of the machine.
- Wear eye and ear protection when using pressurized air or water.
- Disconnect battery connections before working on machine.
- Avoid contact with battery acid.
- Use Tennant supplied or equivalent replacement parts.
- When loading/unloading machine onto/off truck or trailer:
- Turn off machine.
- Use truck or trailer that will support the weight of the machine.
- Use winch. Do not push the machine onto/off the truck or trailer unless the load height is 380 mm (15 in) or less from the ground.
- Block machine tires.
- Tie machine down to truck or trailer.
SAFETY PRECAUTIONS
The safety labels appear on the machine in the locations indicated. If these or any label becomes damaged or illegible, install a new label in its place.
FLAMMABLE MATERIALS LABEL - LOCATED ON THE UNDERSIDE OF THE SOLUTION TANK COVER.
FOR SAFETY LABEL - LOCATED ON THE OPERATOR CONSOLE.
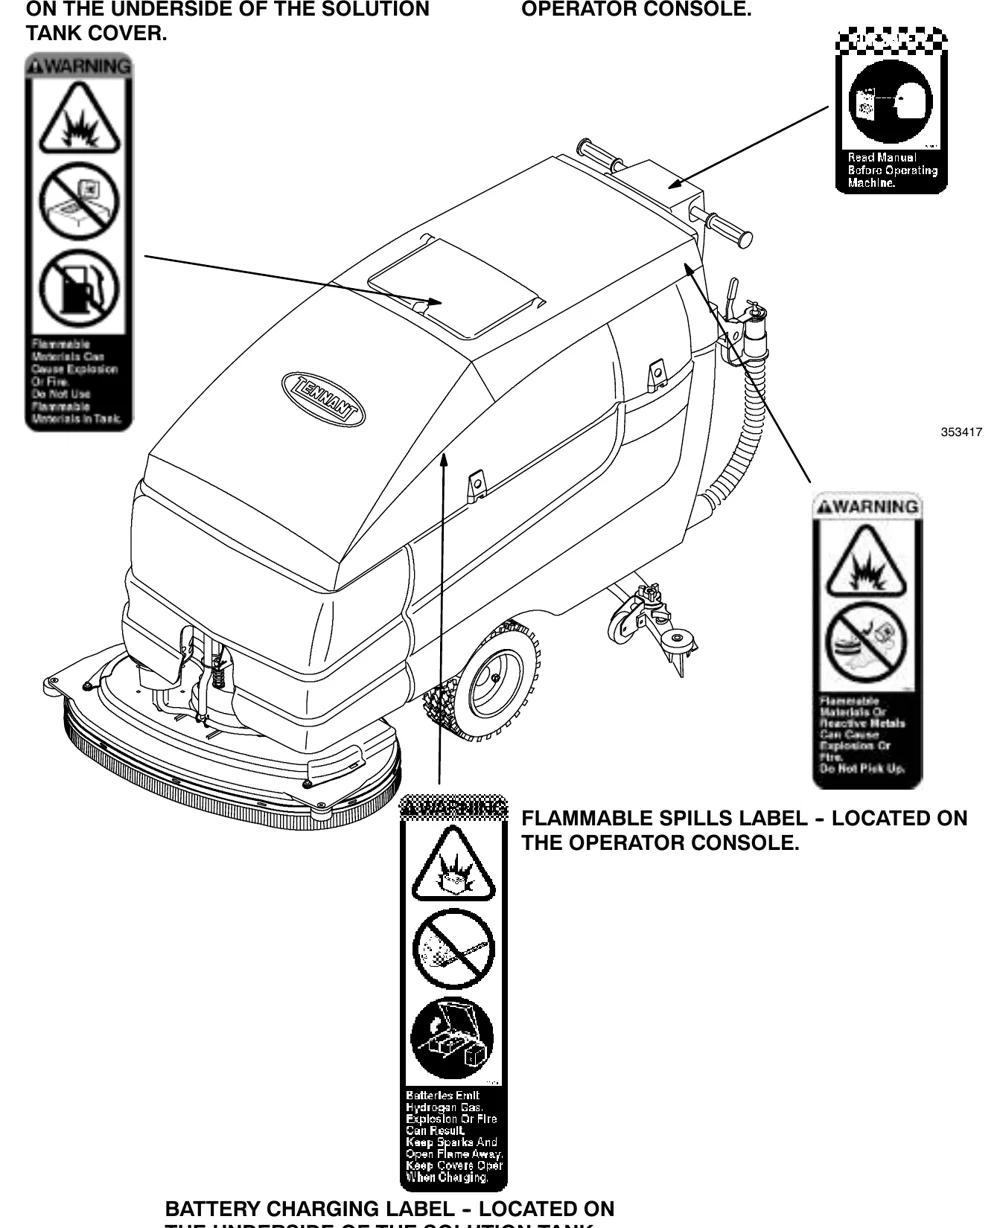
FLAMMABLE SPILLS LABEL - LOCATED ON THE OPERATOR CONSOLE.
BATTERY CHARGING LABEL - LOCATED ON THE UNDERSIDE OF THE SOLUTION TANK.
OPERATION
OPERATOR RESPONSIBILITY
- The operator’s responsibility is to take care of the daily maintenance and checkups of the machine to keep it in good working condition. The operator must inform the service mechanic or supervisor when the maintenance intervals are required as stated in the MAINTENANCE section of this manual.
- Read this manual carefully before operating this machine.
- Check the machine for shipping damage. Check to make sure the machine is complete per shipping instructions.
- Keep your machine regularly maintained by following the maintenance information in this manual. We recommend taking advantage of a regularly scheduled service contract from your Tennant representative.
- Order parts and supplies directly from your authorized Tennant representative. Use the parts manual provided when ordering parts.
- After operation, follow the recommended daily and hourly procedures stated in the MAINTENANCE CHART.
MACHINE COMPONENTS
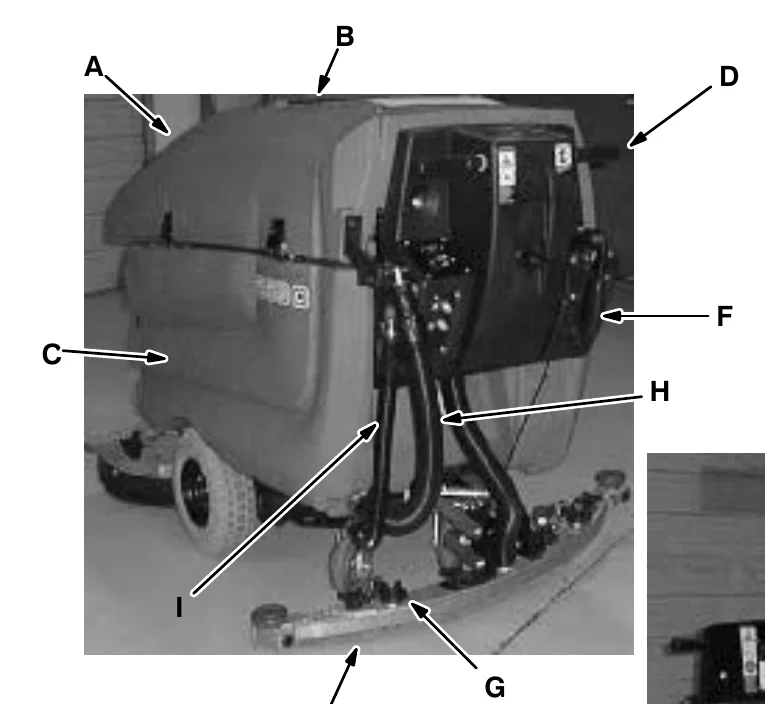
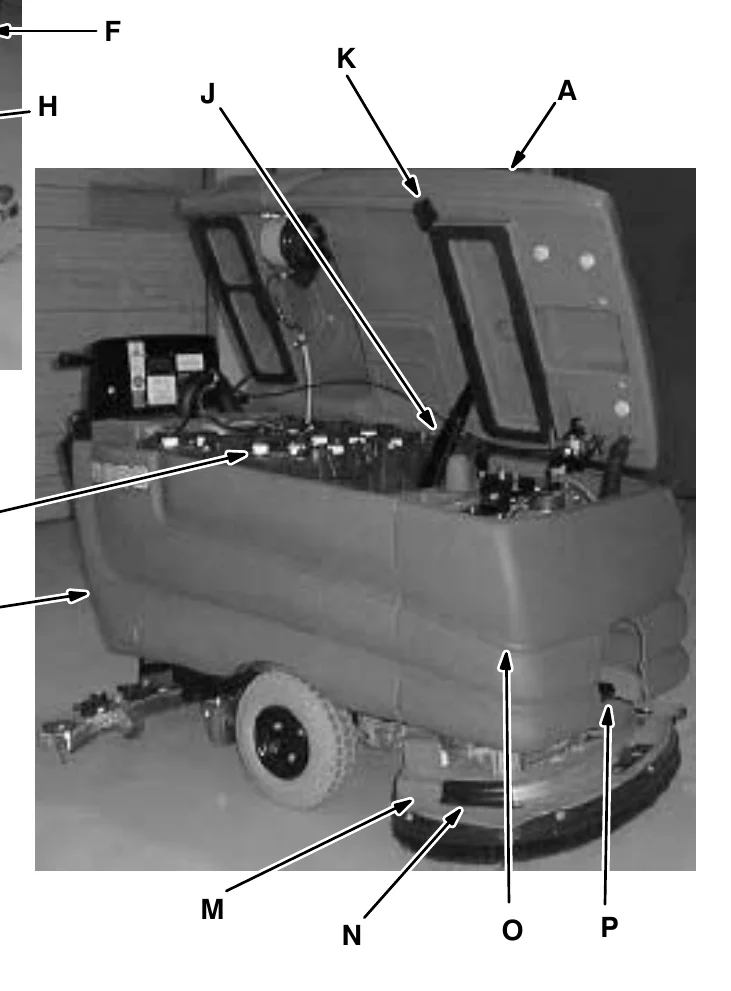
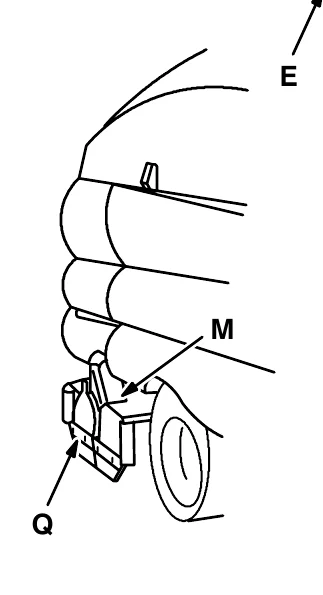
| Key | Component |
|---|---|
| A | Solution tank |
| B | Solution tank fill opening |
| C | Recovery tank |
| D | Steering handles |
| E | Squeegee |
| F | Squeegee lever |
| G | Squeegee down pressure cams |
| H | Recovery tank drain hose |
| I | Solution tank hose |
| J | Support arm |
| K | Stop arm |
| L | Batteries |
| M | Scrub head |
| N | Scrub brush access cover |
| O | FaST solution system (option) |
| P | Heavy duty scrub head strap (Disc Head) |
| Q | Scrub brush idler door |
OPERATION
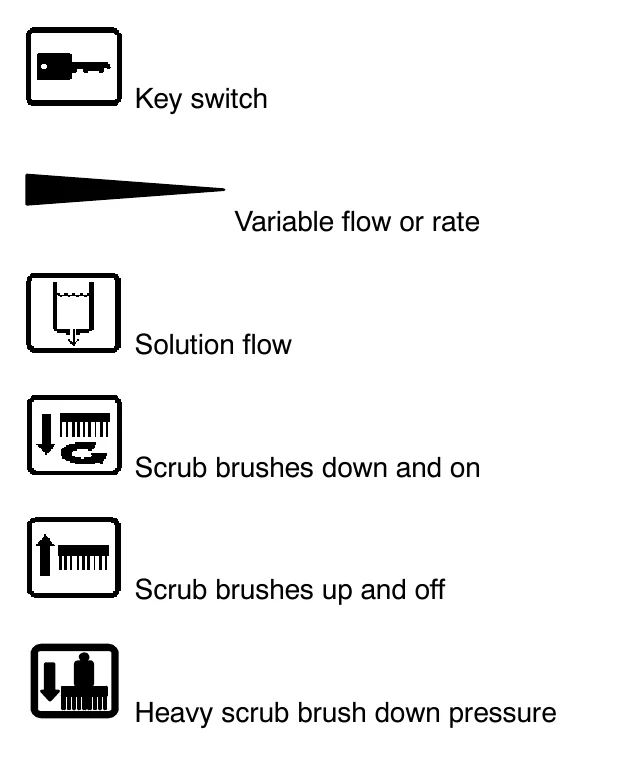
CONTROL PANEL SYMBOLS
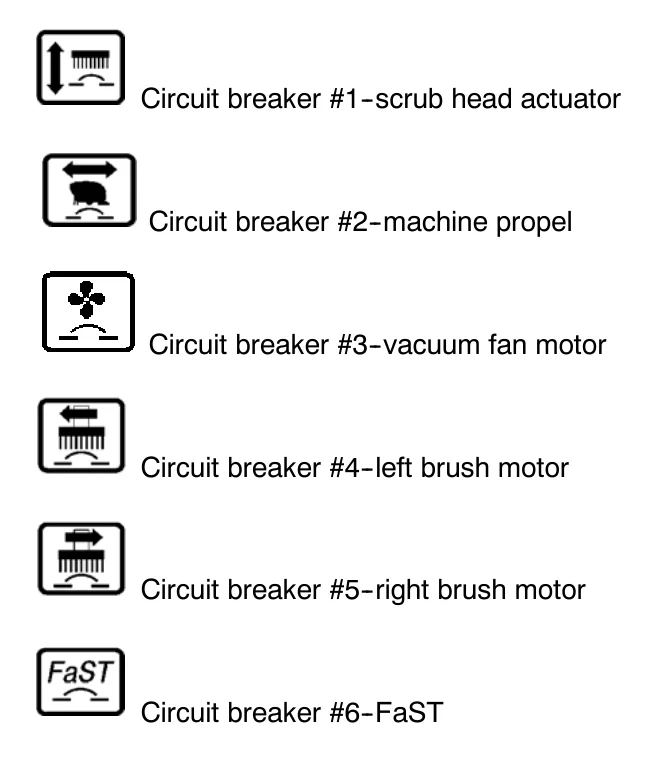
These symbols identify controls and displays on the machine:
CONTROLS AND INSTRUMENTS
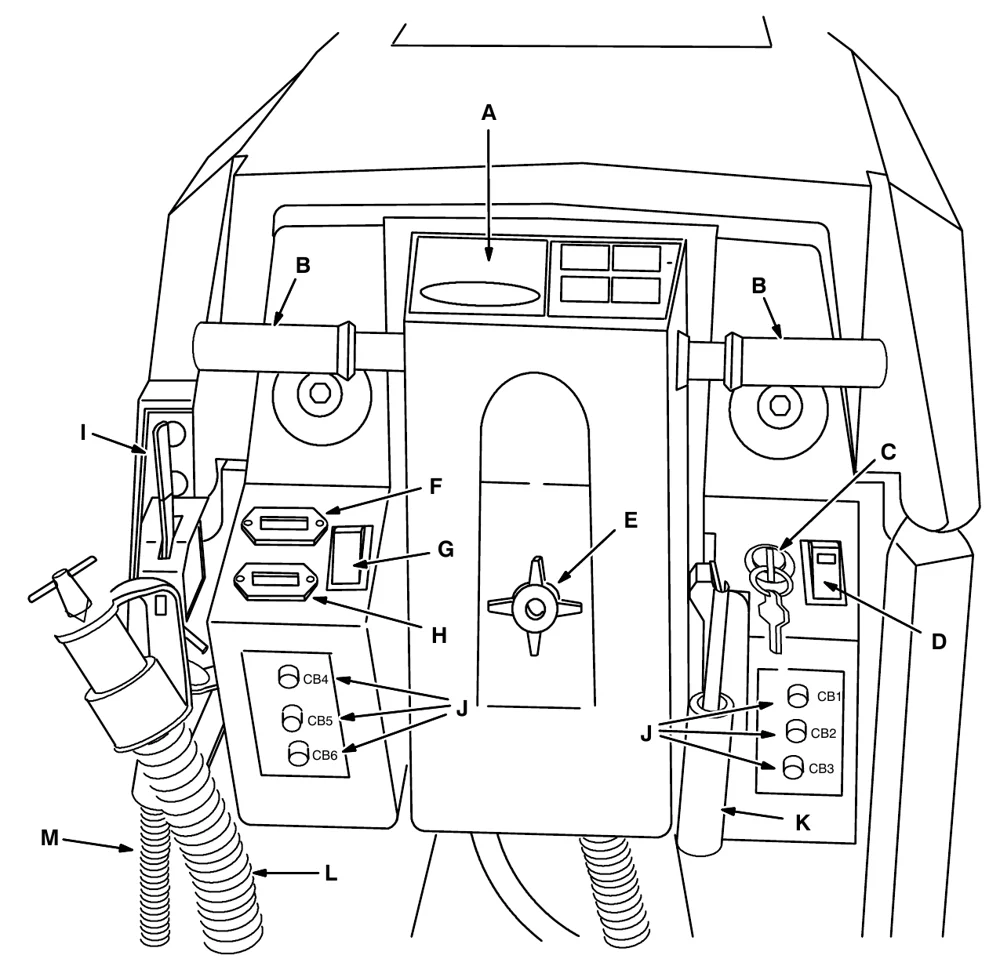
- Operation label
- Steering handles
- On-off key switch
- Scrub switch
- Console height adjustment knob
- Hourmeter
- FaST switch (option)
- Battery discharge indicator
- Solution flow lever
- Circuit breakers
- Squeegee lever
- Recovery tank drain hose
- Solution tank drain hose
OPERATION
STEERING HANDLES
The steering handles control the machine speed and direction.
Forward: Rotate the steering handles forward. The further forward you rotate the steering handles, the faster the machine will go.
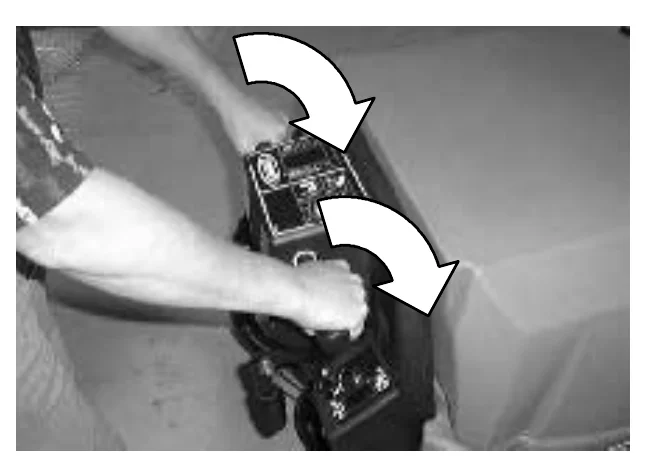
Backward: Rotate the steering handles backwards toward you.
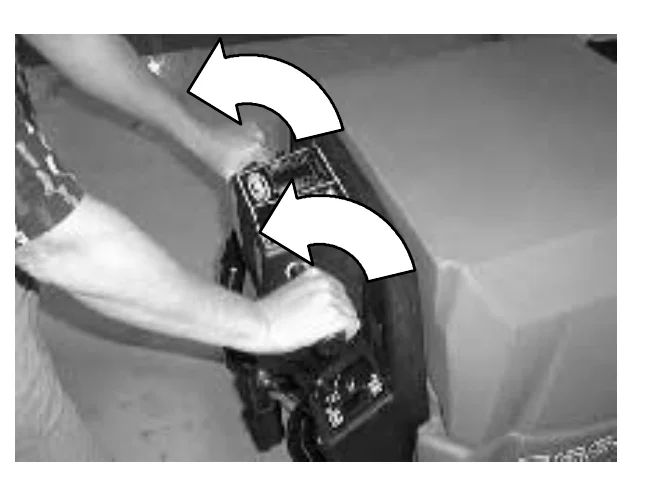
Turning: Push the machine in the direction of the turn with the steering handles. The machine will turn on the swivel casters.
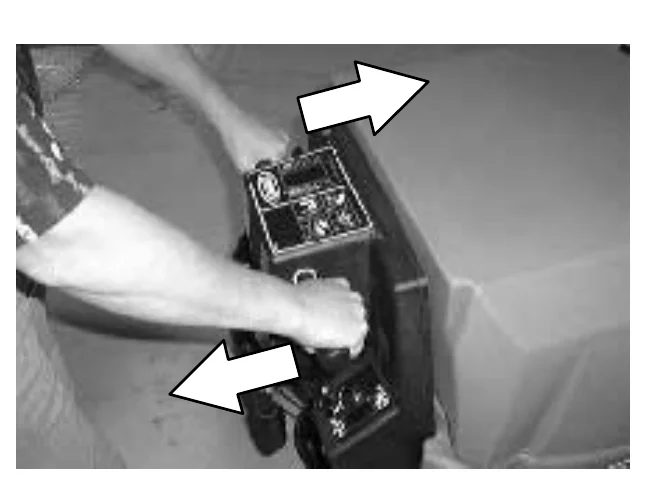
Stop: Release the steering handles.
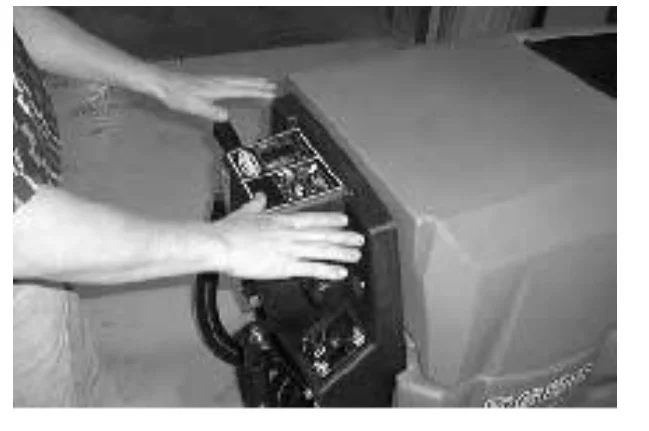
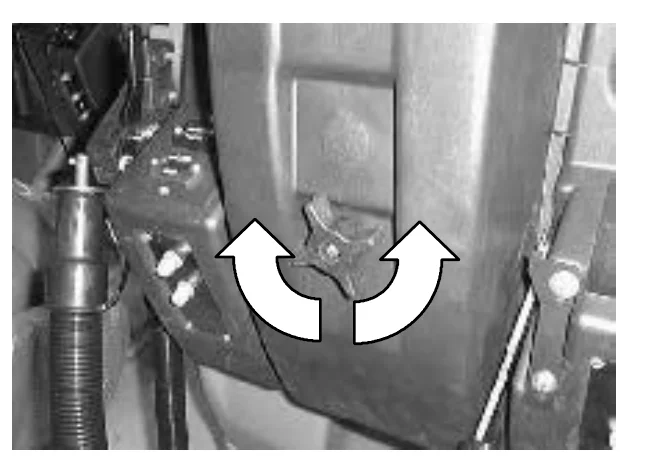
The steering console height is adjustable.
Adjust: Turn the console adjustment knob counterclockwise to loosen the knob. Move the console up or down to the desired height. Then turn the knob clockwise to tighten the knob, and lock the console in position.
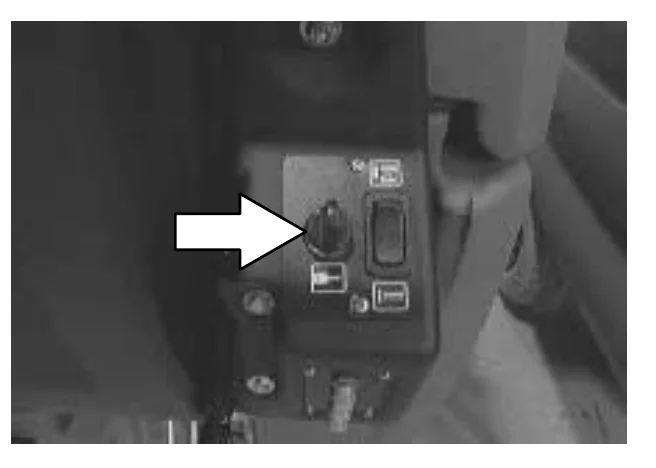
ON-OFF KEY SWITCH
The on-off key switch controls machine power with a key.
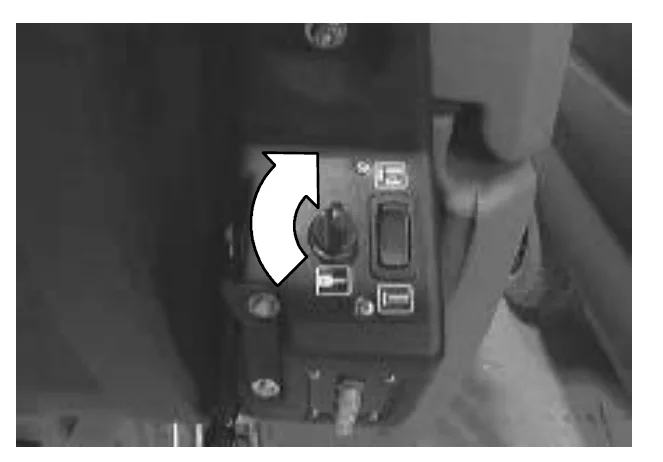
On: Turn the key to the right.
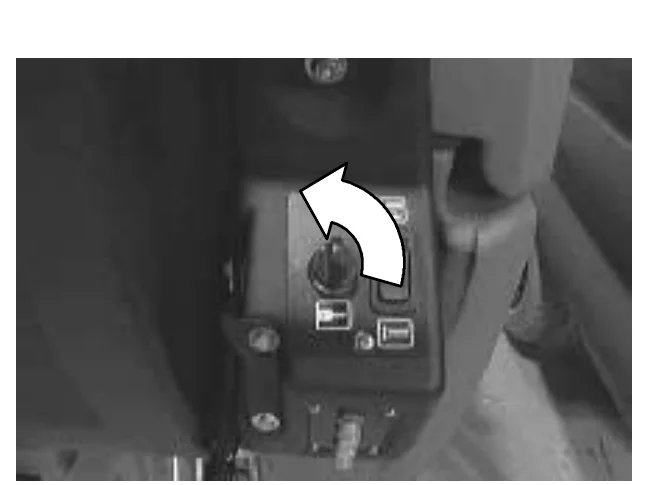
Off: Turn the key to the left.
OPERATION
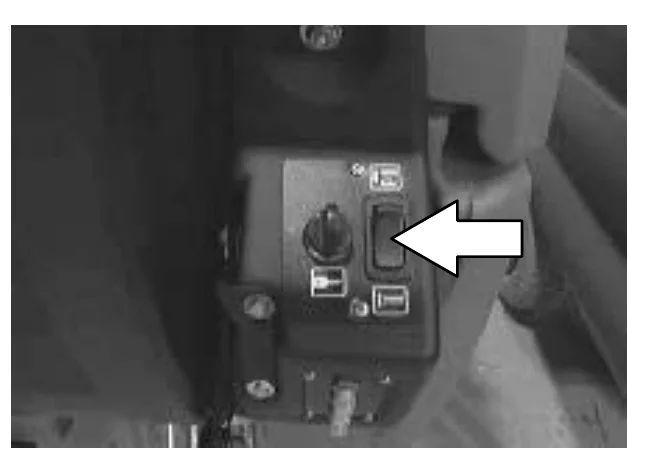
SCRUB SWITCH
The scrub switch controls the scrubbing operations.
Lower brushes and start scrubbing: Press the top of the switch.
Raise brushes and stop scrubbing: Press the bottom of the switch.
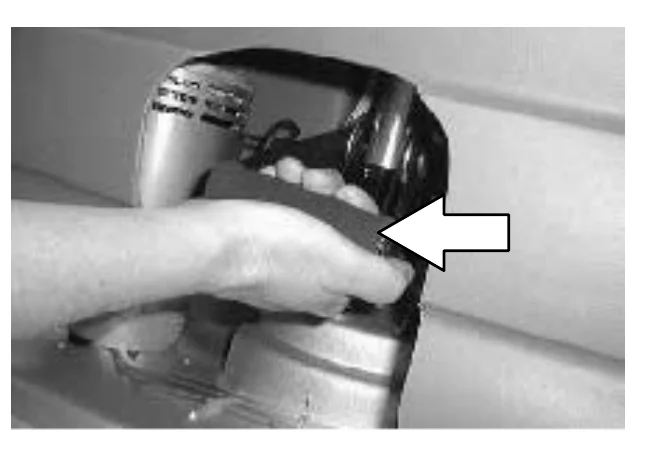
SCRUB HEAD STRAP (DISC HEAD)
The scrub head strap increases the scrub head pressure and puts the scrub head into heavy scrub mode.
The heavy scrub mode is used when deep scrubbing or floor stripping is necessary.
Start heavy scrub mode: With the scrub head in the up position, pull out on the scrub head strap until the scrub head drops into place. Lower the brushes and start scrubbing.
Stop heavy scrub mode: Press the bottom of the scrub switch. The scrub head will reset when it raises and stops scrubbing. When it is started again, the scrub head will operate at daily scrubbing pressure.
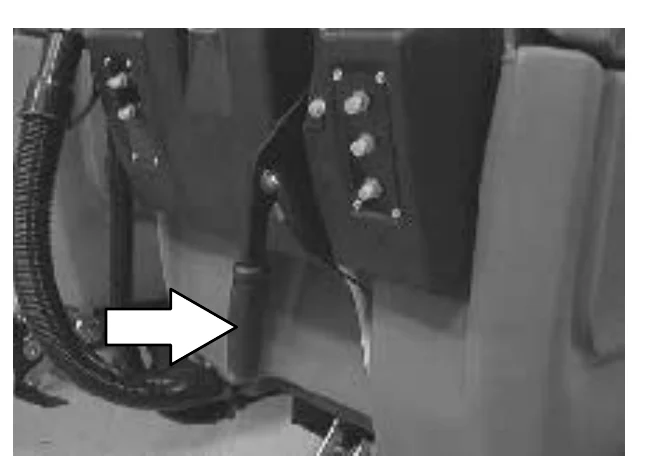
SQUEEGEE LEVER
The squeegee lever controls the squeegee and the vacuum system.
Lower squeegee and start vacuum: Move the squeegee lever up and to the left to unlock it, and then release the lever.
Raise squeegee and stop vacuum: Pull the lever up and move it to the right to lock the lever in the up position.
HOURMETER
The hourmeter records the number of hours the machine has been powered on. This information is useful when servicing the machine.
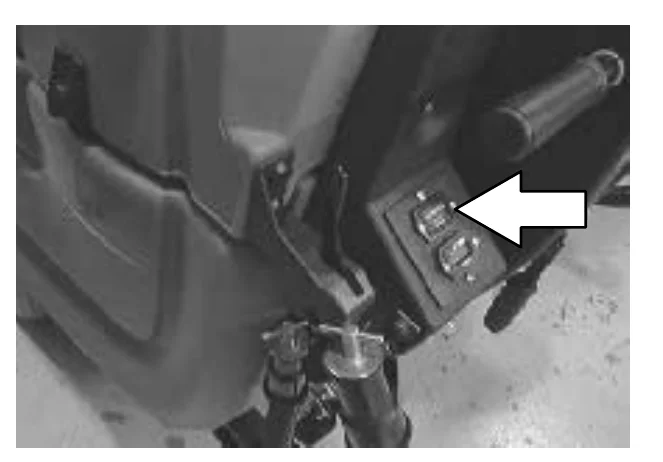
BATTERY DISCHARGE INDICATOR
The battery discharge indicator shows the charge level of the batteries.
When the batteries are fully charged, the indicator on the far right is lit. As the batteries discharge, the indicator will move along the display to the left. Recharge the batteries when the indicator flashes.
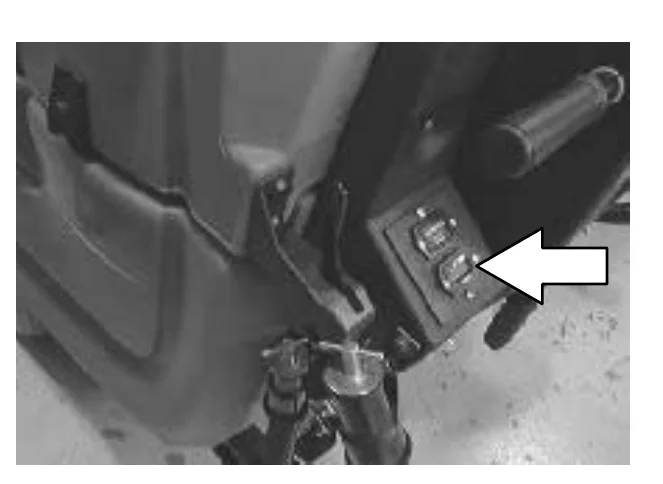
FaST SWITCH (OPTION)
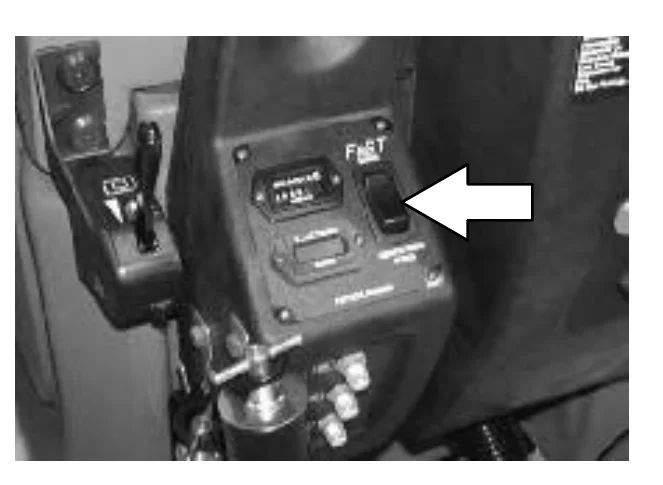
The FaST switch (option) enables the FaST (Foam Scrubbing Technology) system. When the FaST system is enabled, it is turned on and off with the scrub switch
Enable the FaST system: Press the top of the FaST switch.
Enable conventional scrubbing: Press the bottom of the FaST switch.
OPERATION
SOLUTION FLOW LEVER
The solution flow lever controls the amount of solution flow to the floor.
Increase: Push the lever forward.
Decrease: Pull the lever backward.
CIRCUIT BREAKERS
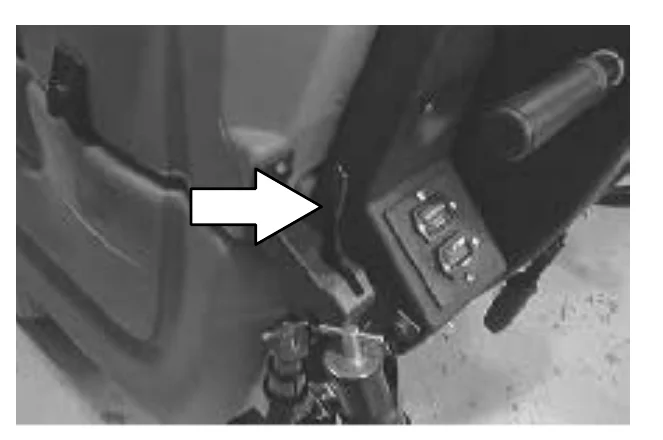
The circuit breakers are resettable electrical circuit protection devices. They stop the flow of current in the event of a circuit overload. Once a circuit breaker is tripped, reset manually by pressing the reset button after the breaker has cooled down.
If the overload that caused the circuit breaker to trip is still there, the circuit breaker will continue to stop current flow until the problem is corrected.
The circuit breakers are located on each side of the operator console.
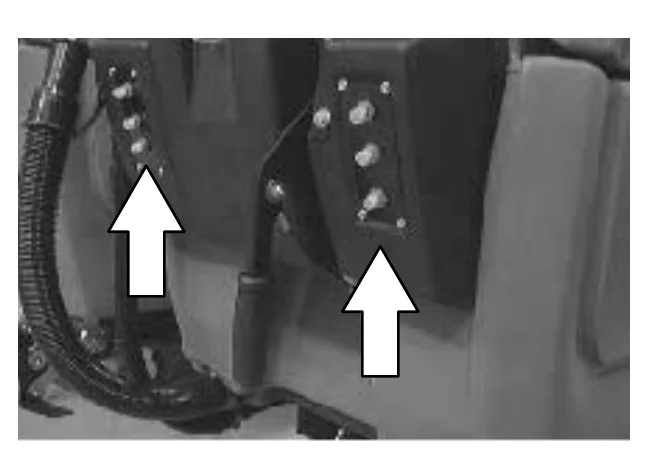
The chart shows the circuit breakers and the electrical components they protect.
| Circuit Breaker | Rating | Circuit Protected |
|---|---|---|
| CB1 | 10 A | Machine power |
| CB2 | 25 A | Machine propel |
| CB3 | 25 A | Vacuum fan motor |
| CB4 | 30 A | Right brush motor |
| CB5 | 30 A | Left brush motor |
| CB6 | 10 A | FaST (option) |
SOLUTION TANK HOSE
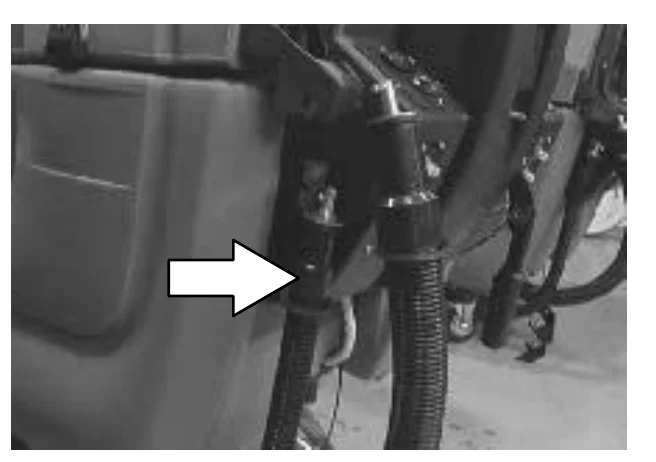
The solution tank hose is used to drain the solution tank. The drain hose plug is removed by turning the plug latch to loosen the plug and pulling the plug out of the drain hose. The drain hose is plugged by placing the hose plug in the end of the hose and turning the plug latch to tighten the plug.
RECOVERY TANK DRAIN HOSE
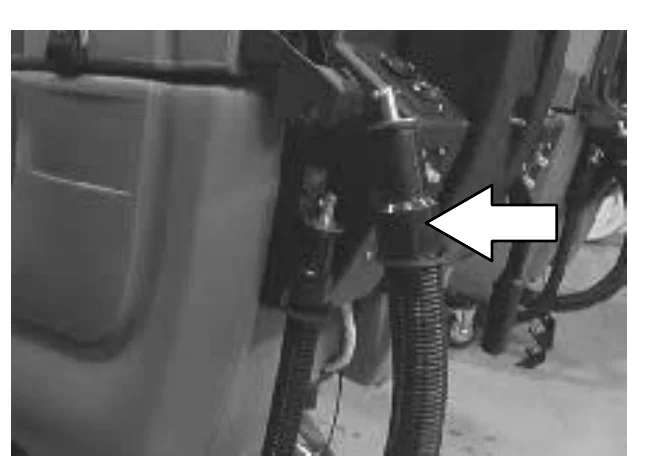
The recovery tank drain hose is used to drain the recovery tank. The drain hose plug is removed by turning the plug latch to loosen the plug and pulling the plug out of the drain hose. The drain hose is plugged by placing the hose plug in the end of the hose and turning the plug latch to tighten the plug.
SUPPORT ARM
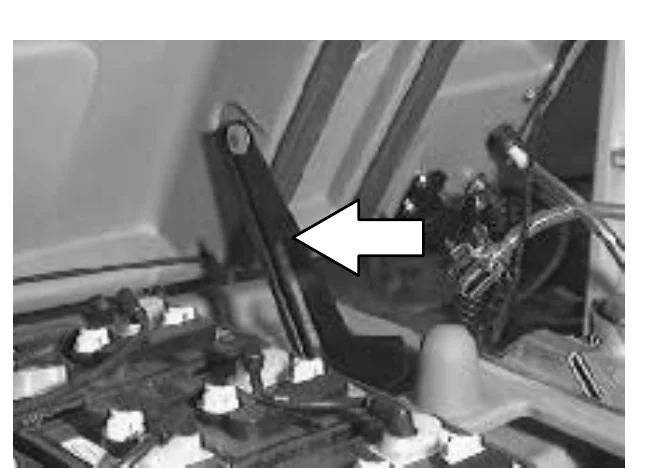
The support arm holds up the solution tank when the tank is lifted. The support arm engages when the solution tank is lifted all the way open. The arm is released by pulling up on it.
OPERATION
STOP ARM
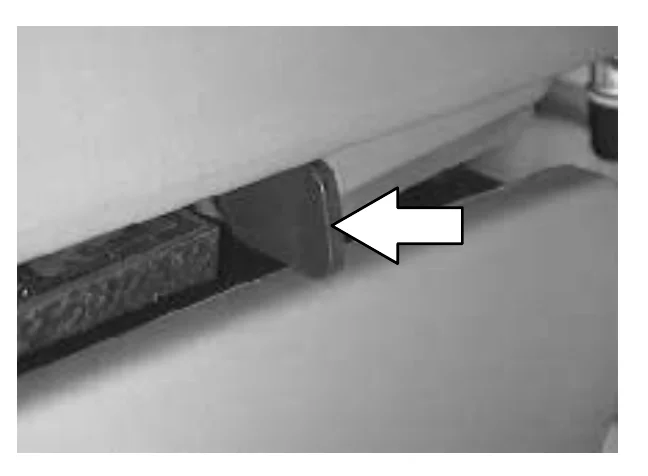
The stop arm prevents the solution tank from fully closing when the tank is lowered. Push the arm in to lower the solution tank completely.
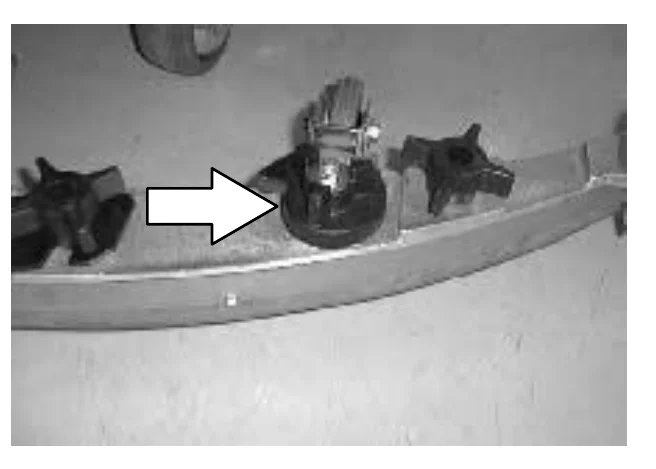
SQUEEGEE DOWN PRESSURE CAMS
The squeegee down pressure cams adjust the squeegee deflection along the entire length of the squeegee.
Increase: Turn the cams clockwise.
Decrease: Turn the cams counter-clockwise.
OPERATION
HOW THE MACHINE WORKS
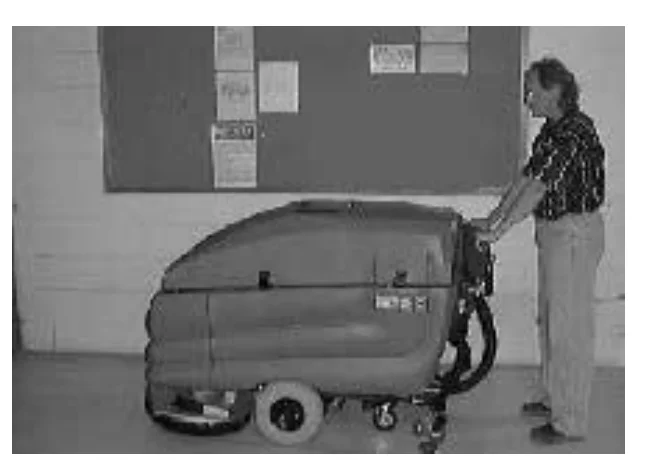
The scrub components of the machine are a solution tank, scrub brushes or pads, a squeegee, a vacuum fan, and a recovery tank.
With conventional scrubbing, water and detergent, from the solution tank, flow to the floor through a solution valve to the scrub brushes or pads. The brushes or pads scrub the floor. As the machine moves forward, the squeegee wipes the dirty solution off the floor, which is then picked up and drawn into the recovery tank.
The steering handles control the direction and speed of the machine in forward or reverse. By rotating the steering handles forward, the machine propels forward. By rotating the handles towards you, the machine propels backward.
Three different widths of scrub heads and squeegees are available for the machine.
The scrub head widths are as follows; the model 700 (700 mm (28 in)), the model 800 (800 mm (32 in)), and the model 900 (900 mm (36 in)). The 700 mm (28 in) squeegee is used with the 700 model scrub head, as well as the 800 mm (32 in) with the model 800, and the 900 mm (36 in) with the model 900.
OPERATION
FaST SCRUBBING SYSTEM (OPTION)
The FaST (Foam Scrubbing Technology) system operates by injecting the FaST PAK concentrate agent (A) into the system with a small amount of water and compressed air. This mixture creates a large volume of expanded wet foam.
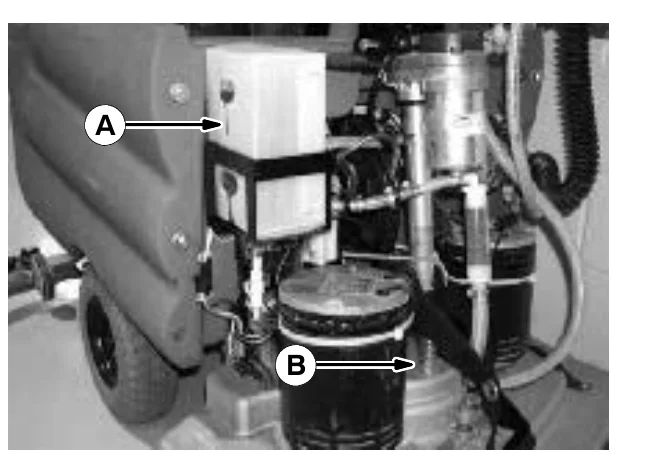
The expanded foam mixture is then dispersed onto the floor (B) while the machine is scrubbing. When the squeegee picks up the mixture, the patented foaming agent has collapsed and is recovered into the recovery tank.
The FaST system can be used with all double scrubbing and heavy duty scrubbing applications.
Using the FaST system can increase productivity by 30% by reducing your dump/fill cycle. It will also reduce chemical usage and storage space. One FaST PAK of concentrated agent can scrub up to 1 million sq. ft.
PRE-OPERATION CHECKLIST
Check over this list of items before operating the machine:
- Check under the machine for leaks.
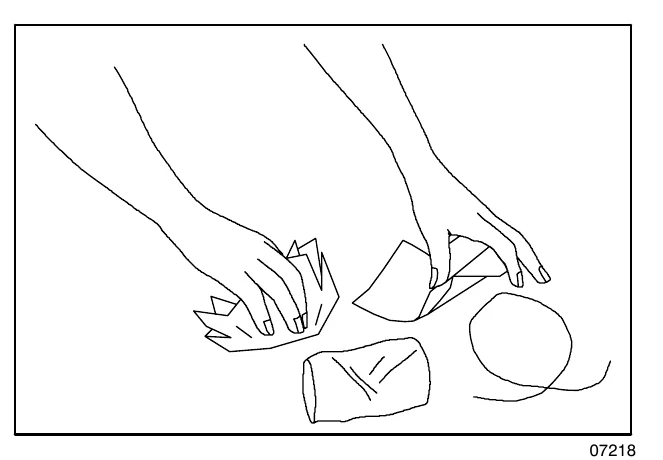
- Check for wire, string, or twine wrapped around the scrub brushes.
- Check the squeegees for wear or damage.
- Check the squeegee suction hose for obstructions.
- Check the recovery tank cover seals for wear or damage.
- Check that the vacuum fan inlet filter is clean.
- FaST Scrubbing: Check the FaST PAK (option) concentrate agent level, replace carton as needed. See the INSTALLING THE FaST PAK AGENT section of the manual.
- FaST Scrubbing: Check that all conventional cleaning agents/restorers are drained and rinsed from the solution tank.
- FaST Scrubbing: Check that solution tank is filled with clear cool water only.
OPERATION
INSTALLING FaST PAK AGENT (OPTION)
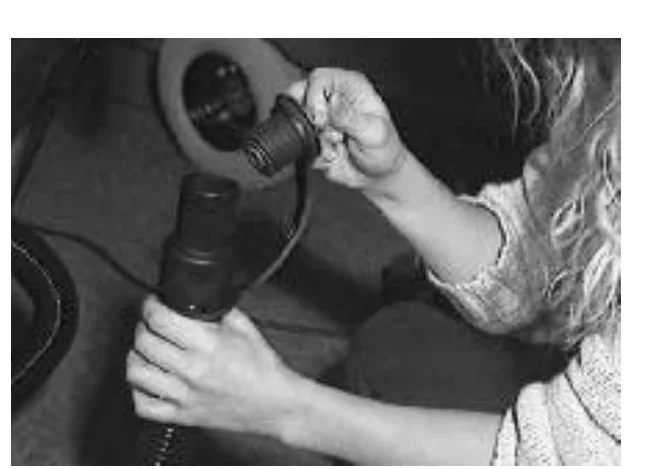
- Remove the perforated knock-outs from the FaST PAK Floor Cleaning Concentrate carton. Do not remove the bag from the carton. Pull out the bag’s hose connector on the bottom of the bag and remove the hose cap from the connector.
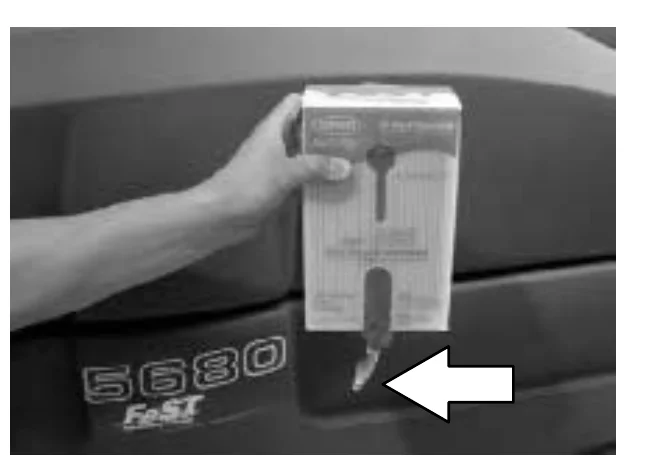
- Empty the solution tank. See the DRAINING AND CLEANING THE TANKS section of the manual.
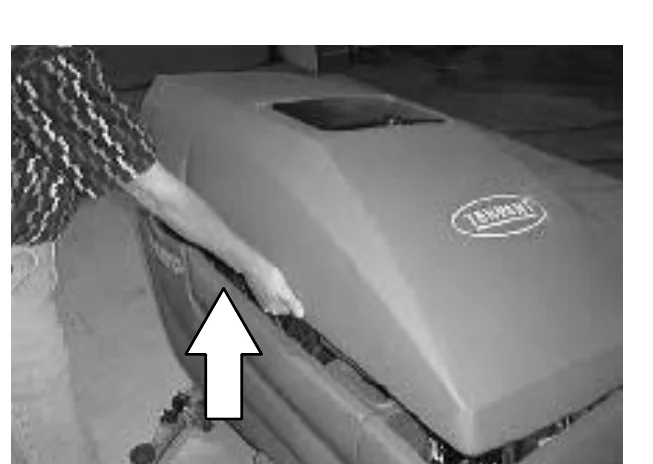
- Raise the solution tank and remove the front cover to access the FaST PAK carton.
OPERATION
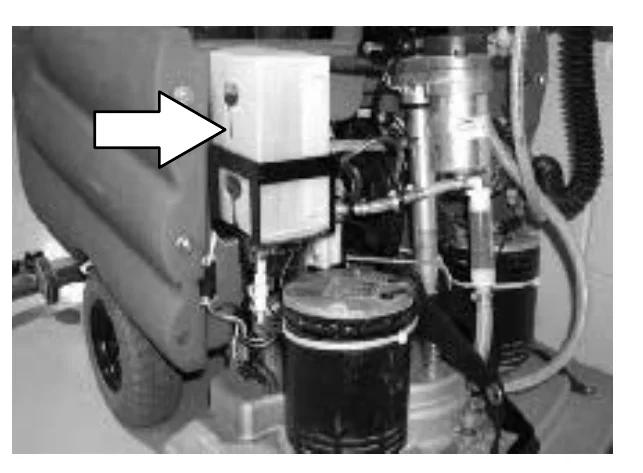
- Place the FaST PAK carton in the carton holder under the front cover of the machine. Connect the supply hose to the FaST PAK bag.
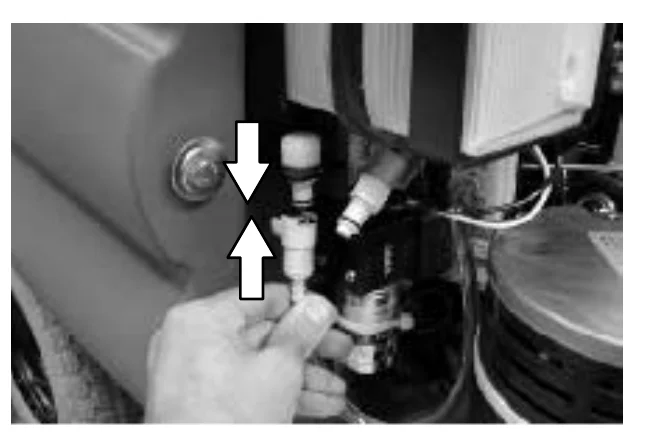
- Make sure to connect the supply hose onto the hose storing plug when the supply hose is not connected to the FaST PAK. This will prevent the FaST solution system from drying out and clogging up the hose.
- When replacing an empty FaST PAK carton, allow the new FaST PAK detergent to gravity feed into the system for several minutes prior to operating the FaST system. If the detergent does not flow out of the FaST PAK, simply squeeze and release the hose several times. If the previous FaST PAK was run dry, it may take up to 3 minutes of operation to remove any air pockets in the system before you achieve maximum foaming.
OPERATION
STARTING THE MACHINE
- Turn the machine power on.
FILLING THE TANKS
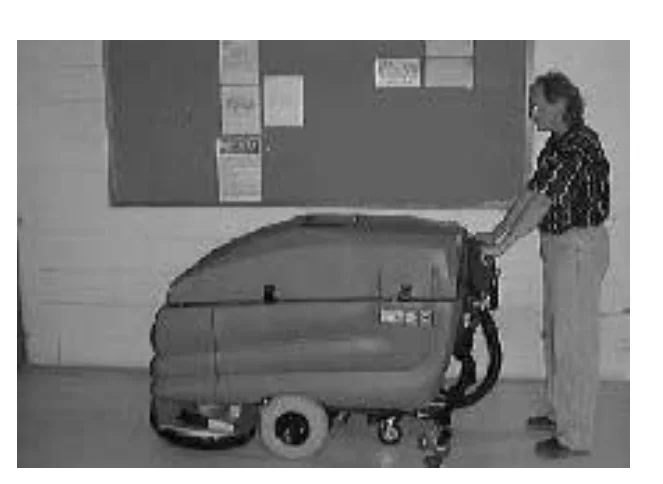
- Start the machine.
- Drive the machine to the filling site.
- Turn the machine power off.
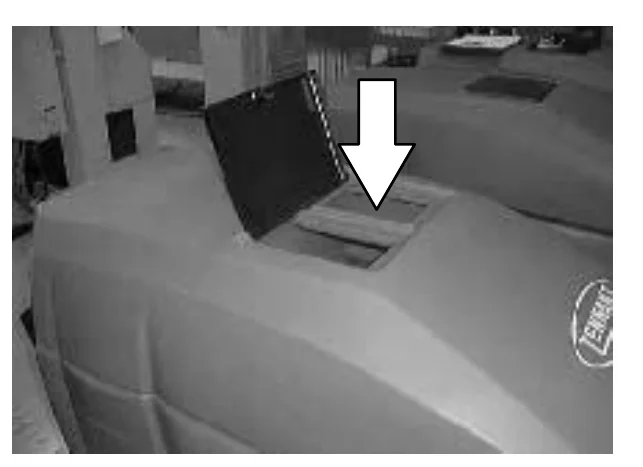
- CONVENTIONAL SCRUBBING: Open the solution tank cover and partially fill the solution tank with water. Pour the required amount of detergent into the solution tank fill opening. Continue filling the solution tank with water 25 mm (1 in) below the bottom of the solution fill opening channel.
- FaST SCRUBBING: Open the solution tank cover and fill the solution tank with clear cool water only.
OPERATION
NORMAL SCRUBBING
- Pick up oversized debris before scrubbing. Pick up pieces of wire, string, twine, etc., which could become wrapped around the scrub brush.
- Plan the scrubbing in advance. Try to arrange long runs with minimum stopping and starting. Do an entire floor or section at one time.
- Try to scrub as straight a path as possible. Avoid bumping into posts or scraping the sides of the machine. When scrubbing dead end aisles, start at the closed end of the aisle and scrub your way out. Overlap the scrub paths by a few centimeters (inches).
- If you see poor scrubbing performance, stop scrubbing and refer to MACHINE TROUBLESHOOTING.
Non-scuff polypropylene scrub brush - This brush uses a softer, general purpose polypropylene bristle to lift lightly compacted soilage without scuffing high-gloss coated floors.
Nylon scrub brush - Recommended for scrubbing coated floors. Cleans without scuffing.
Super abrasive bristle scrub brush - Nylon fiber impregnated with abrasive grit to remove stains and soilage. Strong action on any surface, performing well on buildup, grease, or tire marks.
Heavy duty stripping pad - This black pad is for stripping floors. Cuts through old heavy finishes easier, to prepare the floor for re-coating.
Stripping pad - This brown pad is for stripping floors. Quickly and easily cuts through old finish to prepare the floor for re-coating.
Scrubbing pad - This blue pad is for scrubbing floors. Removes dirt, spills and scuffs, leaving a clean surface ready for re-coating.
Buffing pad - This red pad is for buffing floors. Quickly cleans and removes scuff marks while polishing the floor to a high gloss.
Polishing pad - This white pad is for polishing floors. Maintains a high gloss. Use for buffing very soft finishes and lower traffic areas, or use for polishing soft waxes on wood floors.
Cylindrical polypropylene scrub brush - This cylindrical brush uses a softer, general purpose polypropylene bristle to lift lightly compacted soilage without scuffing high-gloss coated floors.
Cylindrical nylon scrub brush - This cylindrical brush is recommended for scrubbing coated floors. Cleans without scuffing.
Cylindrical super abrasive bristle scrub brush - Nylon fiber impregnated with abrasive grit to remove stains and soilage. Strong action on any surface, performing well on buildup, grease, or tire marks.
- Start the machine.
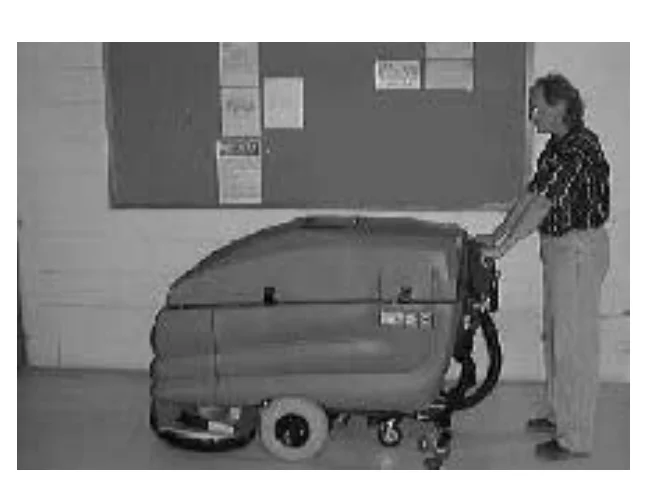
- Drive the machine to the area to be scrubbed.
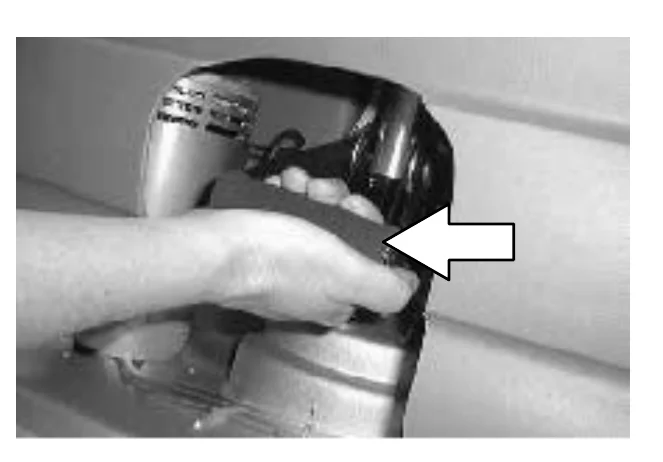
- Heavy Scrub Mode only: With the scrub head in the up position, pull out on the scrub head strap, until the scrub head drops into place.
OPERATION
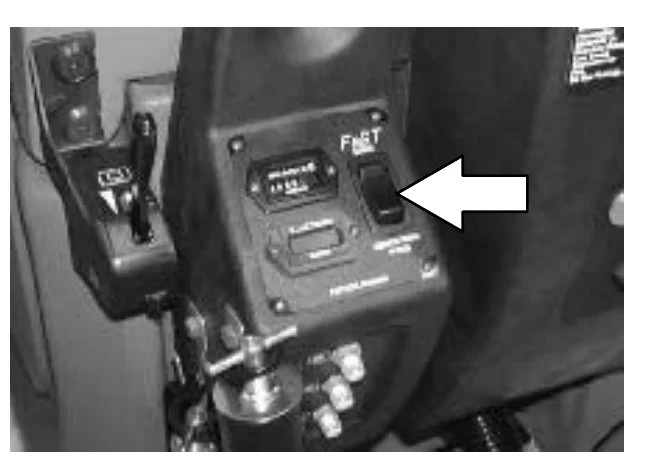
- FaST SCRUBBING: Press the top of the FaST switch to start the FaST system.
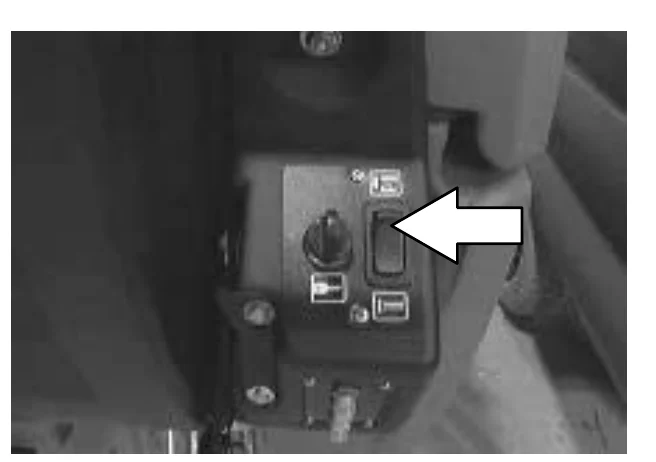
- Press the top of the scrub switch to lower the scrub head and begin scrubbing.
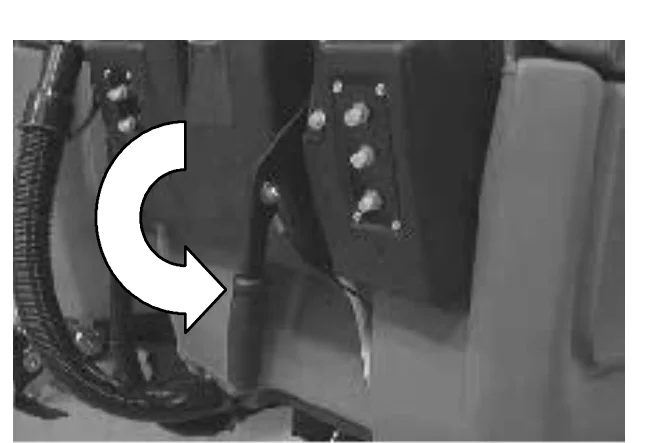
- Lower the squeegee to the floor with the squeegee lever.
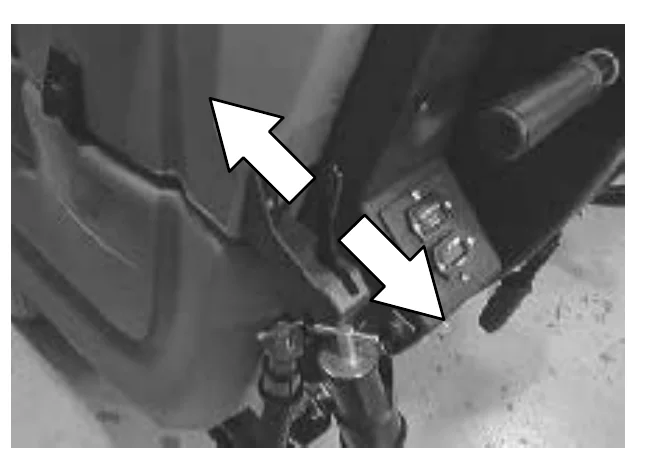
- CONVENTIONAL SCRUBBING: Adjust the solution flow to the floor as needed.
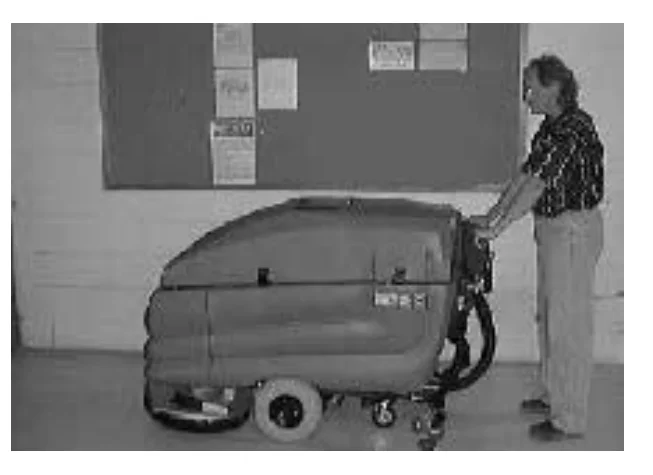
- Drive the machine forward and scrub as required.
OPERATION
DOUBLE SCRUBBING
Double scrubbing is a method for removing heavy floor accumulations. This is done by making two passes over the area to be cleaned with the machine.
Double scrubbing can be performed using the FaST SCRUBBING SYSTEM (option) or CONVENTIONAL SCRUBBING methods.
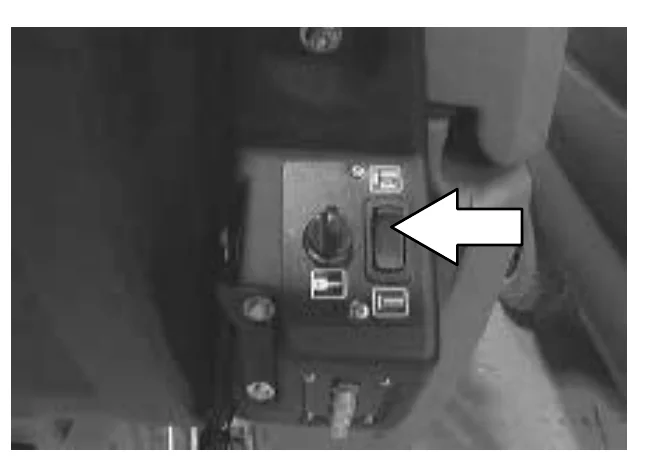
- First, make a pass over the area scrubbing with the squeegee up. This dispenses the solution/foam over the area allowing the solution/foam to soak on the floor.
NOTE: When using the FaST system (option), the solution flow lever is nonfunctional. The FaST system flow rate is pre-set.
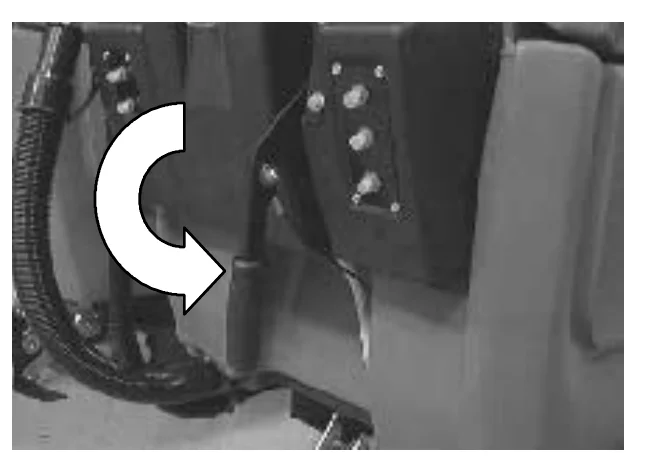
- Lower the squeegee to the floor with the squeegee lever.
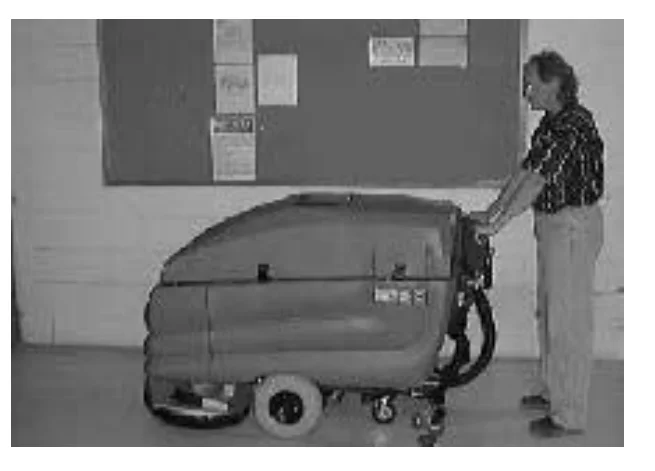
- Then make a second pass scrubbing with the squeegee down.
OPERATION
STOP SCRUBBING
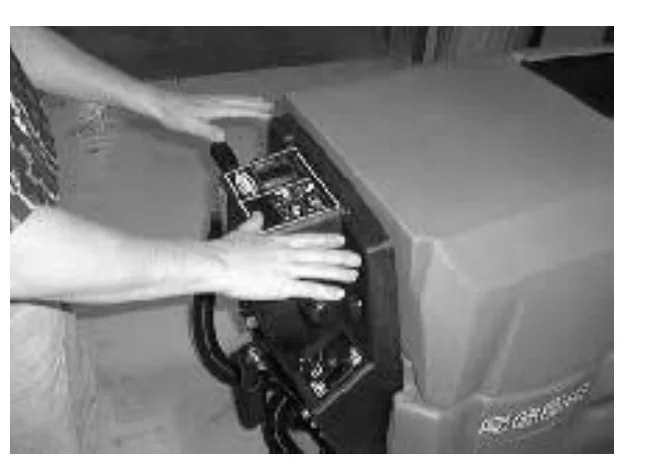
- Release the steering handles.
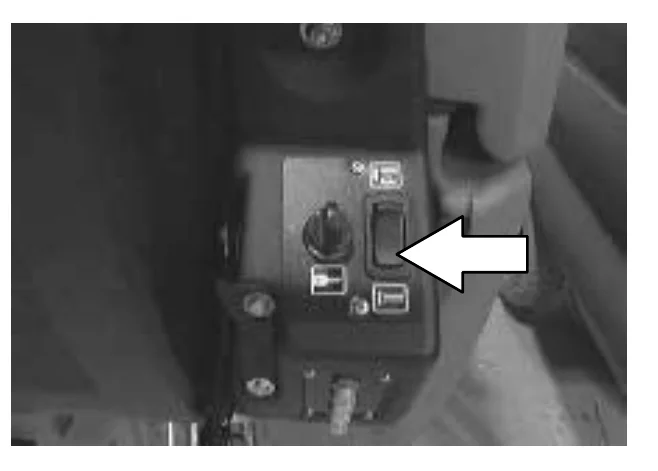
- Press the bottom of the scrub switch to stop scrubbing and raise the scrub brushes.
- Propel the machine forward to pick up any solution left on the floor.
- Raise the squeegee with the squeegee lever.
OPERATION
DRAINING AND CLEANING THE TANKS
When you are finished scrubbing, or when the vacuum fan shuts off, signalling a full recovery tank, the recovery tank should be drained and cleaned. The solution tank then can be filled again for additional scrubbing.
- Stop scrubbing. See the STOP SCRUBBING section of the manual.
- Drive the machine next to a floor drain or sink.
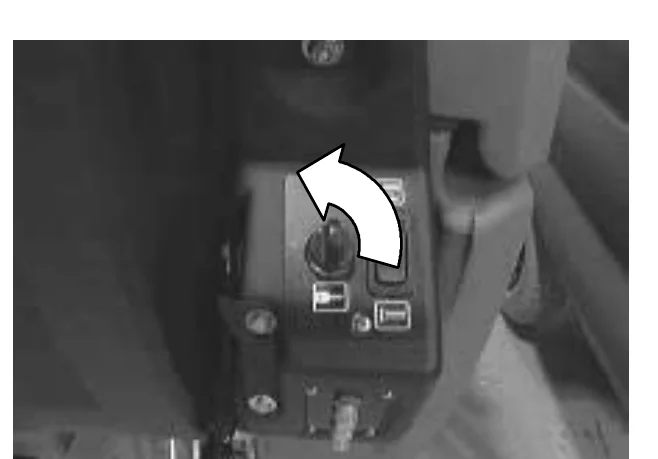
- Turn the machine power off.FOR SAFETY: Before leaving or servicing machine, stop on level surface, and turn off machine.
- Remove the recovery tank drain hose from the mounting clip.
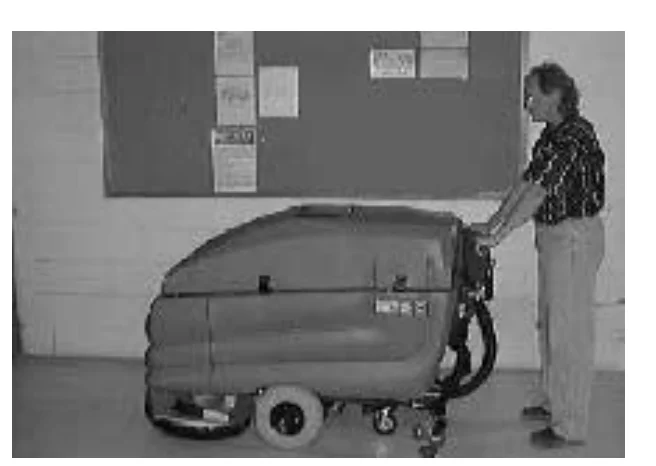
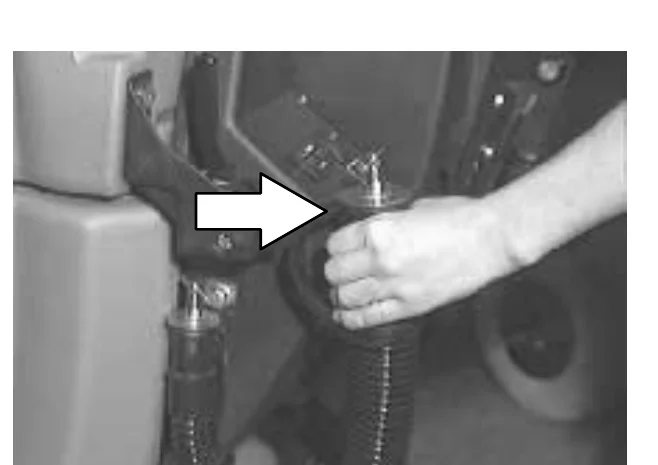
- Remove the recovery tank drain hose plug while holding the hose up, then slowly lower the drain hose to the floor drain or sink.
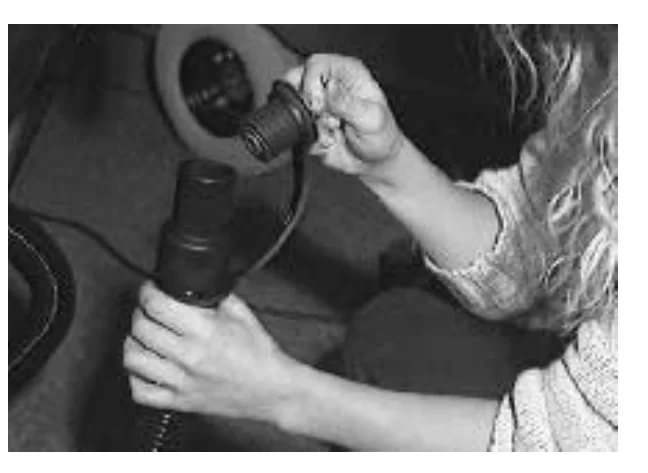
- Check the solution tank, and empty any remaining solution with the solution tank drain hose.
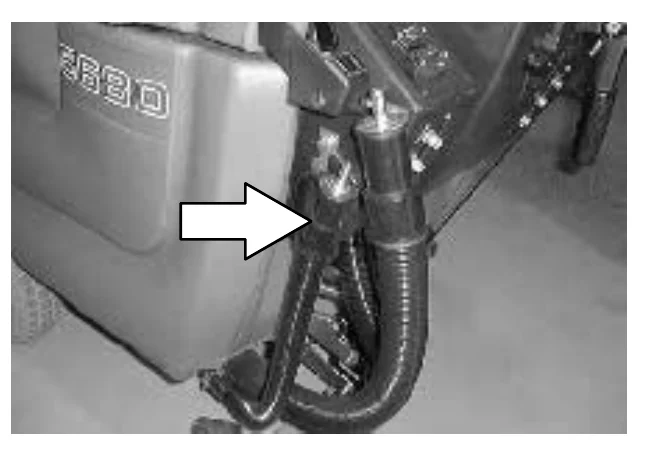
- Lift the solution tank to reach the recovery tank.
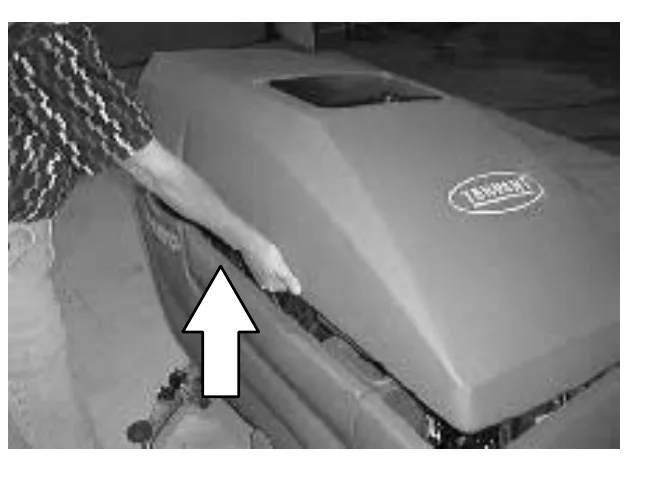
OPERATION
- Flush out the inside of the recovery tank with clean water.
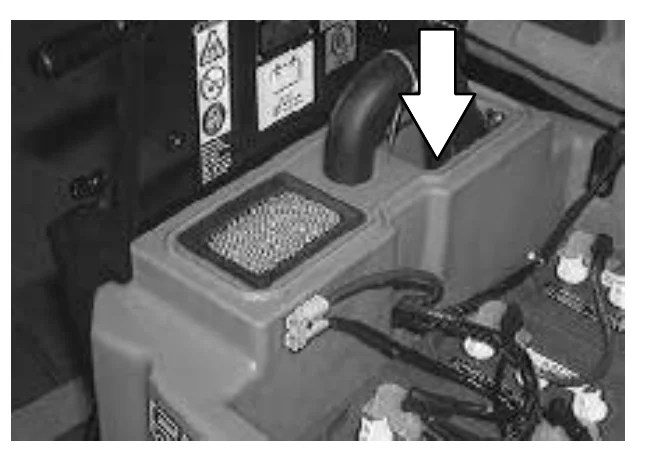
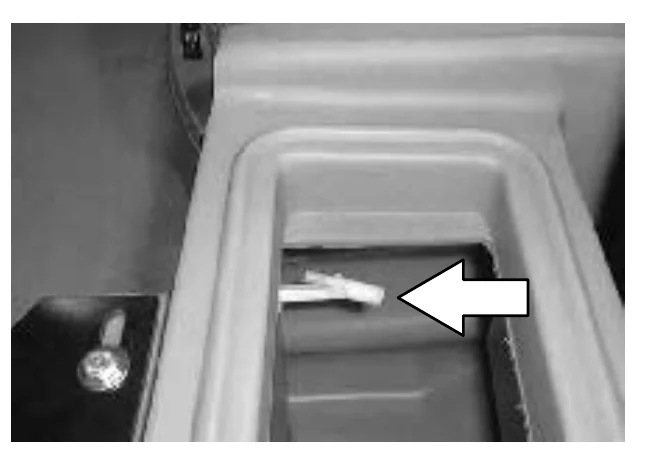
- Rinse off the float sensor on the side of the recovery tank.
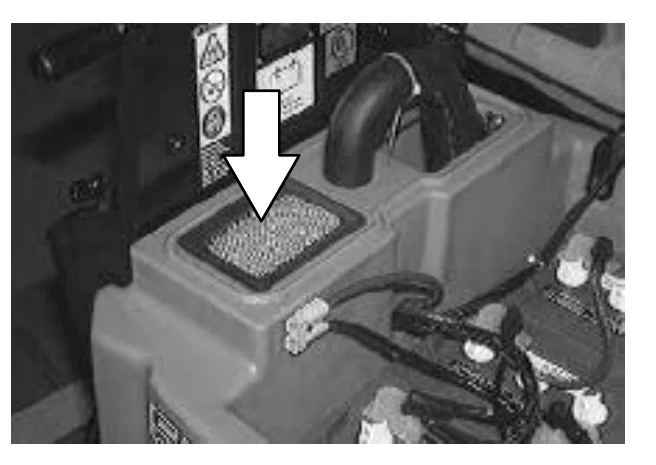
- Remove and clean the vacuum fan filter located in the recovery tank. Clean by shaking dust or rinsing pleats with low pressure water. Insert the filter back in to the recovery tank when finished.
OPERATION
- When the recovery, and solution tanks have completely drained, replace the drain hose plugs. Place the drain hoses back onto the mounting clips on the machine.
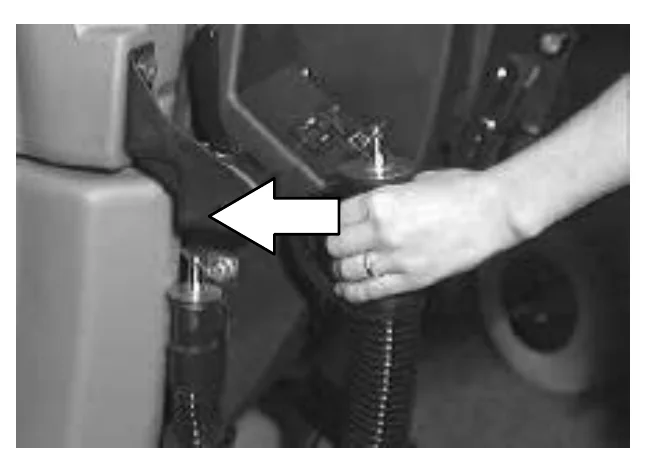
- Pull up on the support arm and lower the solution tank. Push the stop arm in to completely lower the solution tank.
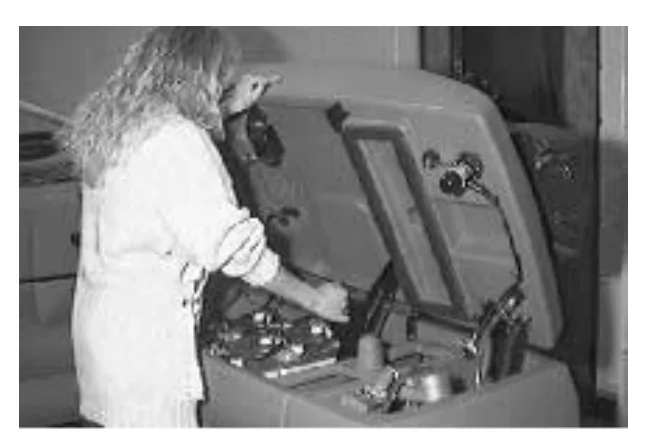
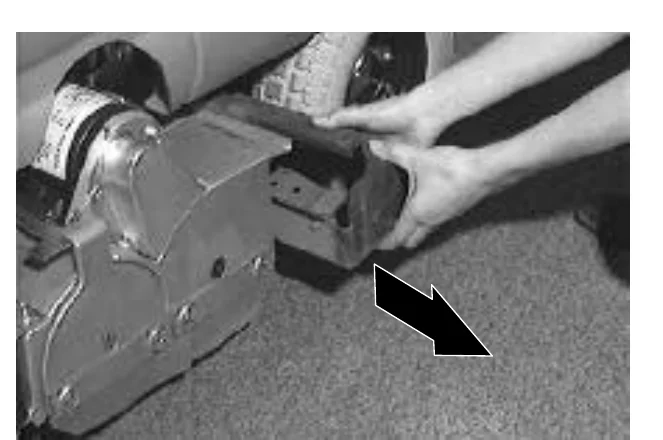
- Cylindrical scrub head: Remove and clean the debris trough. Place the trough back in the scrub head.
OPERATION
OPERATION ON INCLINES
Drive the machine slowly on inclines.
The maximum rated climb and descent incline with empty tanks is 8°, with full tanks is 6°.
STOP THE MACHINE
- Stop scrubbing. See the STOP SCRUBBING section of the manual.
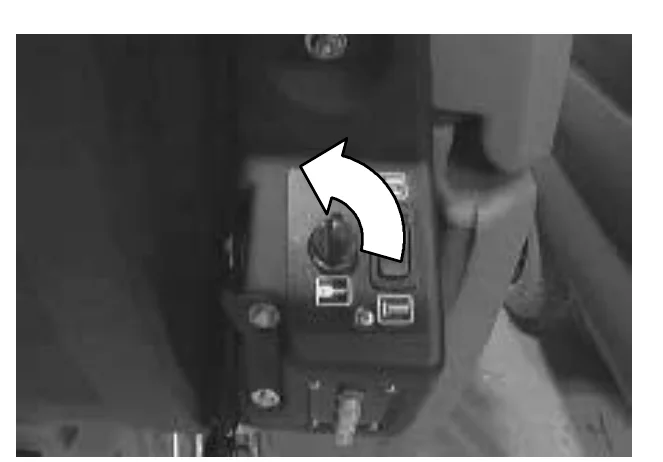
- Turn the machine power off.
POST-OPERATION CHECKLIST
Batteries and chargers: make sure your charger is compatible with your batteries, and set its charging algorithm to your battery pack before you use it.
Check over this list of items after you have finished scrubbing with the machine powered on:
- Check the battery charge level.
Check over this list of items with the machine powered off:
- Check for wire, string, or twine wrapped around the scrub brushes.
- Check the squeegees for wear or damage.
- Check the squeegee suction hose for obstructions.
- Drain and clean the recovery tank.
- Clean the vacuum fan inlet filter.
- Check under the machine for leaks.
- Check the service records to determine maintenance requirements.
- FaST scrubbing: If FaST PAK is empty after scrubbing, install the new FaST PAK or connect the supply hose to the storage plug.
MACHINE TROUBLESHOOTING
| Problem | Cause | Remedy |
|---|---|---|
| Trailing water - poor or no water pickup | Worn squeegee blades | Rotate or replace squeegee blades |
| Squeegee out of adjustment | Adjust squeegee | |
| Vacuum hose clogged | Flush vacuum hoses | |
| Vacuum fan screen dirty | Clean inlet screen | |
| Debris caught on squeegee | Remove debris | |
| Vacuum hose to squeegee or recovery tank disconnected or damaged | Reconnect or replace vacuum hose | |
| Solution tank not completely closed | Check for obstructions | |
| Heavy duty batteries posts too tall, file down posts | ||
| Machine front cover mounted too high, mount cover lower | ||
| Torn seals on solution tank | Replace seals | |
| Vacuum fan will not turn on | Recovery tank full | Drain recovery tank |
| Foam filling recovery tank | Empty recovery tank | |
| Use less or change detergent | ||
| Use a defoamer | ||
| Recovery tank sensor dirty or stuck | Clean or replace | |
| Vacuum fan circuit breaker tripped | Reset circuit breaker | |
| Little or no solution flow to the floor | Solution tank empty | Fill solution tank |
| Solution control cable broken or out of adjustment | Replace and/or adjust cable | |
| Solution flow turned off | Turn solution flow on | |
| Solution supply lines plugged | Flush solution supply lines | |
| Solution supply line filter dirty | Clean filter | |
| Solution solenoid clogged or stuck | Clean or replace | |
| Poor scrubbing performance | Debris caught on scrub brushes or pads | Remove debris |
| Improper detergent, brush, or pad used | Check with TENNANT representative for advice | |
| Worn scrub brush(es) or pad(s) | Replace scrub brush(es) or pad(s) | |
| Scrub brush motor circuit breaker(s) tripped | Reset circuit breaker(s) | |
| Reduce scrub brush down pressure | ||
| Uneven brush pressure, level scrub head | ||
| Check with TENNANT representative for advice | ||
| Low battery charge | Charge batteries until the charger automatically turns off |
OPERATION
| Problem | Cause | Remedy |
|---|---|---|
| Poor propelling traction | Tires slip on oily or waxed floors | Contact TENNANT representative |
| Uneven brush down pressure | Level scrub head | |
| FaST System (option) does not operate | FaST switch is set for Conventional scrubbing | Set the FaST switch for FaST system scrubbing |
| FaST circuit breaker tripped | Determine cause and reset the 10A circuit breaker button | |
| Clogged FaST PAK supply hose and/or connectors | Soak connector and hose in warm water and clean | |
| FaST PAK carton is empty or not connected | Replace FaST PAK carton and/or connect supply hose | |
| Clogged flow control orifice and/or screen | Remove and clean orifice and/or screen | |
| Faulty pump or air compressor | Contact TENNANT representative | |
| Clogged filter screen | Drain solution tank, remove and clean filter screen | |
| FaST system is not primed | To prime, operate the FaST solution system for 3 minutes. |
MAINTENANCE
MAINTENANCE CHART
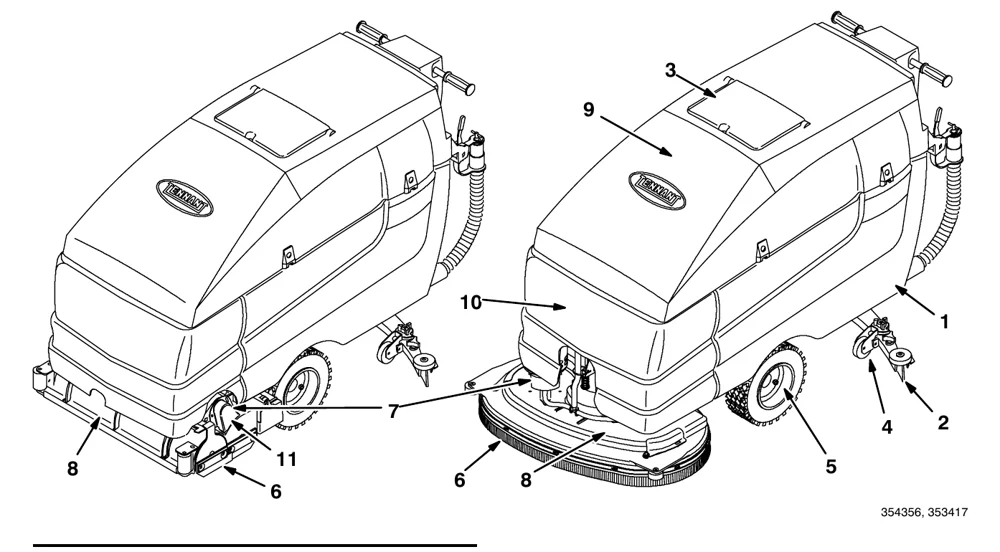
| Interval | Key | Description | Procedure | Lubricant/ Fluid | No. of Service Points |
|---|---|---|---|---|---|
| Daily | 2 | Squeegee | Check for damage and wear | - | 1 |
| 2 | Check deflection and leveling | - | 1 | ||
| 8 | Scrub brushes or pads | Check for damage and wear | - | 2 | |
| 1 | Recovery tank | Clean tank | - | 1 | |
| 1 | Clean float sensor | - | 1 | ||
| 3 | Solution tank | Clean | - | 1 | |
| 3 | Vacuum fan filter | Clean | - | 1 | |
| Machine | Check for leaks | - | 1 | ||
| 6 | Disk scrub head skirt | Check for damage and wear | - | 1 | |
| 6 | Cylindrical scrub head skirts | Check adjustment | - | 4 | |
| 6 | Check for damage and wear | - | 4 | ||
| 10 | FaST PAK supply hose and connector (option) | Clean and connect hose to storing plug when not in use | - | 1 | |
| 50 Hours | 10 | FaST Filter screen (option) | Clean | - | 1 |
| 8 | Cylindrical brushes | Check taper and rotate front to rear | - | 2 | |
| 100 Hours | 4 | Rear casters | Lubricate | SPL | 2 |
| 11 | Cylindrical scrub brush drive belts | Check tension | - | 2 |
MAINTENANCE
| Interval | Key | Description | Procedure | Lubricant/ Fluid | No. of Service Points |
|---|---|---|---|---|---|
| 200 Hours | 10 | FaST Air filter (option) | Clean | - | 1 |
| 500 Hours | 9 | Vacuum fan motor | Check motor brushes | - | 1 |
| 1000 Hours | 7 | Scrub brush motors | Check motor brushes | - | 2 |
| 5 | Propelling motor | Check motor brushes | - | 1 | |
| 5 | Transaxle | Check lubricant level | GL | 1 |
SPL - Special lubricant, Lubriplate EMB grease (TENNANT part no. 01433-1)
GL - SAE 90 weight gear lubricant
MAINTENANCE
LUBRICATION
REAR CASTERS
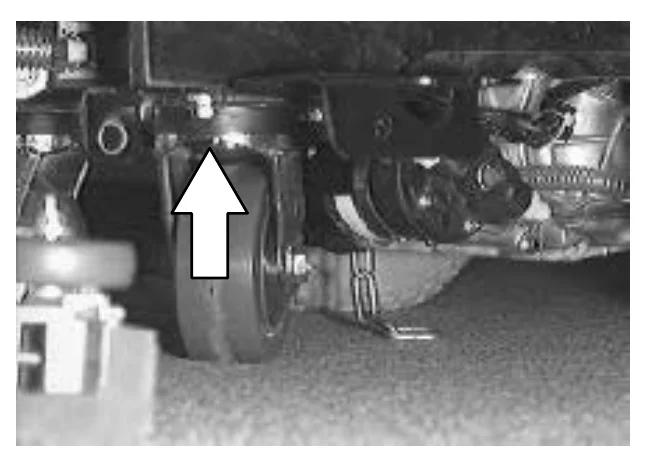
The rear casters each have one grease fitting on the caster swivel. Lubricate the caster with a grease gun containing Lubriplate EMB grease (TENNANT part no. 01433-1) every 100 hours of machine operation.
TRANSAXLE
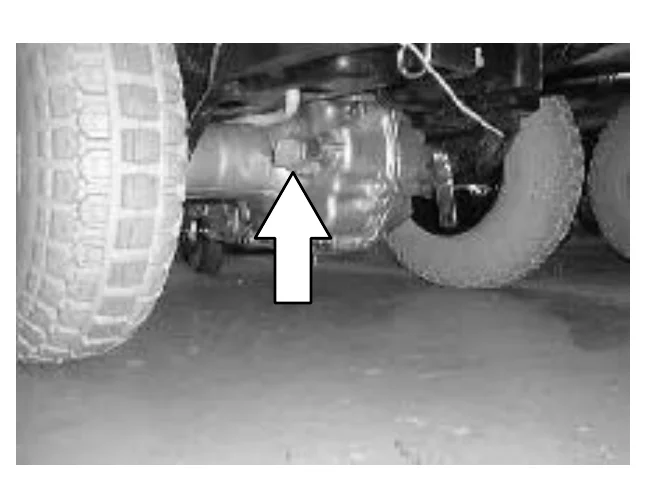
Check the transaxle lubricant level every 1000 hours of operation by removing one of the orange filler plugs. If needed, add SAE 90 weight gear lubricant.
BATTERIES
Batteries and chargers: make sure your charger is compatible with your batteries, and set its charging algorithm to your battery pack before you use it.
The batteries are unique in that they hold their power for long periods of time. The lifetime of the batteries is limited by the number of charges the batteries receive. To get the most life from the batteries, charge them when all the battery discharge indicator segments shut off (20% charge left). Use an automatic charger with the proper rating for the batteries.
Periodically clean the top surface of the batteries and the terminals, and check for loose connections. Use a strong solution of baking soda and water. Brush the solution sparingly over the battery tops, terminals, and cable clamps. Do not allow any baking soda solution to enter the batteries. Use a wire brush to clean the terminal posts and the cable connectors. After cleaning, apply a coating of clear battery post protectant to the terminals and the cable connectors. Keep the tops of the batteries clean and dry.
MAINTENANCE
Keep all metallic objects off the top of the batteries, which may cause a short circuit. Replace any worn or damaged wires.
Never add acid to the batteries, only distilled water. Always keep the battery caps on, except when adding water or taking hydrometer readings.
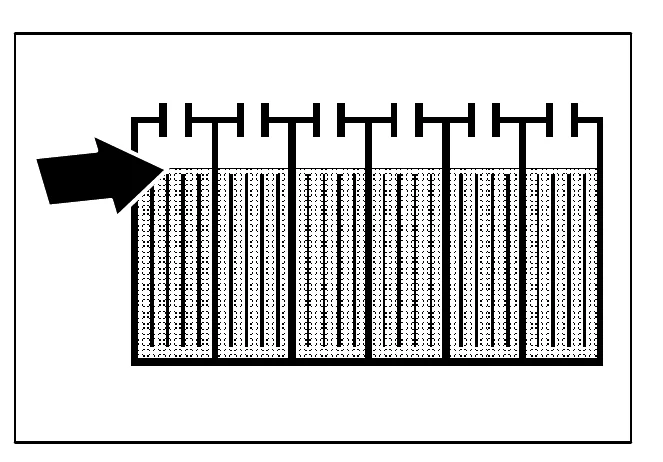
Check the electrolyte level in each battery cell before and after charging, and after every 50 hours of operation. Do not charge the batteries unless the fluid is slightly above the battery plates. If needed, add just enough distilled water to cover the plates. Never add acid to the batteries. Do not overfill. Always keep the battery caps on, except when adding water or taking hydrometer readings.
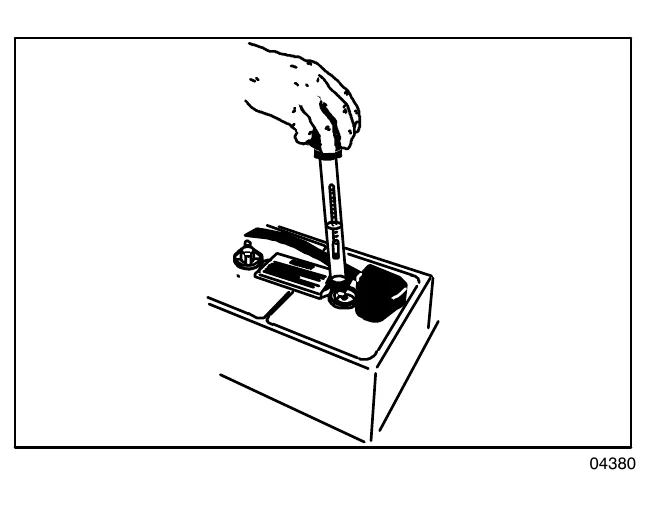
Measuring the specific gravity, using a hydrometer, is a way to determine the charge level and condition of the batteries. If one or more of the battery cells test lower than the other battery cells (0.050 or more), the cell is damaged, shorted, or is about to fail.
| SPECIFIC GRAVITY at 27° C (80°F) | BATTERY CHARGE |
|---|---|
| 1.265 | 100% Charged |
| 1.223 | 75% Charged |
| 1.185 | 50% Charged |
| 1.148 | 25% Charged |
| 1.110 | Discharged |
MAINTENANCE
CHARGING THE BATTERIES
Batteries and chargers: make sure your charger is compatible with your batteries, and set its charging algorithm to your battery pack before you use it.
- Drive the machine to a flat, dry surface in a well-ventilated area.
- Turn the machine power off and set the parking brake if your machine has this option.FOR SAFETY: Before leaving or servicing machine, stop on level surface, and turn off machine.
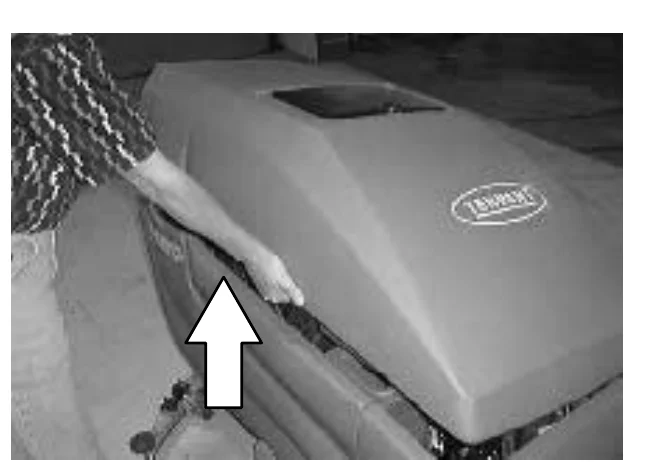
- Lift up the solution tank to get access to the batteries.NOTE: The solution tank must be empty.
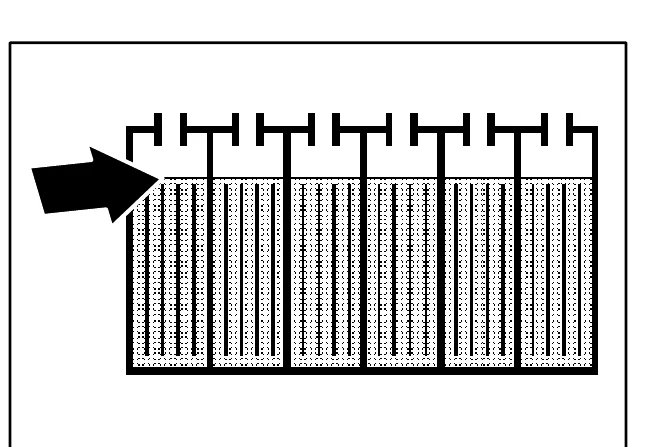
- Check the water level in all the battery cells. If the level is low, add just enough distilled water to cover the plates. DO NOT OVERFILL. The batteries can overflow during charging due to expansion.
 NOTE: Make sure the battery caps are in place while charging.FOR SAFETY: When maintaining or servicing machine, avoid contact with battery acid.
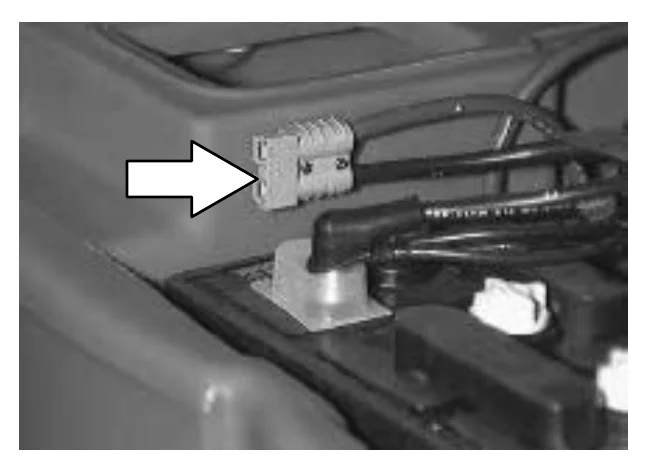
- Plug the charger connector into the battery connector.
- Plug the battery charger into the wall outlet.
- The TENNANT charger will start automatically. When the batteries are fully charged, the TENNANT charger will automatically turn off.
- After the charger has turned off, unplug the charger from the wall outlet.
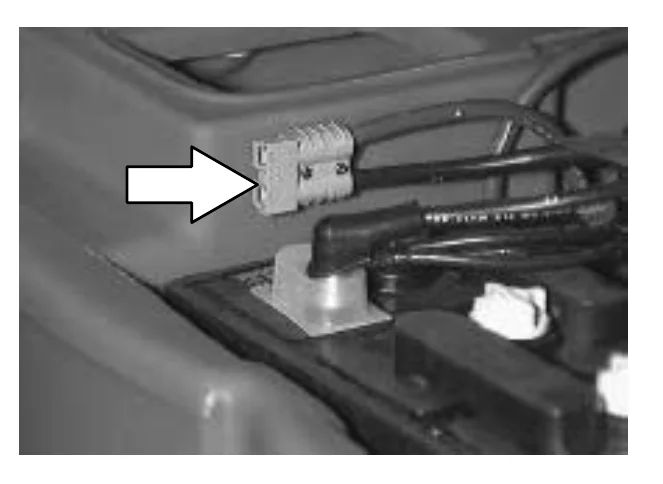
- Unplug the charger connector from the battery connector on the machine.
- Check the electrolyte level in each battery cell after charging. If needed, add distilled water to raise the electrolyte level to about 12 mm (0.4 in) below the bottom of the sight tubes.
- Lower the solution tank.
- Pull up on the support arm and rotate the stop arm out of the way to allow the solution tank to close completely.
ELECTRIC MOTORS
The carbon brushes on the vacuum fan motor should be inspected after every 500 hours of machine operation. The carbon brushes on the scrub brush motors and propelling motor should be inspected after every 1000 hours of machine operation. The carbon brushes on the scrub brush motors,and propelling motor should be inspected after every 1000 hours of machine operation.
MAINTENANCE
SCRUB HEAD
The machine is equipped with a disk brush scrub head. The scrub head contains skirts to control over-spray from the scrub brushes.
DISK BRUSH SCRUB HEAD SKIRT
Make sure the scrub head skirt touches the floor all the way around when the scrub head is lowered. Check the skirt for damage or wear daily.
CYLINDRICAL BRUSH SCRUB HEAD SKIRTS
The four head skirts should just touch the floor. Check the skirts for damage or wear daily.
ADJUSTING THE SCRUB HEAD SKIRTS
- Lower the scrub head on a level floor.
- Turn the machine power off.FOR SAFETY: Before leaving or servicing machine, stop on level surface, and turn off machine.
- Check to see if the scrub head skirts touch the floor.
- If any of the skirts needs adjusting, loosen the retainer strip hardware and slide the skirt to the proper adjustment. Tighten the retainer strip hardware.
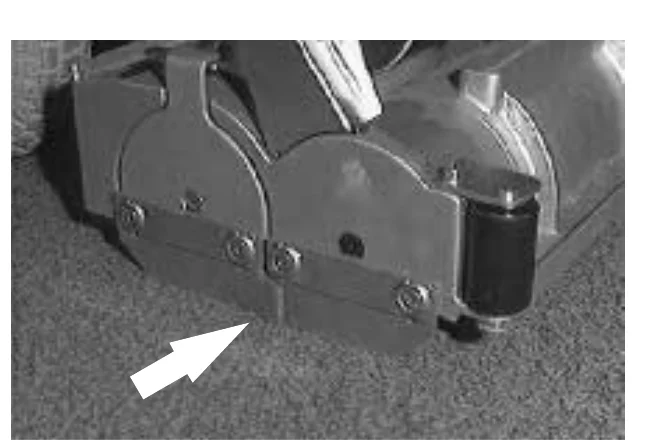
REPLACING THE SCRUB HEAD SKIRTS
- Raise the scrub head.
- Turn the machine power off.FOR SAFETY: Before leaving or servicing machine, stop on level surface, and turn off machine.
- Remove the retainer strip and hardware.
- Replace the old skirt with a new skirt and mount in place with the retainer strip and hardware.
MAINTENANCE
REMOVING OR REPLACING THE SCRUB HEAD
The scrub heads are available in three widths.
- Lower the scrub head.
- Turn the machine power off.FOR SAFETY: Before leaving or servicing machine, stop on level surface, and turn off machine.
- Remove the machine front cover.
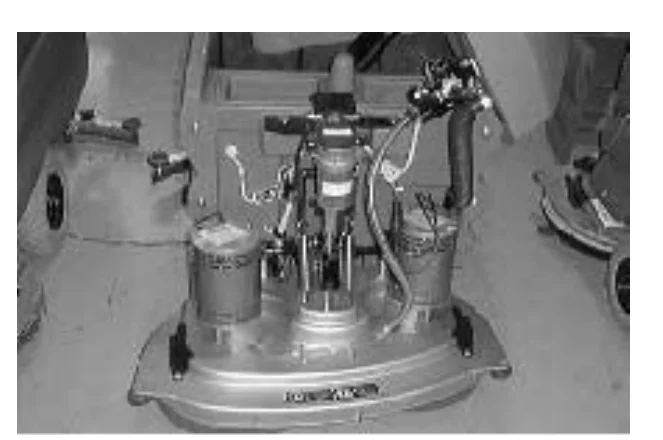
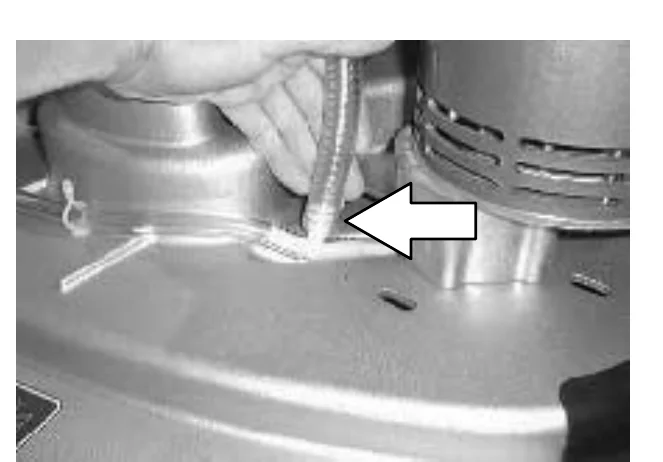
- Disconnect the solution line from the scrub head tee fitting.
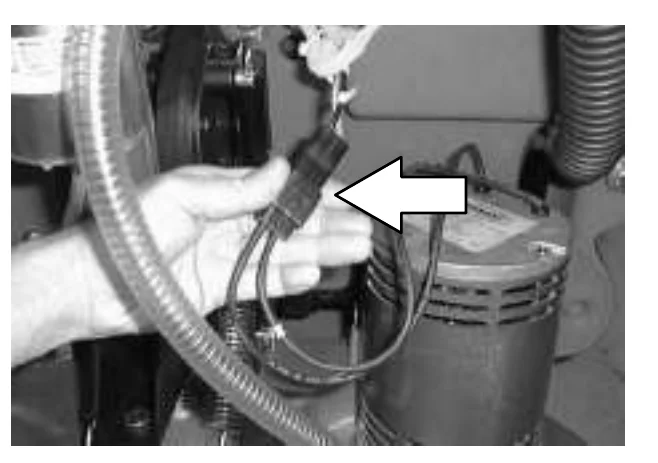
- Disconnect the wire harness from each scrub motor.
- Disconnect the scrub head from the guide by removing the clevis pin.
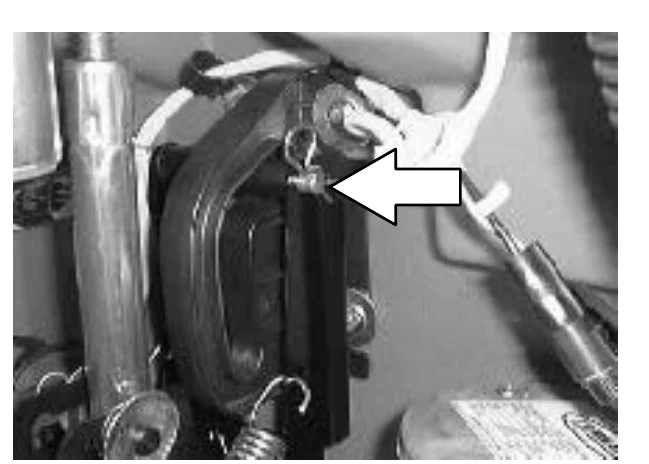
- Disconnect the lift arms from the scrub head by removing the two clevis pins.
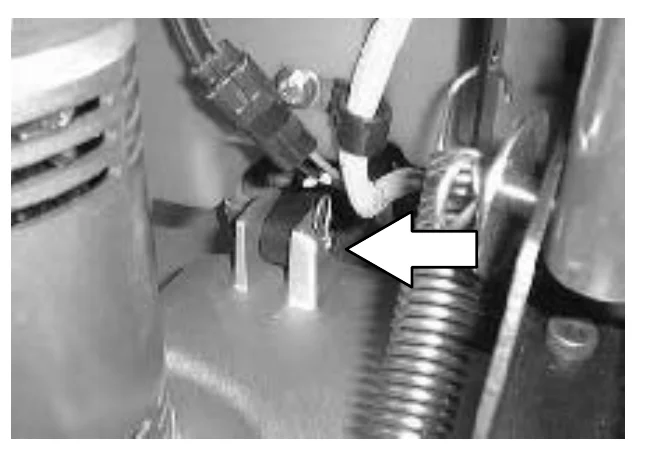
- Mark the location of the actuator tube on the actuator shaft before disconnecting the actuator. Disconnect the actuator from the scrub head by removing the clevis pin.
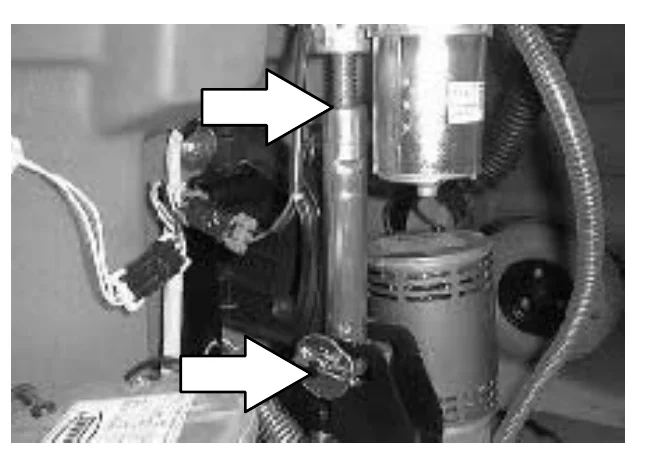
- To install the scrub head, connect the lift arms to the scrub head with the two clevis pins.
- Connect the scrub head to the guide with the clevis pin.
- Make sure the actuator tube lines up with the mark made earlier on the actuator shaft. If not, turn the actuator tube until it does. Connect the actuator to the scrub head with the clevis pin.
- Connect the wire harness.
- Connect the solution line to the scrub head tee fitting.
MAINTENANCE
LEVELING THE SCRUB HEAD
- Make sure the scrub head is lowered to the floor.
- Check the level of the scrub head by measuring the distance from the top of the scrub head, to the floor at all four corners. The scrub head should measure the same on all four corners.
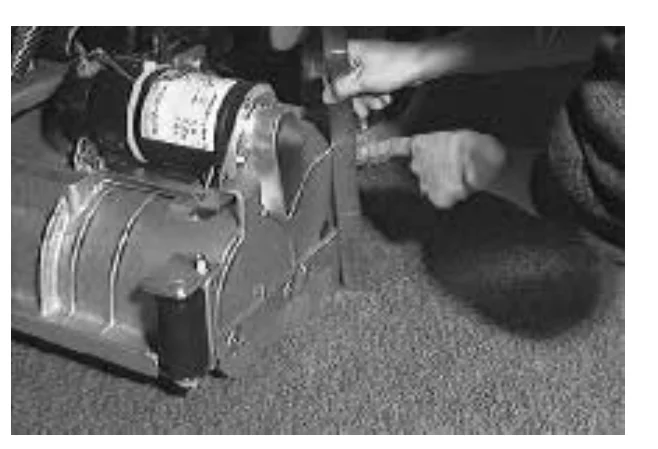
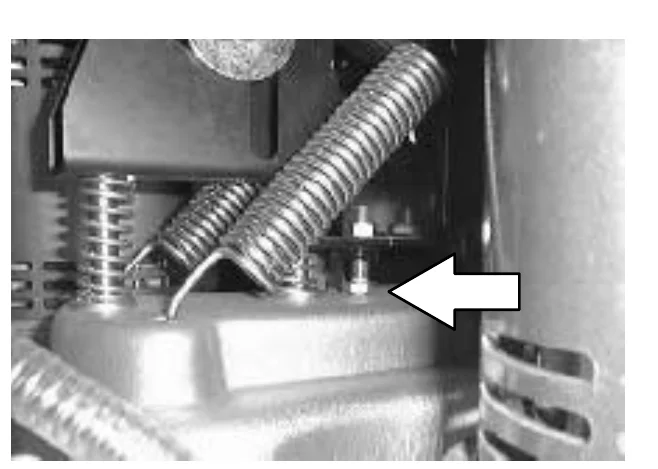
- If the scrub head is not level at all four corners, loosen the jam nut on the adjustment screw located on the top of the scrub head. Turn the adjustment screw until the scrub head measures level. Tighten the jam nut.
- Install the machine front cover.
- Cylindrical scrub head: Check the brush pattern as described in CHECKING AND ADJUSTING CYLINDRICAL BRUSH PATTERN.
SCRUB BRUSHES AND PADS
The scrub brushes should be checked daily for wire or string tangled around the brush or drive hub. The brushes should also be checked for any damage and wear.
DISK BRUSHES
The disk brushes should be replaced if large amounts of bristles are missing, or if the remaining bristles' length is less than 10 mm (0.38 in).
Cleaning pads must be placed on pad drives before they are ready to use. The cleaning pad is held in place by a pad holder.
Cleaning pads need to be cleaned immediately after using with soap and water. Do not wash the pads with a pressure washer. Hang dry pads, or lie flat to dry.
REPLACING THE DISK BRUSHES OR PADS
- Raise the scrub head.
- Turn the machine power off.FOR SAFETY: Before leaving or servicing machine, stop on level surface, and turn off machine.
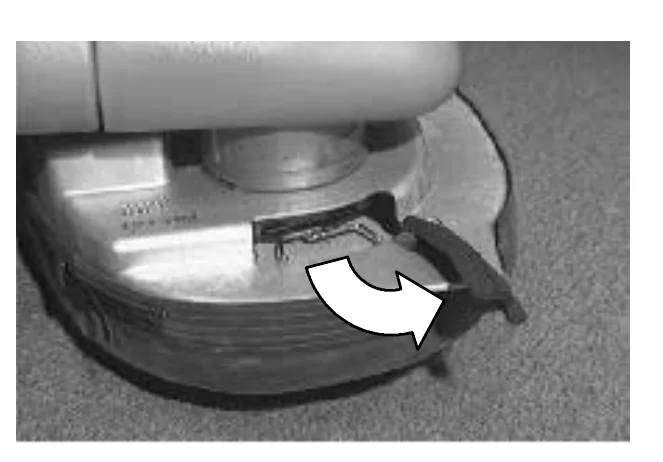
- Open the access cover on either corner of the scrub head.
MAINTENANCE
- Turn the brush/pad driver until you can see the brush spring clip.
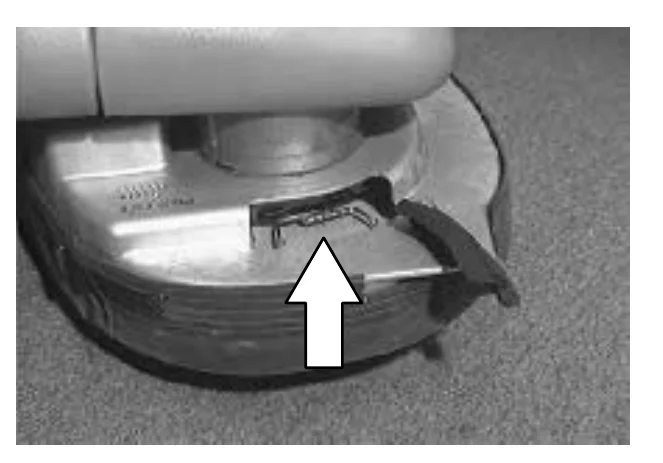
- Press the spring clip together with your thumb and index finger. The brush/pad driver will drop off the drive hub.
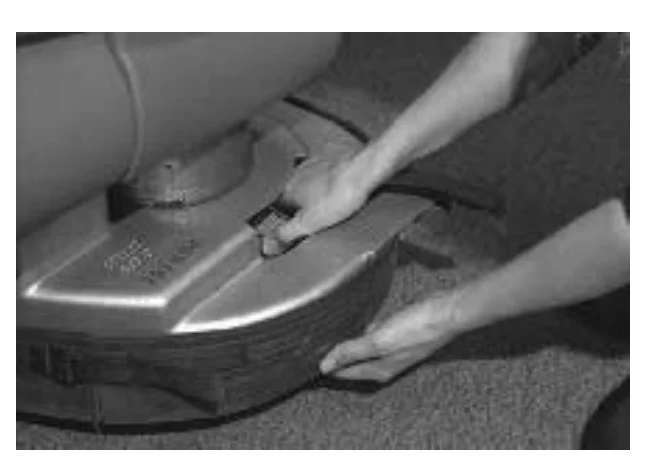
- Pull the brush/pad driver out from under the scrub head.
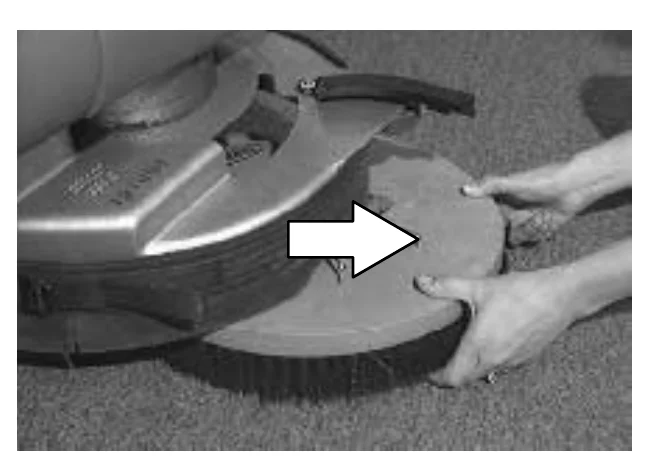
MAINTENANCE
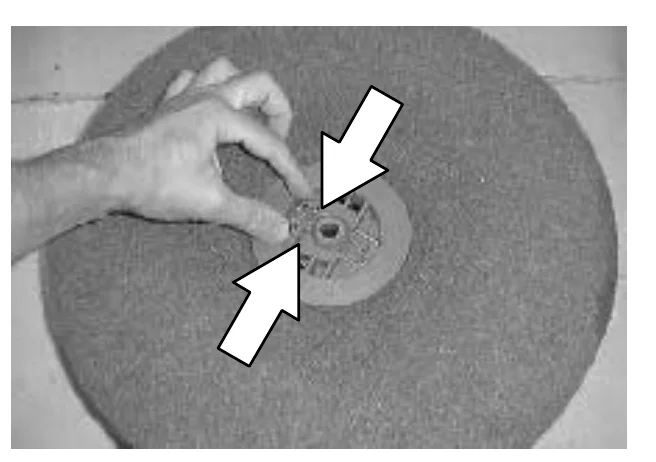
- PAD DRIVER ONLY: Turn the pad driver over to access the spring clip underneath.
- Press the spring clip together with your thumb and index finger to remove the center disk.
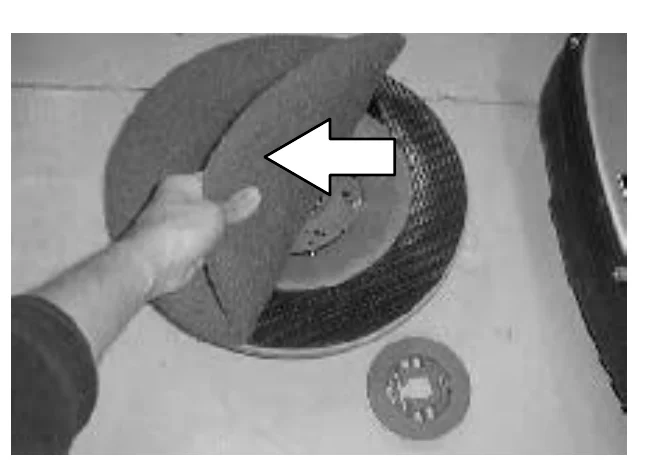
- Flip or replace the scrub pad, center the scrub pad on the pad driver.
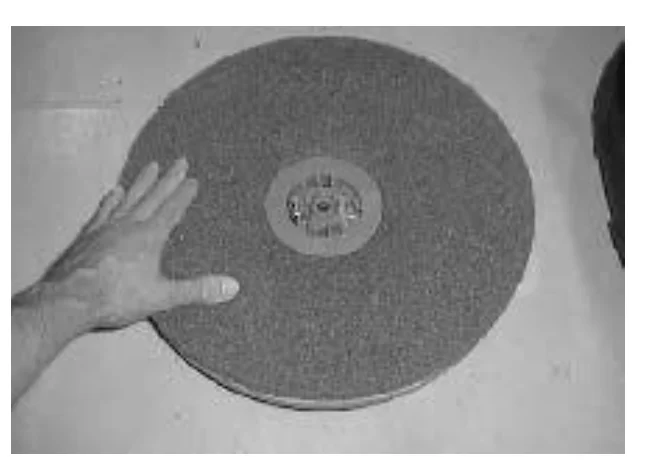
- Replace the center disk to secure the pad in place on the driver.
- Place the new scrub brush/pad driver on the floor in front of the scrub head. Push the brush under the scrub head.
- Line up the drive socket with the drive plug.
- Lift the scrub brush/pad driver assembly into the drive plug.
- Check to make sure the brush/pad driver assembly is securely mounted on the brush drive hub.
- Close the scrub head access cover.
- Repeat for the other brush/pad driver.
MAINTENANCE
CYLINDRICAL BRUSHES
Check the brush taper and rotate the brushes from front-to-rear every 50 hours of operation, for maximum brush life and best scrubbing performance.
The cylinder brushes should be replaced if large amounts of bristles are missing, or if the remaining bristles’ length is less than 10 mm (0.38 in).
REPLACING THE CYLINDRICAL BRUSHES
- Raise the scrub head.
- Turn the machine power off and set the parking brake if your machine has this option.
FOR SAFETY: Before leaving or servicing machine, stop on level surface, and turn off machine.
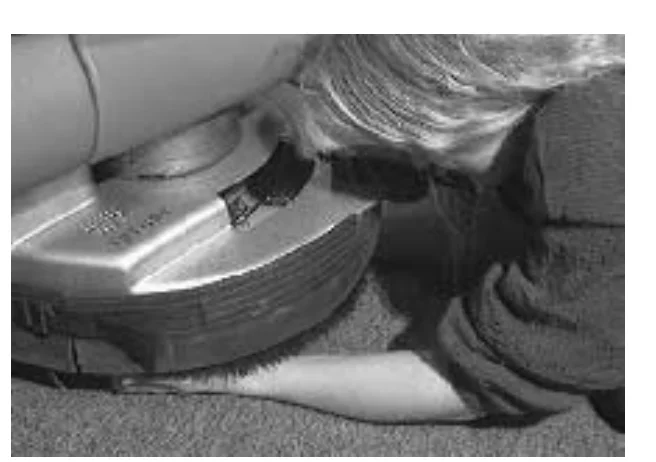
- Push down on the mounting spring and the idler door, then pull out on the bottom of the door. Push down on the spring until the door releases from the scrub head. Pull the idle plug off the brush.
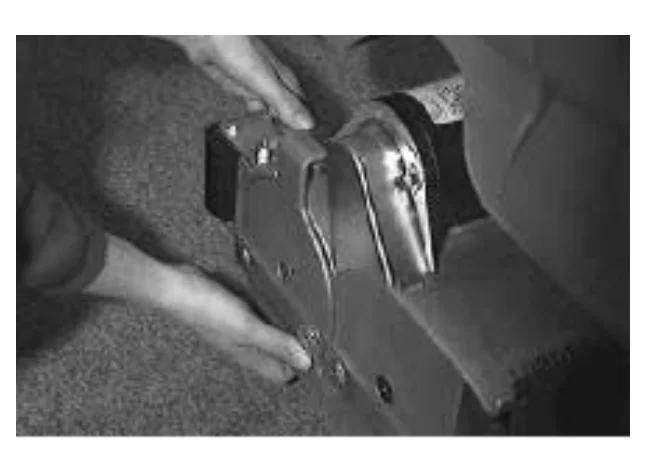
- Pull the brush out of the scrub head.
- With the double row end of the brush towards you, guide the brush onto the drive hub.
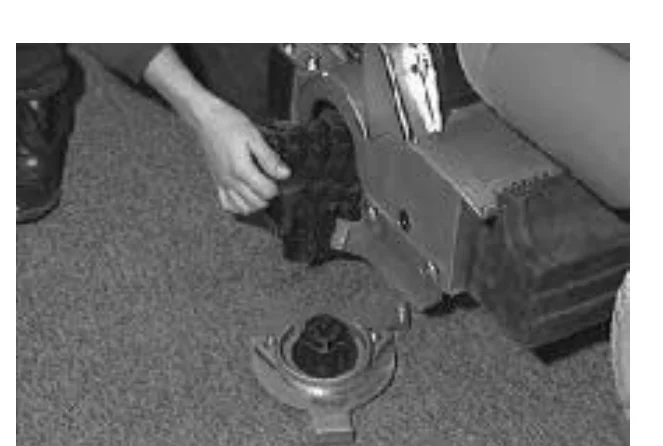
- Insert the Idler plug of the idler door into the brush.
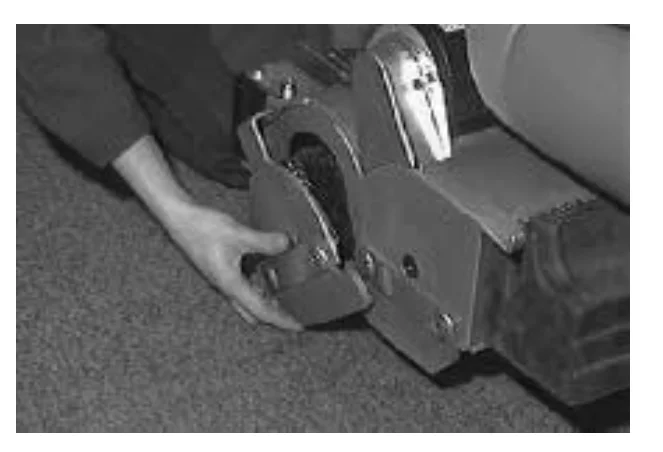
- Push down on the door to catch the door in the scrub head, then pull up on the door to latch it in the spring.
- Repeat for the other brush on the other side of the scrub head.
CHECKING AND ADJUSTING CYLINDRICAL BRUSH PATTERN
- Apply chalk, or some other material that will not blow easily away, to a smooth, level floor.
- Raise the scrub head. Position the scrub head over the chalked area.
- Set the parking brake if your machine has this option.
- Lower the scrub head for 15 to 20 seconds while keeping the scrub head in one spot in the chalked area.
- Raise the scrub head and move the machine away from the chalked area. Turn the machine power off.
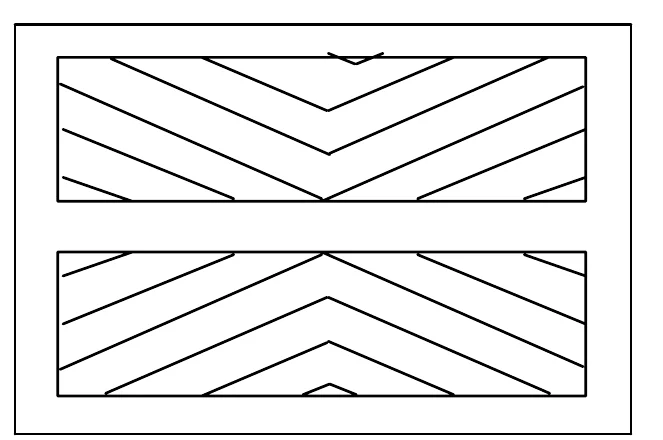
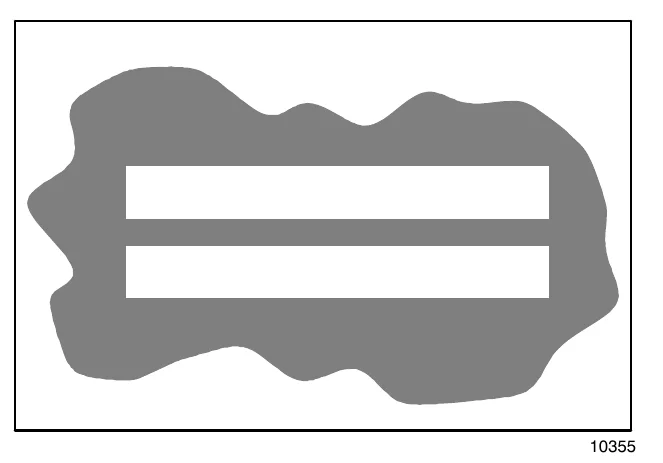
- Observe the shape of the brush patterns. If the brush patterns have parallel sides, the brushes do not need taper adjustment.
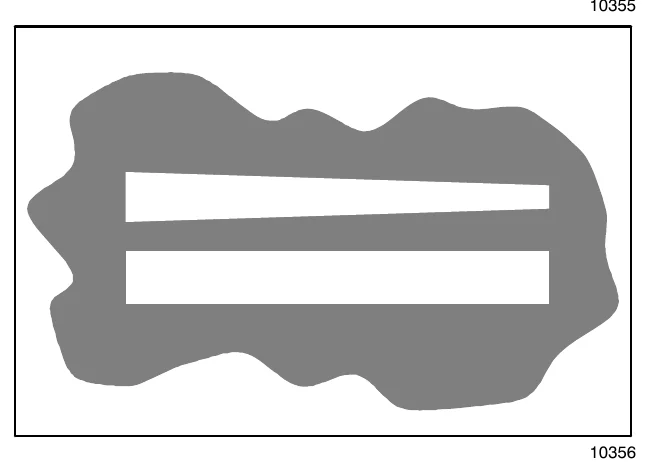
If one or both of the brush patterns are tapered, the brushes will have to be adjusted to straighten the brush pattern.
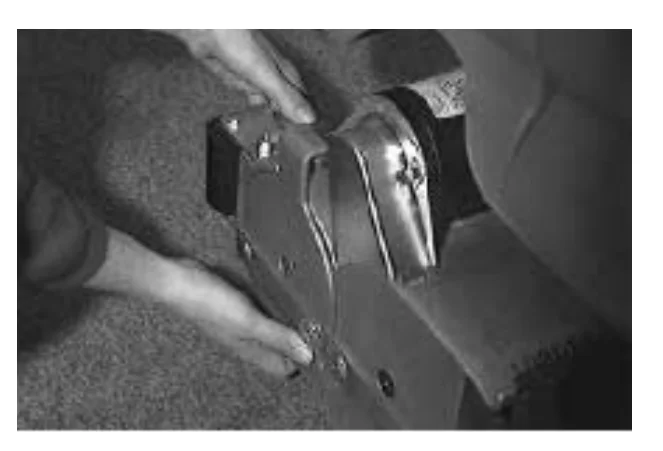
- Remove the idler door by pushing down on the mounting spring and the idler door, then pulling out on the bottom of the door. Push down on the spring until the door releases from the scrub head. Pull the idle plug off the brush.
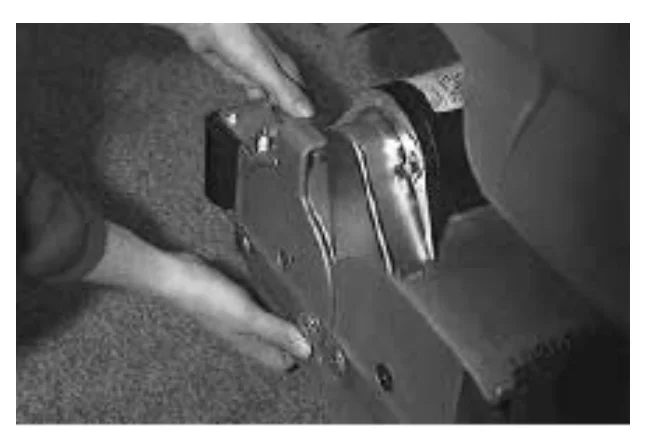
- While holding the flat end of the idler shaft with a wrench, loosen the mounting screw on the outside of the idler door.
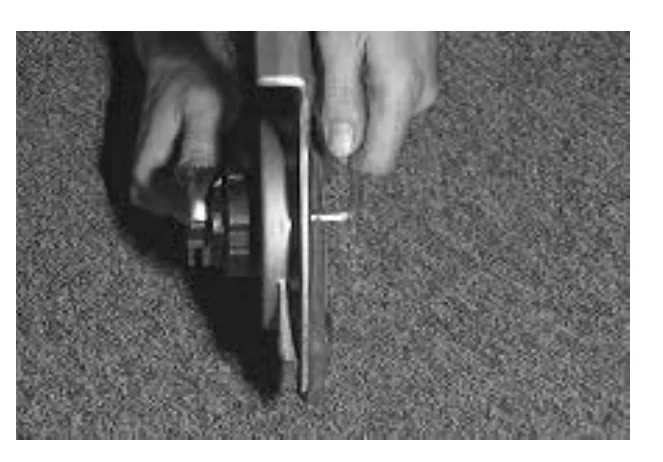
- Turn the idler shaft to raise or lower the end of the brush as needed to straighten the brush pattern. Tighten the mounting screw.
- Check the brush patterns again and readjust as necessary.
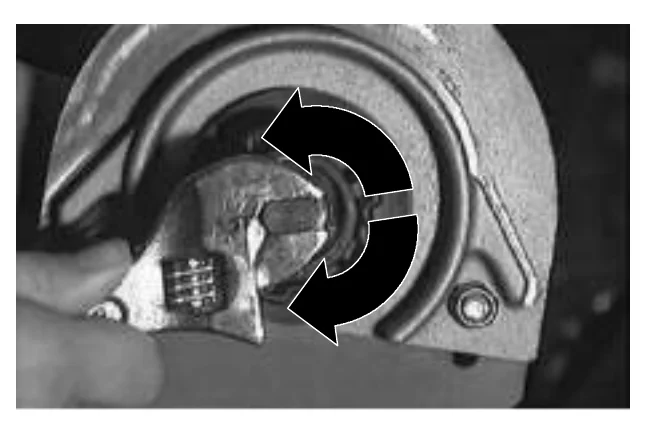
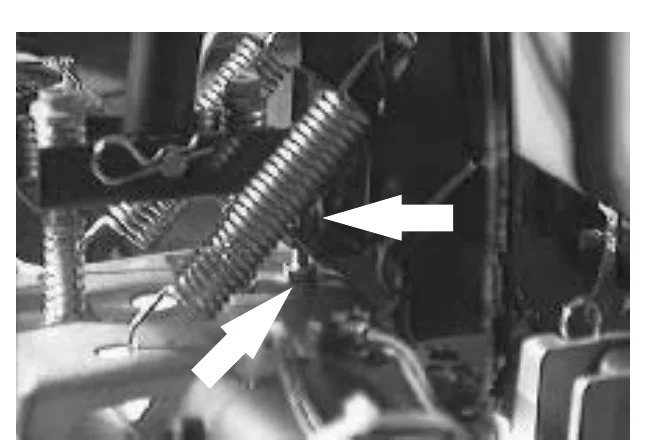
The brush patterns should be the same width. If one is narrower then the other, loosen the jam nut on the adjustment screw located on the top of the scrub head.
Turn the adjustment screw clockwise to increase the front brush pattern width. Turn the adjustment screw counter-clockwise to increase the back brush pattern width. Check the brush patterns again. Adjust until the front and back patterns are the same width.
Tighten the jam nut.
SOLUTION SYSTEM
RECOVERY TANK
The recovery tank stores recovered solution. The recovery tank should be drained and cleaned daily. The outside of the tank can be cleaned with vinyl cleaner.
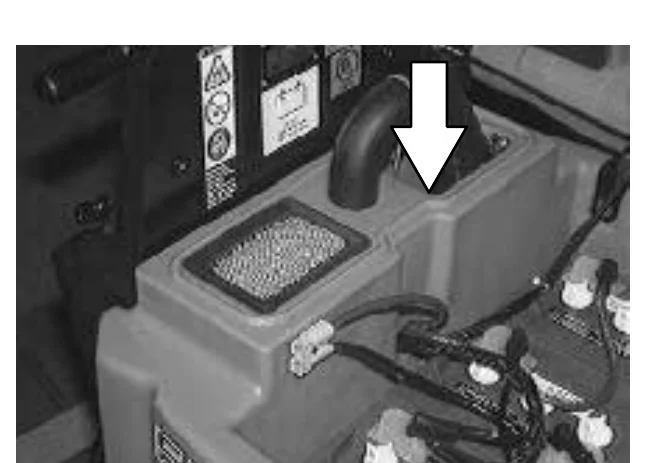
Rinse and wipe off the sensors daily on machines with float sensors installed inside the recovery tank.
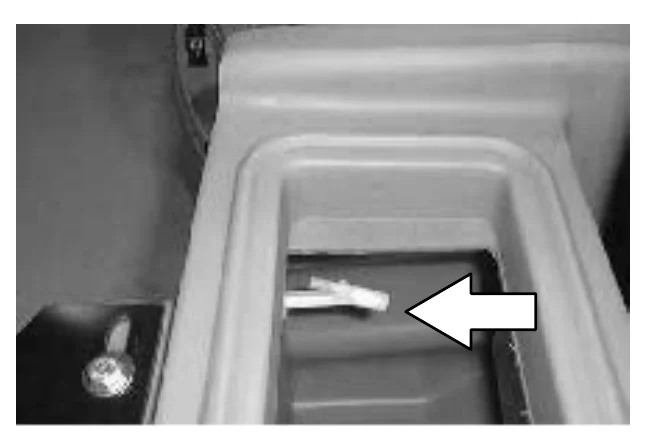
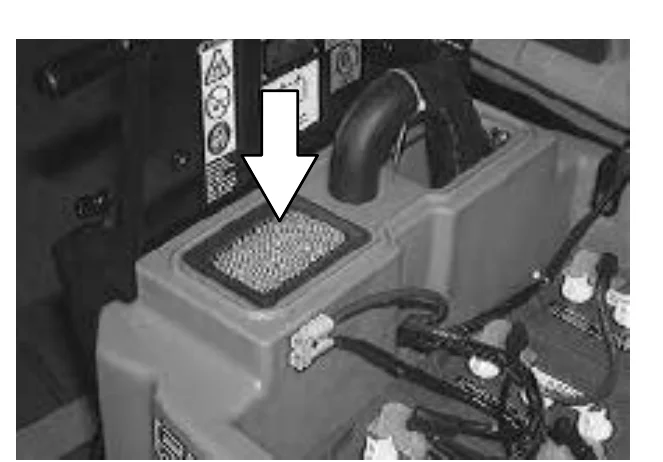
A vacuum fan filter is located in the recovery tank. Remove and clean this filter daily. Clean by shaking dust or rinsing pleats with low pressure water.
SOLUTION TANK
The solution tank stores the cleaning solution.
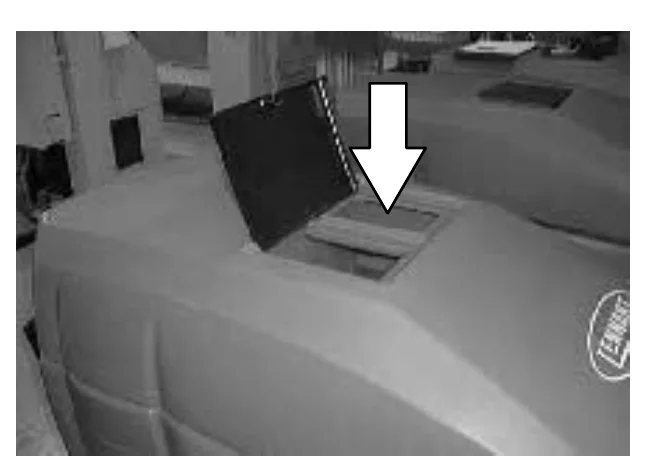
The solution tank does not require regular maintenance. If deposits form on the bottom of the tank, rinse the tank with a strong blast of warm water. The tank can be flushed through the fill opening and top access hole.
The solution tank contains one standard solution line filter. If the filter becomes dirty, the solution flow will be reduced. Check and clean these filters if necessary.
MAINTENANCE
FaST SYSTEM (OPTION)
FaST SYSTEM FILTER SCREEN
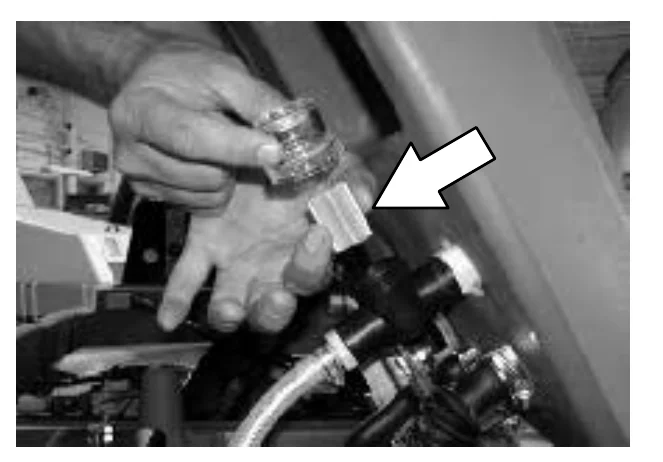
The FaST system filter screen is located under the solution tank and filters the water from the solution tank as it flows into the FaST system.
Remove the filter screen bowl and clean the filter screen after every 50 hours of machine operation. Empty the solution tank before removing the filter.
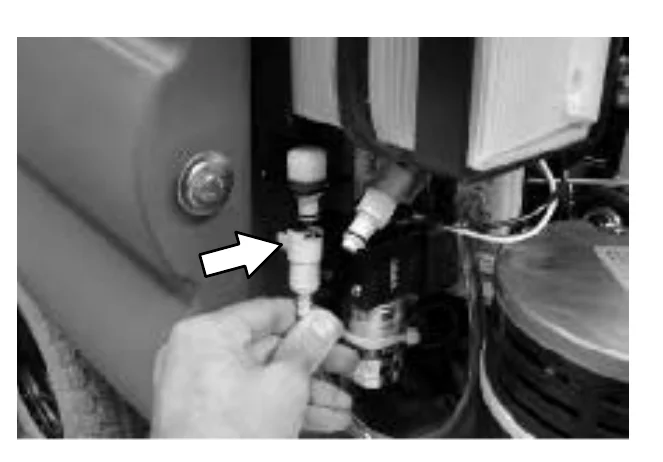
FaST SUPPLY HOSE CONNECTOR
The FaST supply hose connector is located below the FaST PAK holder. Soak the connector in warm water if detergent buildup is visible. When a FaST PAK carton is not installed, store the supply hose connector on the storing plug to prevent the hose from clogging.
FaST SYSTEM AIR PUMP FILTER
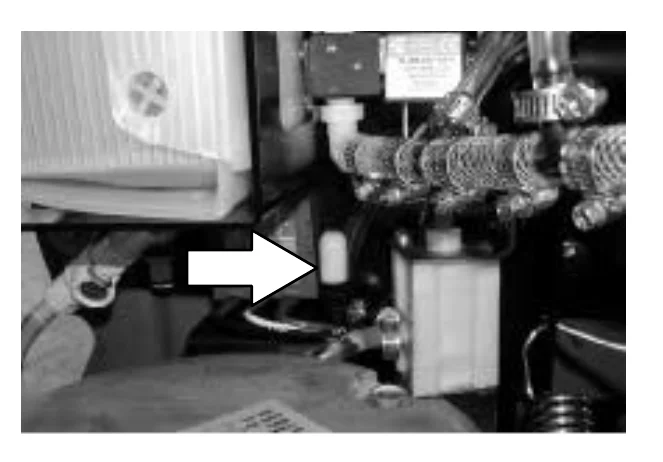
The FaST system air filter is located on top of the air pump.
Remove and clean out the air filter with compressed air after every 200 hours of FaST scrubbing.
SQUEEGEE
The squeegee assembly channels water into the vacuum fan suction. The front blade channels the water, and the rear blade wipes the floor.
Check the squeegee blades for damage and wear daily. Rotate or replace either of the squeegee blades if the leading edge is torn or worn half-way through the thickness of the blade.
The squeegee can be adjusted for leveling and deflection. The deflection and leveling of the squeegee blades should be checked daily, or when scrubbing a different type of floor.
The squeegee assembly can be removed from the squeegee pivot to prevent damage during transport of the machine, or when changing to a different squeegee width. The squeegees are available in three widths to be used with the three different model scrub heads; model 700 (700 mm (28 in)), model 800 (800 mm (32 in)), and model 900 (900 mm (36 in)).
REMOVING THE SQUEEGEE ASSEMBLY
- Raise the squeegee.
- Turn the machine power off.FOR SAFETY: Before leaving or servicing machine, stop on level surface, and turn off machine.
- Remove the squeegee suction hose from the squeegee.
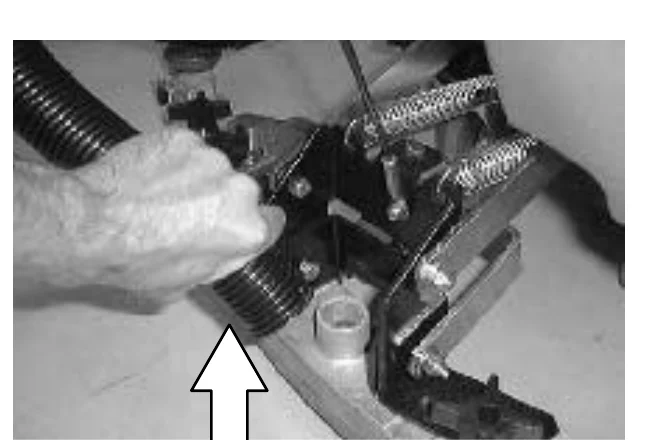
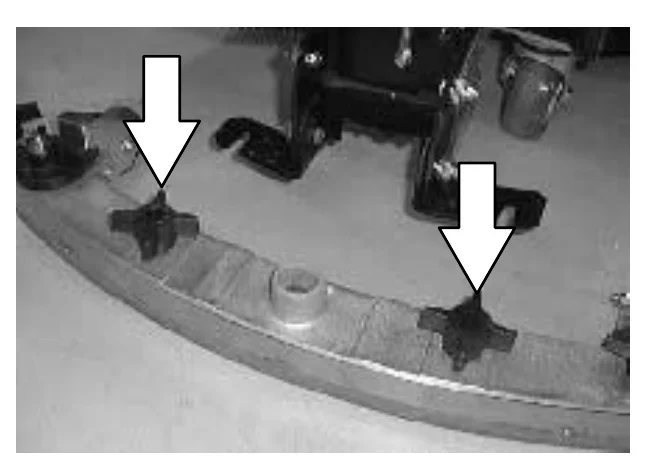
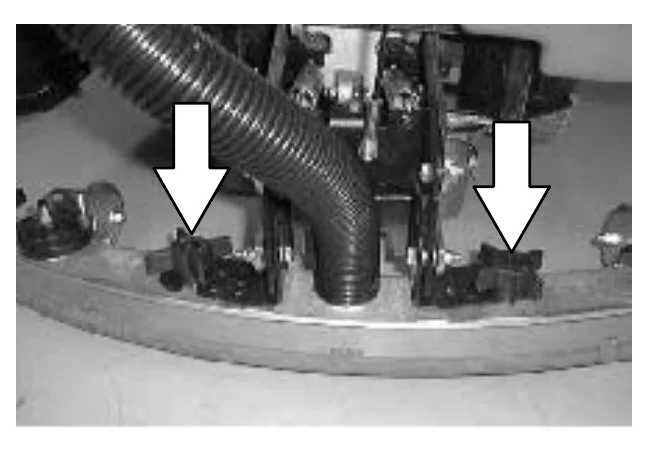
- Loosen the two mounting knobs.
- Pull the squeegee off the machine.
INSTALLING THE SQUEEGEE ASSEMBLY
- Make sure the squeegee is raised.
- Place the squeegee under the squeegee pivot.
- Slide the squeegee frame onto the squeegee pivot.
- Tighten the mounting knobs.
- Push the squeegee suction hose on the squeegee.
LEVELING THE SQUEEGEE
Leveling of the squeegee assures even contact the length of the squeegee blade with the surface being scrubbed. Make sure this adjustment is done on an even, level floor.
- Turn the machine power on.
- Lower the squeegee.
- Drive the machine forward, then turn the machine power off.
- Look at the deflection of the squeegee blade, over the full length of the squeegee blade.
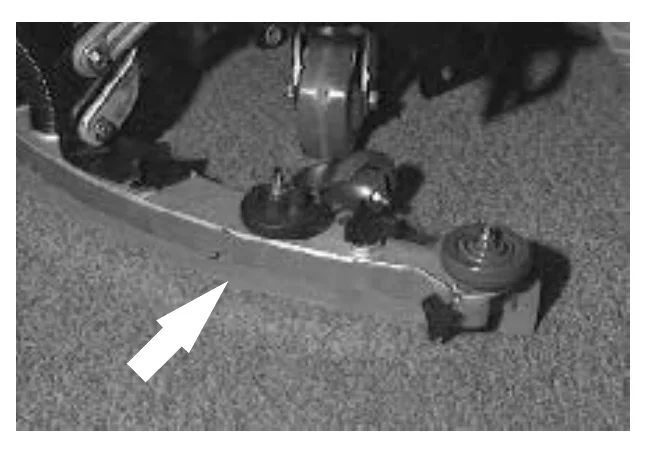
- If the deflection is not the same over the full length of the blade, turn the squeegee leveling bolt counter-clockwise to increase the deflection at the ends of the squeegee.
Turn the squeegee leveling bolt clockwise to decrease the deflection at the ends of the squeegee blade. - Drive the machine forward again with the squeegee down to check the squeegee blade deflection.
- Readjust the squeegee blade deflection if necessary.
ADJUSTING SQUEEGEE BLADE DEFLECTION
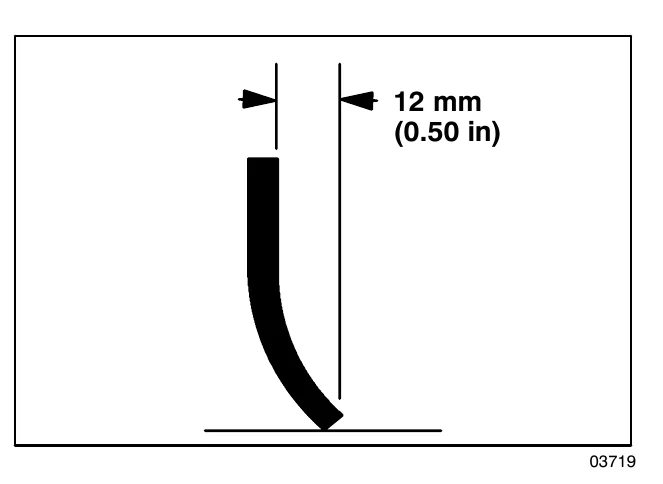
Deflection is the amount of curl the squeegee blade has when the machine moves forward with the squeegee lowered to the floor. The best deflection is when the squeegee wipes the floor just dry with a minimum amount of deflection.
- Turn the machine power on.
- Lower the squeegee.
- Drive the machine forward, and look at the deflection of the squeegee blade. The correct amount of deflection is 12 mm (0.50 in) for scrubbing smooth floors and 15 mm (0.62 in) for rough floors.
- Turn the machine power off.
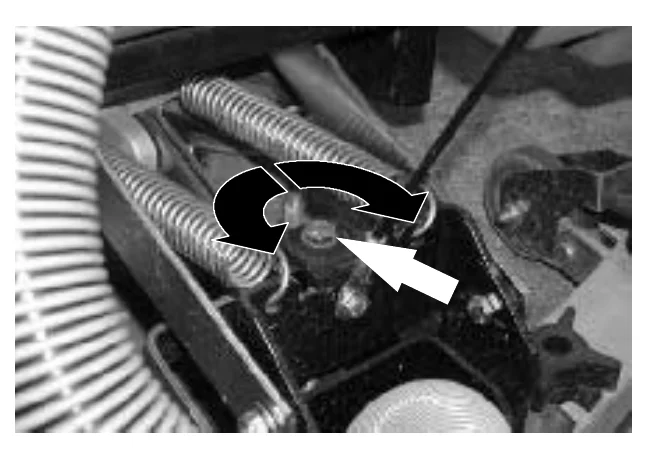
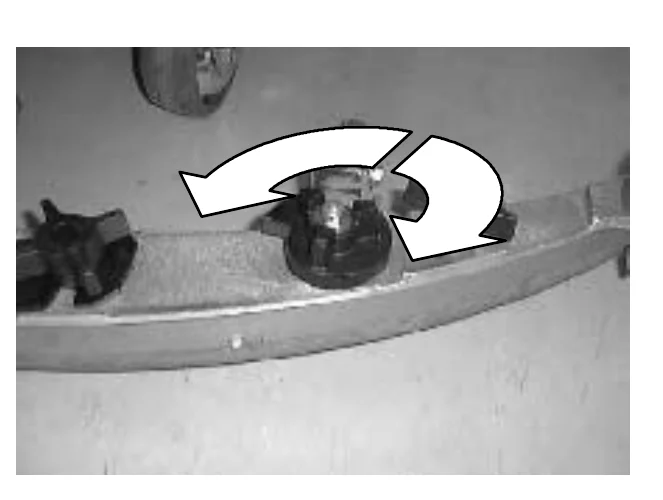
- To adjust the amount of deflection, turn the squeegee deflection cams counter-clockwise to decrease the blade deflection.
Turn the squeegee deflection cams clockwise to increase blade deflection. - Drive the machine forward again to check the squeegee blade deflection.
- Readjust the squeegee blade deflection if necessary.
MAINTENANCE
SQUEEGEE BLADES
The squeegee has two squeegee blades, the front and back. Each blade has four wiping edges. To use them all, start with one wiping edge. To use the next wiping edge, rotate the blade end-for-end. To use the next wiping edge, rotate the top edges down, bottom edges up. To use the last edge, rotate the blade end-for-end.
Replace any worn or damaged squeegee blades.
REPLACING OR ROTATING THE REAR SQUEEGEE BLADE
- Make sure the squeegee is raised off the floor.
- Turn the machine power off.FOR SAFETY: Before leaving or servicing machine, stop on level surface, and turn off machine.
- Loosen the two retention knobs, one at each end on the squeegee.
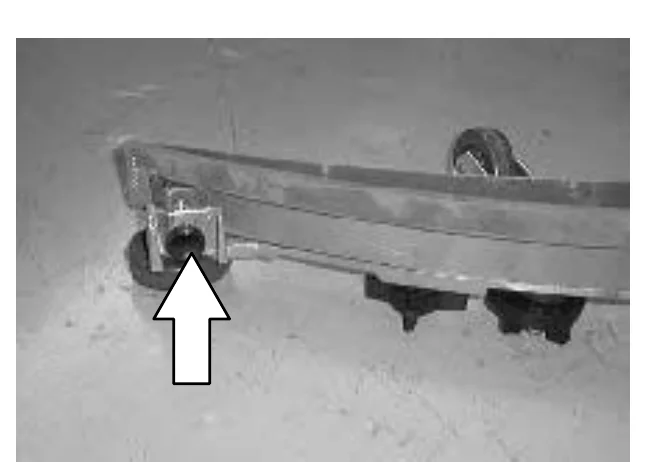
- Pull off the rear retaining band.
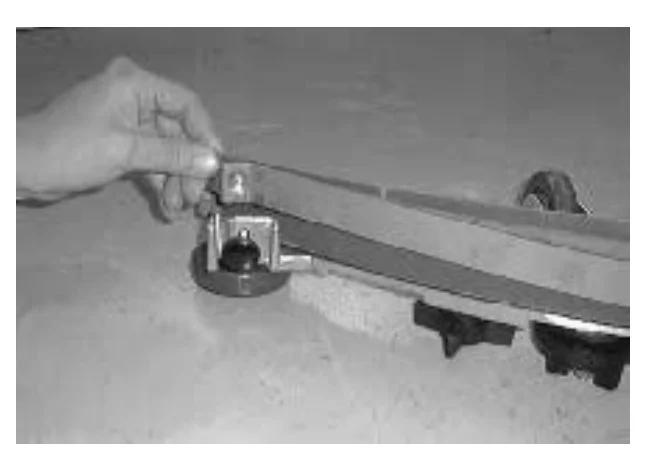
- Pull off the rear squeegee blade.
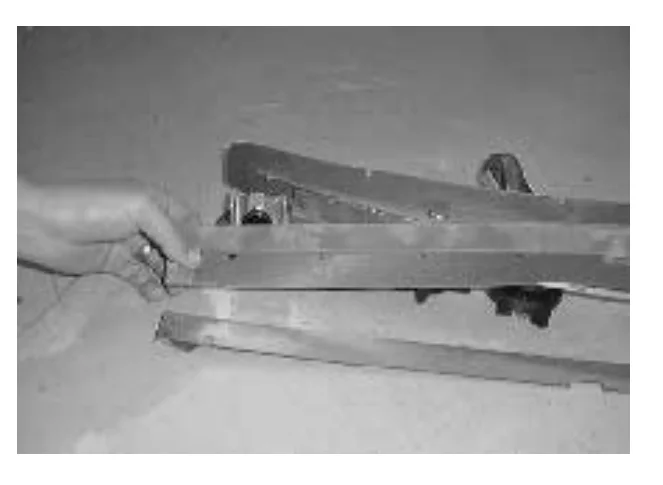
- Insert the rotated or new squeegee blade and then insert the retainer band.
- Tighten the two retention knobs until the ends of the front and rear squeegee blades touch. Do not overtighten.
REPLACING OR ROTATING THE FRONT SQUEEGEE BLADE
- Make sure the squeegee is raised off the floor.
- Turn the machine power off.
- Remove the squeegee from the machine. See REMOVING THE SQUEEGEE ASSEMBLY.
- Remove the rear squeegee blade and retainer. See REPLACING OR ROTATING THE REAR SQUEEGEE BLADE.
- Loosen the two remaining knobs on top of the squeegee assembly.
- Pull the retainer plate back and pull out the front squeegee blade of the squeegee frame.
- Insert the rotated or new squeegee blade in the squeegee frame, lining up the slots in the blade with the tabs on the retainer plate.
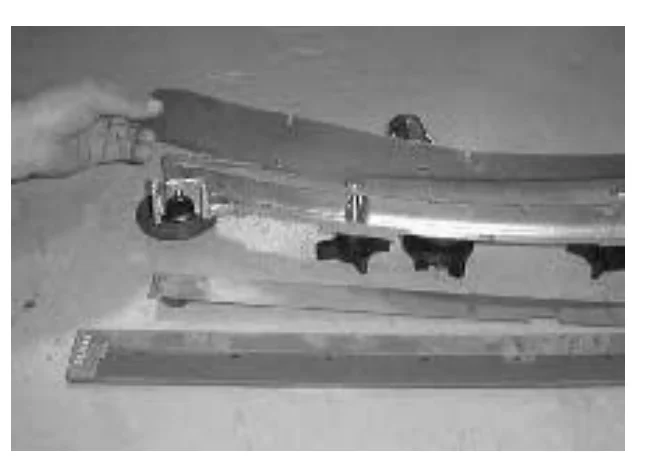
- Push the retainer plate forward. Tighten the two outside knobs on top of the squeegee assembly.
- Insert the rear squeegee blade and retainer. Tighten the two rear blade retention knobs until the ends of the front and rear squeegee blades touch. Do not overtighten.
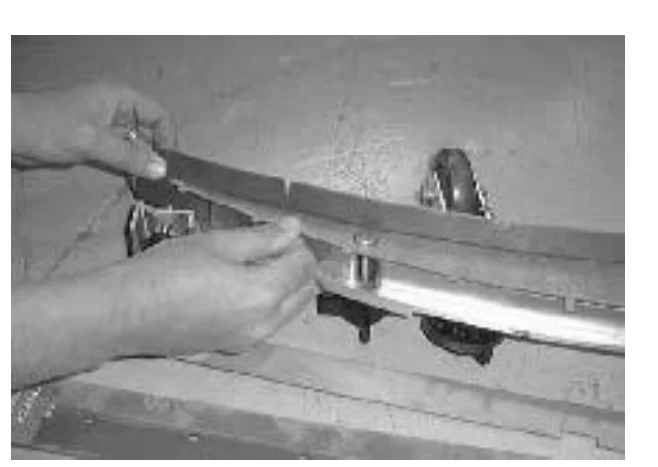
- Install the squeegee assembly on the squeegee pivot. See INSTALLING THE SQUEEGEE ASSEMBLY.
- Adjust the squeegee blade leveling and deflection as stated in LEVELING THE SQUEEGEE and ADJUSTING SQUEEGEE BLADE DEFLECTION.
BELTS AND CHAINS
BRUSH DRIVE BELT
The two brush drive belts are located on the cylindrical brush scrub head. The belts drive the cylindrical brushes. Proper new belt tension is a 3 mm (0.1 in) deflection from a force of 1.37 to 1.48 kg (3.0 to 3.26 lb) at the belt midpoint.
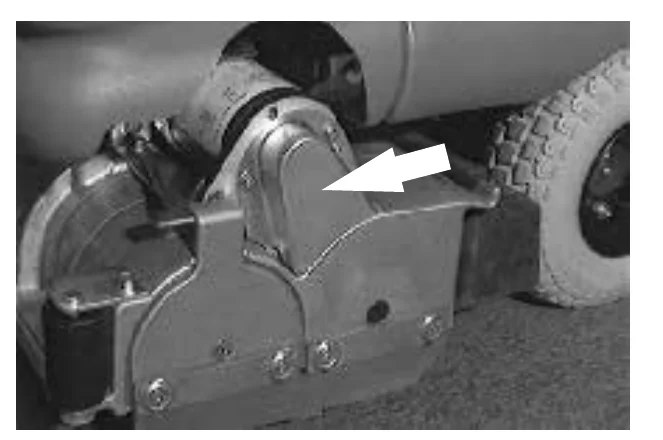
When reusing an old belt, measure and record the belt tension before removal, so that the belt can be reinstalled at the same tension.
If the old belt tension was not recorded, the recommended force per old belts is 1.03 to 1.14 kg (2.28 to 2.52 lb) with a deflection of 3 mm (0.1 in).
Check the belt tension and wear every 100 hours of operation.
STATIC DRAG CHAIN
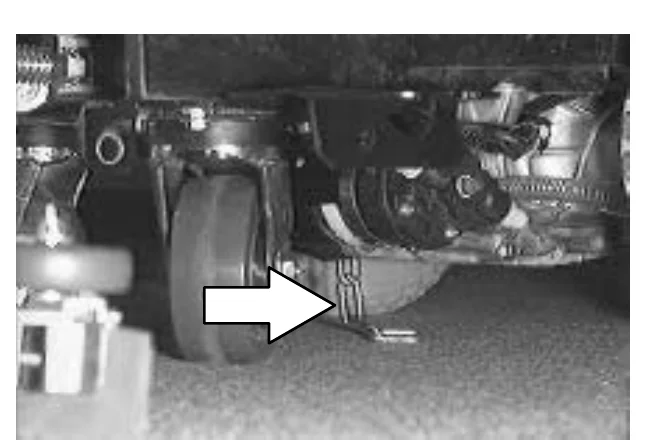
A static drag chain prevents the buildup of static electricity in the machine. The chain is attached to the transaxle.
Make sure the chain is always touching the floor.
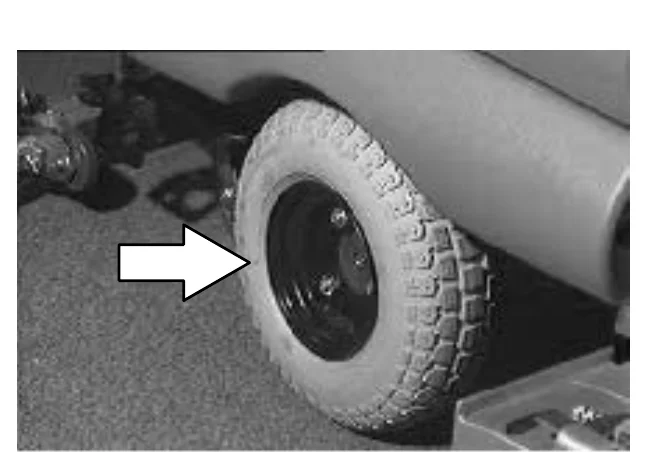
TIRES
The standard front tires are foam filled.
The front wheel lug nuts should be tightened to 102 to 115 Nm (75 to 85 ft lb).
PUSHING AND TRANSPORTING THE MACHINE
PUSHING THE MACHINE
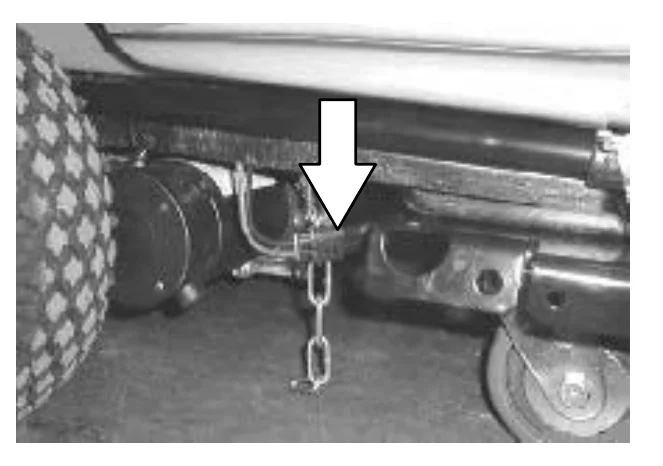
If the machine becomes disabled, it can be pushed if necessary.
Unplug the drive motor from the electrical harness before attempting to push a disabled machine. The machine will become easier to maneuver when it is unplugged.
Only push a disabled machine for a very short distance and do not exceed 3.2 kp/h (2 mph). It is NOT intended to be pushed for a long distance or at a high speed.
TRANSPORTING THE MACHINE
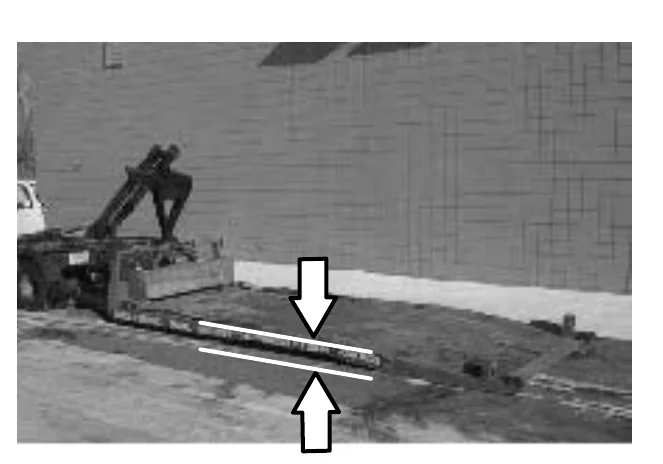
- Position the rear of the machine at the loading edge of the truck or trailer.
- If the loading surface is not horizontal or is higher than 380 mm (15 in) from the ground, use a winch to load machine.
If the loading surface is horizontal AND is 380 mm (15 in) or less from the ground, the machine may be pushed onto the truck or trailer.
MAINTENANCE
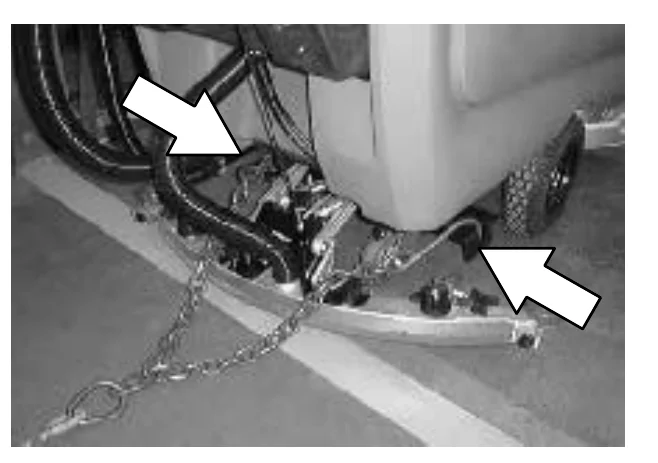
- To winch the machine onto the truck or trailer, attach the winching chains to the rear tie down locations on either side of the machine frame by the rear casters.
- Unplug the drive motor from the electrical harness before attempting to winch the machine. The machine will become easier to maneuver when it is unplugged.
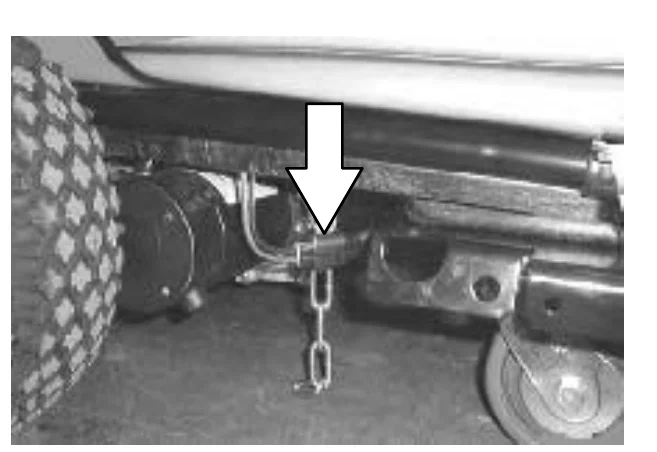
- Position the machine onto the truck or trailer as far as possible. If the machine starts to veer off the centerline of the truck or trailer, stop and straighten the machine.
- Lower the scrub head with the brushes or pad drivers installed, lower the squeegee when transporting the machine. Block the machine tires and tie down the machine to the truck or trailer before transporting.
Secure a strap over the top of the machine to prevent the machine from tipping.
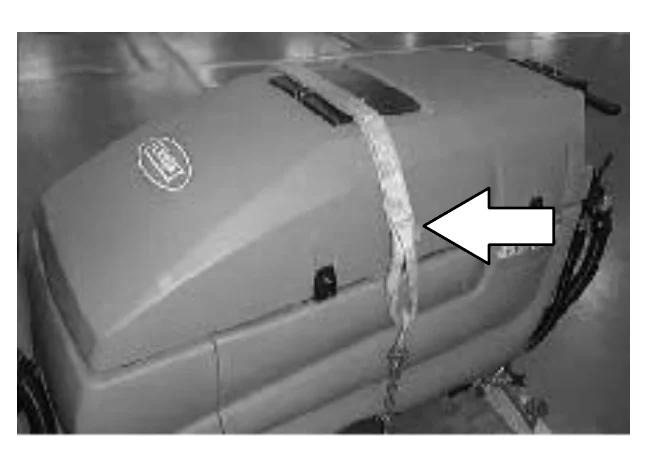
The rear tie-down locations are on either side of the machine frame by the rear casters.
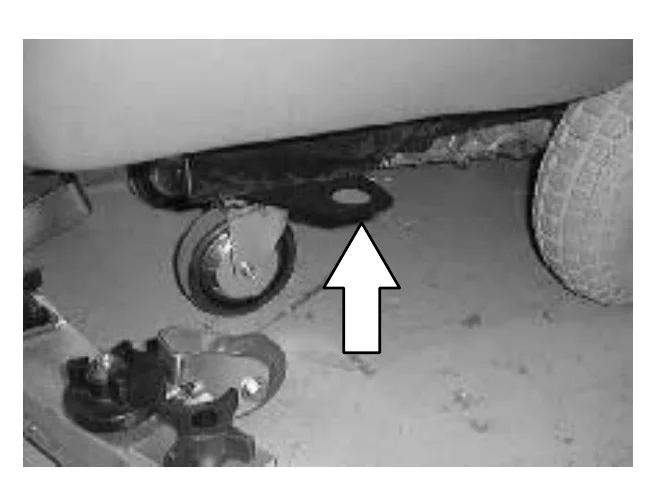
- If the loading surface is not horizontal or is higher than 380 mm (15 in) from the ground, use a winch to unload machine.
If the loading surface is horizontal AND is 380 mm (15 in) or less from the ground, the machine may be pushed off the truck or trailer.
MACHINE JACKING
Check that both the solution and recovery tanks are empty before attempting to jack up the machine.
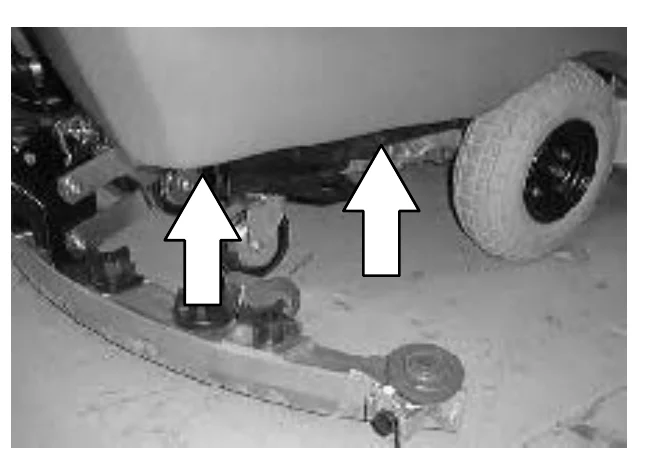
You can jack up the machine for service anywhere under the recovery tank. Use a jack that will support the weight of the machine. Use a piece of wood to distribute the machine weight load.
Always stop the machine on a flat level surface and block the machine tires before jacking up the machine.
STORAGE INFORMATION
Batteries and chargers: make sure your charger is compatible with your batteries, and set its charging algorithm to your battery pack before you use it.
The following steps should be taken when storing the machine for extended periods of time.
- Drain and clean the solution and recovery tanks.
- Park the machine in a cool, dry area.
- Remove the batteries, or charge them after every three months.
FREEZE PROTECTION
- Be sure the solution tank is empty.
- Pour 3.8 L (1 gal) of pre-mixed automotive-type windshield washer solution into the solution tank.
- Turn the machine power on.
- Start the solution flow.
- The washer solution does not need to be drained from the solution tank.
SPECIFICATIONS
GENERAL MACHINE DIMENSIONS/CAPACITIES
| Item | Dimension/capacity |
|---|---|
| Length with cylindrical scrub head | 1600 mm (63 in) |
| Length with 700 mm (28 in) disk scrub head | 1625 mm (64 in) |
| Length with 800 mm (32 in) disk scrub head | 1660 mm (65.25 in) |
| Length with 900 mm (36 in) disk scrub head | 1690 mm (66.5 in) |
| Width (less squeegee and scrub head) | 720 mm (28.25 in) |
| Height | 1090 mm (43 in) |
| Disk brush diameter for 700 mm (28 in) scrub head | 355 mm (14 in) |
| Disk brush diameter for 800 mm (32 in) scrub head | 405 mm (16 in) |
| Disk brush diameter for 900 mm (36 in) scrub head | 455 mm (18 in) |
| Cylindrical brush diameter | 150 mm (6 in) |
| Cylindrical brush length for 700 mm (28 in) scrub head | 695 mm (27.37 in) |
| Cylindrical brush length for 800 mm (32 in) scrub head | 795 mm (31.37 in) |
| Cylindrical brush length for 900 mm (36 in) scrub head | 900 mm (35.37 in) |
| Squeegee width for 700 mm (28 in) scrub head | 950 mm (37.5 in) |
| Squeegee width for 800 mm (32 in) scrub head | 1065 mm (42 in) |
| Squeegee width for 900 mm (36 in) scrub head | 1155 mm (45.5 in) |
| Scrubbing path width for 700 mm (28 in) scrub head | 700 mm (28 in) |
| Scrubbing path width for 800 mm (32 in) scrub head | 800 mm (32 in) |
| Scrubbing path width for 900 mm (36 in) scrub head | 900 mm (36 in) |
| Solution tank capacity (recommended usage) | 114 L (30 gal) |
| Solution tank capacity (maximum) | 133 L (35 gal) |
| Recovery tank capacity to full sensor | 114 L (30 gal) |
| Recovery tank capacity to top of tank | 152 L (40 gal) |
| Transaxle 90 weight gear lubricant capacity | 1.42 L (1.5 qt) |
| GVWR | 690 kg (1520 lb) |
SPECIFICATIONS
FaST SYSTEM (OPTION)
| Item | Measure |
|---|---|
| Solution pump | 36 Volt DC, 5A, 5.7 LPM (1.5 GPM) open flow, 45 psi bypass setting |
| Solution flow rate | 0.83 LPM (0.22 GPM) |
| Detergent pump | 36 Volt DC |
| Concentrate flow rate | 0.9 CC/Minute (0.03 Ounces/Minute) |
| Concentrate to water dilution ratio | 1:1000 |
| Air pump | 24 Volt DC, 0.6 Maximum Amp draw |
| Air pump flow rate | 8.7 LPM (0.3 CFM) open flow |
GENERAL MACHINE PERFORMANCE
| Item | Measure |
|---|---|
| Aisle turnaround width with 700 mm (28 in) scrub head | 1685 mm (66.25 in) |
| Aisle turnaround width with 800 mm (32 in) scrub head | 1700 mm (67 in) |
| Aisle turnaround width with 900 mm (36 in) scrub head | 1715 mm (67.5 in) |
| Maximum rated climb and descent angle with empty tanks | 8° |
| Maximum rated climb and descent angle with full tanks | 6° |
SPECIFICATIONS
Batteries and chargers: make sure your charger is compatible with your batteries, and set its charging algorithm to your battery pack before you use it.
POWER TYPE
| Type | Quantity | Volts | Ah Rating | Weight |
|---|---|---|---|---|
| Batteries | 6 | 6 | 235 @ 20 hr rate | 30 kg (67 lb) |
| 6 | 6 | 335 @ 20 hr rate | 47 kg (104 lb) |
| Type | Use | VDC | Kw (hp) |
|---|---|---|---|
| Electric Motors | Scrub brush (disk) | 36 | 0.56 (.75) |
| Vacuum fan | 36 | 0.63 (0.85) | |
| Propelling | 36 | 0.37 (0.50) | |
| Scrub brush (cylindrical) | 36 | 0.56 (0.75) |
| Type | VDC | amp | Hz | Phase | VAC |
|---|---|---|---|---|---|
| Chargers (Smart) | 36 | 20 | 60 | 1 | 115 |
| 36 | 30 | 60 | 1 | 115 |
TIRES
| Location | Type | Size |
|---|---|---|
| Front (2) | Foam filled, non-marking | 4.10/3.5 - 6 |
| Rear, casters (2) | Solid, non-marking | 5 x 1.38 in |
SPECIFICATIONS
MACHINE DIMENSIONS
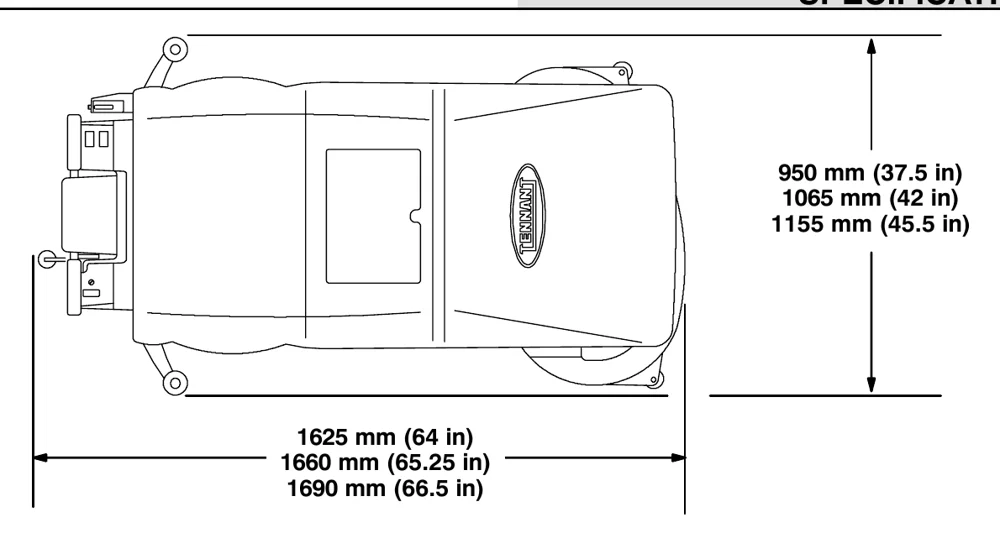
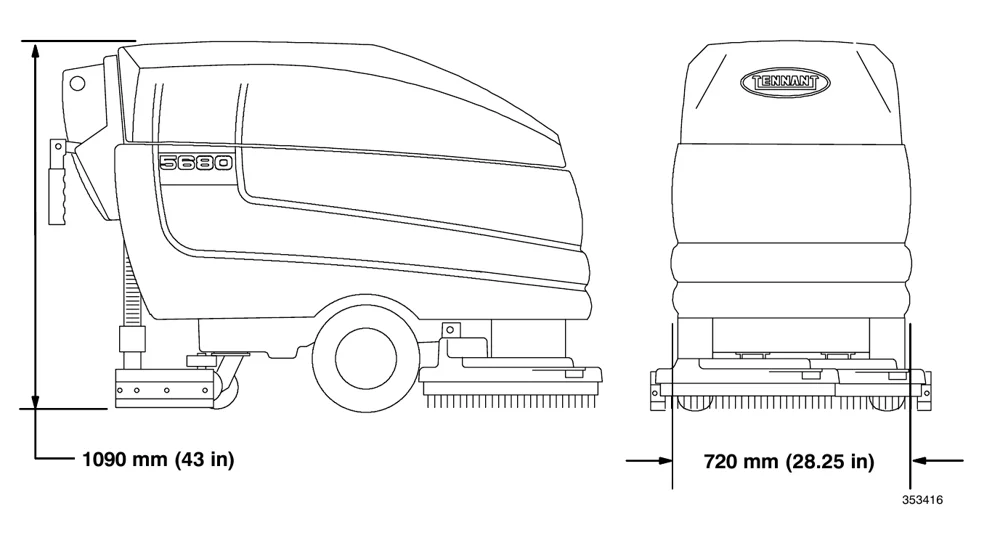
INDEX
A
Adjusting brush pattern, Cylindrical, 52–54
Adjusting squeegee deflection, 59
Aisle turn, 69
B
Batteries, 38–40
- Charger specifications, 70
- Charging, 40–42
- Discharge indicator, 11
- Maintenance, 38
- Specifications, 70
Battery discharge indicator, 11
Belts, 63
- Brush drive belt, 63
Brushes
- Cylindrical, 51
- Adjusting pattern, 52–54
- Disk, 47
- Scrubbing, 22
C
Cams, Squeegee down pressure, 14
Capacities, 68
Chains, 63
- Static drag, 63
Circuit breakers, 12
Controls, 7
- Battery discharge indicator, 11
- Circuit breakers, 12
- FaST switch (option), 11
- Height adjustment knob, 9
- Hourmeter, 11
- On-off key switch, 9
- Scrub head strap, 10
- Scrub switch, 10
- Solution flow lever, 12
- Squeegee down pressure cams, 14
- Squeegee lever, 10
- Steering handles, 8
- Symbols, 6
Cylindrical brushes
- Adjusting scrub head skirt, 42
- Replacing scrub head skirts, 42
Cylindrical scrub head, Debris trough, 31
D
Debris trough, 31
Dimensions, 68
Double scrubbing, 26
Draining and cleaning the tanks, 28–32
E
Electric motors, 41, 70
Electrical
- Batteries, 38–40
- Charging batteries, 40–42
- Circuit breakers, 12
F
FaST, System, 56
FaST pak agent (option), Installing, 18–20
FaST pak agent installation, 18–20
FaST Supply Hose Connector, 56
FaST switch (option), 11
FaST System, 56
FaST system (option), 16
FaST System Air Pump Filter, 56
FaST System Filter Screen, 56
Filling the tanks, 20–22
Filter
- FaST System Air Pump Filter, 56
- FaST System Filter Screen, 56
Freeze protection, 67
Front wheel, Tires, 63
Front wheels, Lug nuts, 63
G
Grease fittings, Rear casters, 38
H
Hoses
- Recovery tank drain, 13
- Solution tank, 13
Hourmeter, 11
How the machine works, 15
INDEX
I
Installing the squeegee, 58
J
Jack points, 67
Jacking, 67
L
Knob, Steering height adjustment, 9
Leveling the scrub head, 46
Leveling the squeegee, 58
Levers
- Solution flow, 12
- Squeegee, 10
Lubrication, 38
- Rear casters, 38
- Transaxle, 38
Lug nuts, Front wheel, 63
M
Machine, Jacking, 67
Machine components, 5
Machine dimensions, 71
Machine tie down location, 66
Maintenance, 36–60
- Intervals, 36
- Recommended, 4
Maintenance chart, 36
Motors, Electric, 41, 70
N
Normal scrubbing, 22
O
On-off key switch, 9
Operation, 4–41
Operation on inclines, 32
Operator Responsibility, 4
Options
- FaST pak agent installation , 18–20
- FaST switch, 11
- FaST System, 56
- FaST System specifications, 69
P
Post-operation checklist, 33
Pre-operation checklist, 17
Pushing and transporting machine, 64
Pushing machine, 64
Pushing the machine, 64
R
Rated incline and descent, 69
Recovery tank, 54
- Draining and cleaning, 28–32
- Hose, 13
- Optical sensors, Cleaning, 55
- Sensors, Cleaning, 30
Recovery tank drain hose, 13
Recovery tank optical sensor, 55
Recovery tank sensor, 30
Removing or replacing scrub head, 43–45
Removing the squeegee, 57
Replacing cylindrical brushes, 51
Replacing front squeegee blades, 61
Replacing rear squeegee blades, 60
Replacing scrub pads, 49
Replacing the disk brushes or pads, 47
Rotating front squeegee blades, 61
Rotating rear squeegee blades, 60
S
Safety
- Labels, 3
- Precautions, 2
- Stop arm, 14
- Support arm, 13
Screen, FaST System Filter Screen, 56
Scrub, Switch, 10
Scrub brushes, 47
- Cylindrical, 51
- Adjusting pattern, 52–54
- Replacing, 51
- Disk, 47
Scrub brushes and pads, 47
Scrub brushes or pads, Disk, Replacing, 47
INDEX
- Scrub head, 42–48
- Brush drive belt, 63
- Cylindrical brushes, 42
- Adjusting skirts, 42
- Replacing skirts, 42
- Disk brushes, 42
- Leveling, 46
- Removing or replacing, 43–45
- Strap, 10
- Scrub head strap, 10
- Scrub pads, 47, 49
- Scrub switch, 10
- Scrubbing
- Brushes and pads, 47
- Double, 26
- Normal, 22
- Stop, 27
- Scrubbing brushes, 22
- Scrubbing pads, 22
- Sensors
- Optical, Recovery tank, 55
- Recovery tank, 30
- Skirts
- Cylindrical brushes, 42
- Disk brushes, 42
- Solution
- Filling the tanks, 20–22
- Flow lever, 12
- System, 54
- Tank hose, 13
- Solution flow lever, 12
- Solution System, 54
- Solution Tank, 55
- Solution tank
- Draining and cleaning, 28–32
- Filling, 20–22
- Hose, 13
- Stop arm, 14
- Support arm, 13
- Solution tank hose, 13
- Specifications, 68–70
- Chargers, 70
- Electric motors, 70
- FaST System, 69
- Machine capacities, 68
- Machine dimensions, 68
- Machine performance, 69
- Power type, 70
- Tires, 70
- Squeegee, 57–60
- Blades, 60
- Replacing or rotating front, 61
- Replacing or rotating rear, 60
- Deflection, Adjusting, 59
- Down pressure cams, 14
- Leveling, 58
- Lever, 10
- Blades, 60
- Squeegee assembly
- Installing, 58
- Removing, 57
- Squeegee blades, 60
- Squeegee down pressure cams, 14
- Squeegee lever, 10
- Staring the machine, 20
- Static drag chain, 63
- Steering handles, 8
- Height adjustment, 9
- Stop arm, 14
- Stop scrubbing, 27
- Stop the machine, 32
- Storage information, 67
- Freeze protection, 67
- Straps, Scrub head, 10
- Support arm, 13
- Switches
- FaST, 11
- On-off key, 9
- Scrub , 10
T
- Tanks
- Recovery, 54
- Solution, 55
- Tie down location, 66
- Tires, 63–64
- Specifications, 70
- Transaxle, 38
- Transporting machine, 64
- Transporting the machine, 64
- Troubleshooting, 34
Tennant and Nobles are trademarks of Tennant Company. Southeastern Equipment & Supply is an independent dealer.