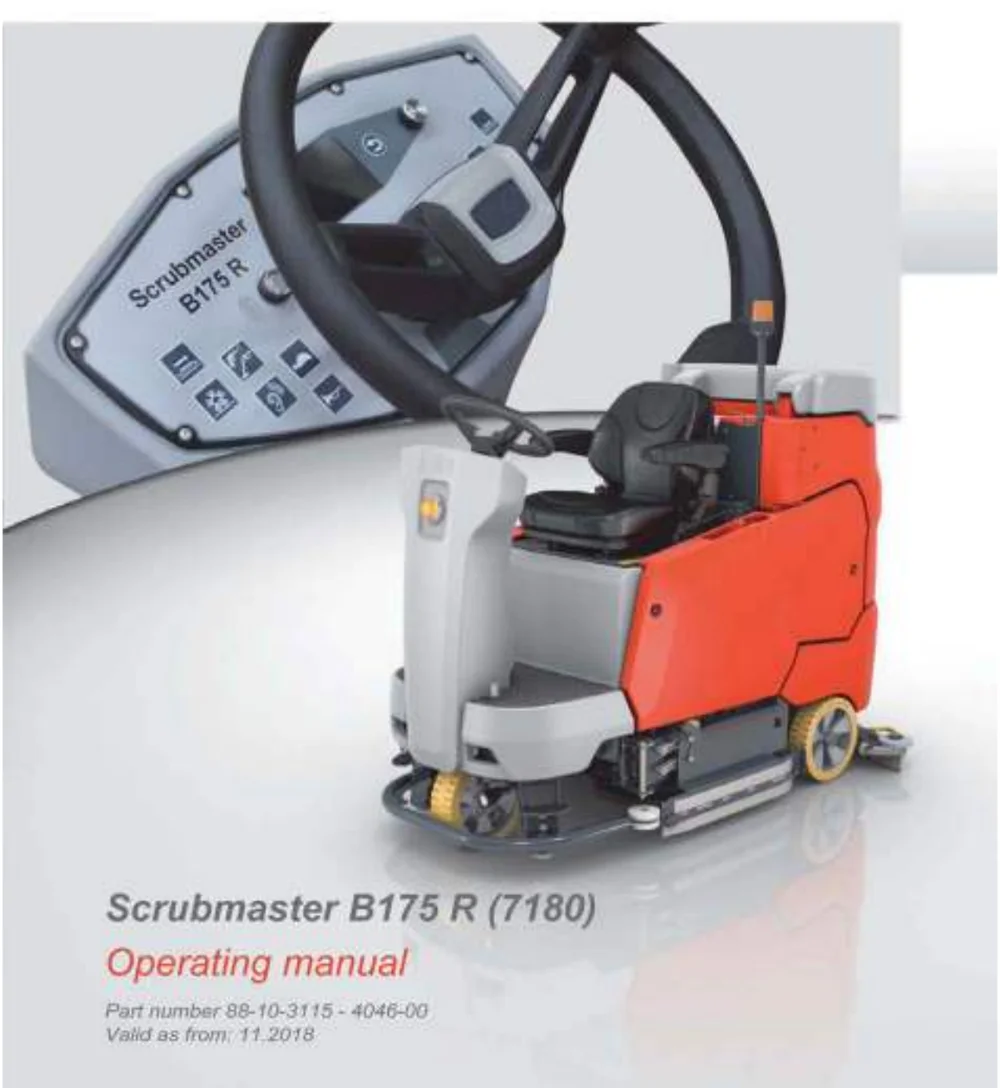
Scrubmaster B175 R (7180) Operating manual
Part number 88-10-3115 - 4046-00
Valid as from: 11.2018
Introduction
Foreword
Dear Customer,
We are certain that the excellent qualities of the machine will justify the faith you have shown in us by your purchase.
To guarantee safe working with the machine, please read the Safety Notes chapter before putting it into service.
Your own safety, as well as the safety of others, depends essentially on your ability to control the vehicle. Please read this original operating manual before you use the vehicle for the first time, act accordingly and keep these instructions for future reference or subsequent users. The operating manual contains all important information for operation, maintenance and care. We have provided the places in this operating manual concerning your safety with a danger pictogram. Your authorized PowerBoss dealer is available at all times to answer further questions about the vehicle or the operating manual.
We would expressly advise you that no legal claims may be asserted based on the contents of this operating manual. In the case of necessary repair work, please make sure that only original spare parts are used. Spare parts must be original spare parts to guarantee safety. We reserve the right to make changes in the interests of further technical development.
PowerBoss
14N845 U.S. Route 20
Pingree Grove, IL 60140
Phone: (800) 323-9420
Email: [email protected]
Issue:
| Index | Book number | Change no. | Valid as from: |
|---|---|---|---|
| 0 | 88-10-3115 | 3922-00 | 04.2018 |
| 1 | 88-10-3115 | 3954-00 | 06.2018 |
| 2 | 88-10-3115 | 4046-00 | 11.2018 |
Introduction
Intended use
Scrubmaster B175 R is a scrubber-drier for the wet cleaning of hard indoor floor surfaces. This machine is intended for commercial use, e.g. in shopping centres, swimming pools, shops, airports, schools and hotels. Any use extending beyond this is not intended use. The manufacturer is not liable for any damage resulting from this and the user alone bears the risk. Intended use also includes compliance with the operating, maintenance and servicing conditions specified by the manufacturer.
The Scrubmaster B175 R may be used, maintained and repaired only by persons who are familiar with this work and instructed about the dangers. The relevant accident prevention regulations as well as the other generally recognised safety engineering and occupational medical rules must be complied with.
The machine corresponds by virtue of its design and construction as well as in the version distributed by us to the usual health and safety requirements of the EC Directives (see Declaration of Conformity). This declaration loses its validity in the event of a modification to the machine not authorised by us. The manufacturer is not deemed liable for any damage resulting from unauthorised modifications to the machine.
Notes on warranty
The terms defined in the purchase agreement apply. Claims for compensation in relation to damage are excluded from the terms of the warranty when the damage is the result of the failure to observe rules concerning servicing and maintenance. Maintenance work must be carried out by an authorised PowerBoss service workshop and confirmed in the “Maintenance Report”, which serves as a warranty logbook.
The following are excluded from the terms of warranty: wear and tear through overuse, defective fuses, improper handling and use and unauthorised modifications. Claims under the terms of the warranty are also annulled when damage occurs to the machine resulting from the use of parts or accessories not explicitly approved of by us or from failure to observe maintenance rules.
Introduction
Acceptance of the machine
Inspect the machine immediately on delivery for signs of transport damage. You will be compensated for transport damage provided you immediately have the damage confirmed by the transport company and send in the damage report together with the consignment note to us.
Machine data
Your machine is described clearly by the following data. Please always quote these data in correspondence or when making a telephone query to your authorised PowerBoss dealer or our company.
- Machine type
- Manufacturing no.
- Start-up on:
Your nearest authorised PowerBoss dealer:
- Address:
- Telephone:
Table of contents
| No. | Title | Page |
|---|---|---|
| 1 | Safety instructions | 8 |
| 1.1 | Warning and danger symbols | 8 |
| 1.2 | General safety instructions | 9 |
| 1.3 | Operating safety instructions | 10 |
| 1.3.1 | Before putting into service | 10 |
| 1.3.2 | During operation | 10 |
| 1.3.3 | After operation | 11 |
| 1.4 | Maintenance instructions | 11 |
| 1.5 | Information about special risks | 12 |
| 1.5.1 | Electrical system | 12 |
| 1.5.2 | Batteries | 13 |
| 1.5.3 | Power connection and mains plug | 13 |
| 1.6 | Environmental protection instructions and disposal | 15 |
| 1.7 | Labels on the machine | 16 |
| 1.8 | Labels on the pre-sweep suction unit | 19 |
| 2 | Operation | 20 |
| 2.1 | Overviews | 20 |
| 2.1.1 | Front view | 21 |
| 2.1.2 | Rear view | 23 |
| 2.1.3 | Control panel | 24 |
| 2.2 | Controls and display elements | 26 |
| 2.2.1 | Control panel | 26 |
| 2.3 | Multifunction display (MFD) | 31 |
| 2.3.1 | Menu guidance | 31 |
| 2.3.2 | Main menu | 32 |
| 2.3.3 | Sub-menu | 38 |
| 2.3.4 | Controls at the machine | 42 |
| 2.4 | Functional description: | 44 |
| 2.4.1 | Solution tank | 44 |
| 2.4.2 | Rotating brush and roller brush unit | 45 |
| 2.4.3 | Side brush unit | 45 |
| 2.4.4 | Wiper | 45 |
| 2.4.5 | Squeegee | 46 |
| 2.4.6 | Waste water tank | 46 |
| 2.4.7 | Suction turbine | 46 |
| 2.4.8 | Travel drive | 47 |
| 2.4.9 | Brakes | 47 |
| 2.4.10 | Batteries | 47 |
| 3 | Operation | 48 |
| 3.1 | Instruction | 48 |
| 3.2 | Before putting into service | 48 |
Table of contents
| Section | Title | Page |
|---|---|---|
| 3.3 | Check list: Before machine start-up | 49 |
| 3.3.1 | Installing the mains cable | 49 |
| 3.3.2 | Driver's seat | 50 |
| 3.3.3 | Side mirror (optional) adjustment | 51 |
| 3.4 | Cleaning | 52 |
| 3.4.1 | Fleet-Recorder (option) | 53 |
| 3.4.2 | On-board dosing system (option) | 54 |
| 3.4.3 | Useful cleaning tips | 55 |
| 3.4.4 | Handling and braking the vehicle | 56 |
| 3.4.5 | Pushing the machine | 57 |
| 3.4.6 | Turning off the machine | 58 |
| 3.4.7 | Check list: After cleaning | 58 |
| 3.5 | Loading and transporting | 59 |
| 3.6 | Service information | 60 |
| 4 | Technical data | 62 |
| 5 | Maintenance and Servicing | 66 |
| 5.1 | Maintenance plan | 67 |
| 5.2 | Battery | 68 |
| 5.2.1 | Checking the charging state | 68 |
| 5.2.2 | Charge the battery | 69 |
| 5.2.3 | Checking the acid level | 73 |
| 5.2.4 | Replacing the battery | 74 |
| 5.2.5 | Battery plug coding | 75 |
| 5.2.6 | Maintaining drive batteries | 76 |
| 5.2.7 | Taking the machine out of service for a long period | 76 |
| 5.2.8 | Disposing of batteries | 76 |
| 5.3 | Solution tank | 77 |
| 5.3.1 | Filling the solution tank | 77 |
| 5.3.2 | Emptying the solution tank | 79 |
| 5.3.3 | Cleaning the solution tank | 79 |
| 5.4 | Waste water tank | 80 |
| 5.4.1 | Emptying the waste water tank | 80 |
| 5.4.2 | Cleaning the waste water tank | 81 |
| 5.4.3 | Cleaning the coarse dirt sieve | 82 |
| 5.4.4 | Cleaning the intake sieve | 82 |
| 5.4.5 | Checking the seal at the drain valve | 82 |
| 5.4.6 | Cleaning the fresh water filter | 83 |
| 5.4.7 | Checking the seal in the tank cap | 83 |
| 5.5 | Rotating brush unit | 84 |
| 5.5.1 | Replacing the brushes/pads | 84 |
| 5.5.2 | Cleaning the brushes | 84 |
| 5.5.3 | Ejecting the brushes/pads | 85 |
| 5.5.4 | Coupling the brushes/pads | 85 |
Table of contents
| Section | Title | Page |
|---|---|---|
| 5.6 | Roller brush unit | 86 |
| 5.6.1 | Emptying the dirt hopper | 86 |
| 5.6.2 | Replacing the brushes | 87 |
| 5.6.3 | Cleaning the brushes | 87 |
| 5.6.4 | Disassembling the brushes | 87 |
| 5.6.5 | Installing the brushes | 87 |
| 5.7 | Side brush unit (optional) | 88 |
| 5.7.1 | Adjusting the side brush | 88 |
| 5.7.2 | Changing the side brush | 89 |
| 5.8 | Squeegee | 90 |
| 5.8.1 | Cleaning the squeegee | 90 |
| 5.8.2 | Changing the sealing / slot strip | 92 |
| 5.8.3 | Adjusting the sealing strips | 93 |
| 5.9 | Wiper | 95 |
| 5.9.1 | Changing the wiper rubber | 95 |
| 5.10 | Pre-sweep suction unit (optional) | 96 |
| 5.10.1 | Emptying the dirt hopper | 96 |
| 5.10.2 | Dirt hopper seal | 96 |
| 5.10.3 | Shaking the filter | 97 |
| 5.10.4 | Cleaning the filter | 97 |
| 5.10.5 | Cleaning the cylindrical brush and the cylindrical brush compartment | 98 |
| 5.10.6 | Changing the cylindrical brush | 98 |
| 5.10.7 | Adjusting the sweeping level | 99 |
| 5.10.8 | Replacing the sealing strips of the cylindrical brush compartment | 99 |
| 5.10.9 | Changing the side brush | 100 |
| 6 | Attachments/options | 101 |
| 6.1 | Spray suction tool | 101 |
| 6.2 | Manual suction tool: | 102 |
| 6.3 | Spray nozzle | 103 |
| 6.4 | Pre-sweep suction unit | 104 |
| 6.4.1 | Pre-sweep suction unit installation | 104 |
| 6.4.2 | Check and correct settings | 105 |
| 6.4.3 | Sweeping operation | 106 |
| 6.4.4 | Stop sweeping operation | 106 |
| 6.4.5 | After sweeping | 106 |
| 6.4.6 | Parking the pre-sweep suction unit | 107 |
| 6.5 | Overhead guard | 107 |
| EC Declaration of Conformity | 109 |
1 Safety instructions
1.1 Warning and danger symbols
Important tasks concerning the safety of the operator and machine are named as follows in this operating manual and emphasised by symbols.
1.2 General safety instructions
- Apart from the instructions in this operating manual, the general safety and accident prevention regulations of the legislation must be taken into account.
- Before the machine is put into service, please carefully read the operating manual you receive as well as further separate instructions for additional implements or attachments and observe them in all aspects of your work.
- The machine may be used, maintained and repaired only by persons who have been instructed by PowerBoss experts.
- The machine is not intended for use by persons (including children) with reduced physical, sensory or mental capabilities or by persons lacking the required experience and knowledge.
- Children should be supervised to ensure they do not play with the machine.
- The operating manual should always be available at the machine's place of use and should therefore be stored with the machine.
- Please hand over these documents to the new owner/operator on sale or rental of the device. Have the hand-over confirmed!
- The labels attached to the machine provide important information for safe operation. Renew labels that are no longer legible or present.
- Only wheels (wheel tyres) approved by PowerBoss may be used.
- With PowerBoss-AntiBac® machine variants, the plastic inner surface of the fresh water and waste water tanks contains silver ions in nanoparticle form.
- Spare parts must be original spare parts to guarantee safety.
1.3 Operating safety instructions
Batteries and chargers: make sure your charger is compatible with your batteries, and set its charging algorithm to your battery pack before you use it.
1.3.1 Before putting into service
- Before initially starting up the machine, charge the used battery fully and appropriately with commissioning charge. Please observe the operating manual of the charger and the operating manual of the battery manufacturer. PowerBoss assumes no liability for battery damage resulting from insufficient commissioning charge.
- Check the machine for operating safety before every start-up! Eliminate faults immediately.
- Before starting work, the operator must familiarize himself with all equipment, operating and actuating elements as well as with their function. It is too late to do this during operation!
1.3.2 During operation
- Sturdy and slip-proof shoes must be worn when working with the machine.
- Only those surfaces approved by the contractor or its authorised representative for use of the machine may be driven on.
- If the machine is used in areas in which objects may fall down, this is only permitted if it has an overhead guard which protects the driver.
- When working with the machine, pay special attention to third persons, especially children.
- When driving over thresholds, raise the brush head.
- Only use detergents suitable for automatic machines (foam retarded) and observe the application, disposal and warning instructions provided by the detergent manufacturer.
- The machine and the pre-sweep suction unit are not suitable for removing combustible or explosive liquids, dust or materials that are hazardous to health. It is also prohibited to collect burning objects, e.g. glowing cigarettes. The collection of wood dust, e.g. beech and oak dust, is also prohibited – health hazard!
- Excessive quantities of dust must be avoided when working with the side brush unit or the pre-sweep suction unit!
- The machine is not suitable for collecting large quantities of water, e.g. in the event of flooding.
- For reasons of safety, the driver's seat is equipped with a seat contact switch. The machine can only be started when the driver is sitting on the driver's seat. The function of the seat contact switch must not be bypassed.
- The machine must not be used in potentially explosive atmospheres.
- It is not permitted to transport other people or heavy objects.
- When transporting the machine, raise the squeegee and the brush head. Adjust your way of driving to local conditions.
- Drive slowly on wet surfaces, particularly in bends, due to the risk of skidding.
- Drive slowly into the bend when driving downhill.
- Manipulating the switches and protective devices is forbidden.
Machine with standard drive:
- For cleaning purposes, the machine may only be used on a surface with a maximum slope of 6 %.
- Transport journeys on slopes of up to 10 % may only take place for a limited period of time and with special caution.
Machine with X-AC drive:
- Cleaning may only be carried out on slopes of up to 15 % for a duration of up to 5 minutes.
- Transport journeys on slopes of up to 18 % may only take place for a maximum duration of 3 minutes.
The machine must not be parked on an uphill or downhill gradient of more than 15 %!!
Dirt hopper:
- Ensure there is sufficient ventilation when carrying out sweeping work in enclosed rooms.
- The permissible total weight of the dirt hopper must not be exceeded. Monitor the filling level of the dirt hopper at regular intervals.
1.3.3 After operation
- Remove the key when leaving the machine to prevent unauthorised use.
- After use, park the machine in a dry, indoor location with the brush head and squeegee raised.
1.4 Maintenance instructions
- Daily and weekly maintenance work must be done in accordance with the maintenance plan by the operating staff. In all other maintenance work, please contact your nearest PowerBoss service centre.
- The maintenance work and maintenance intervals specified in the operating manual must be complied with.
- Suitable tools and protective clothing such as gloves and safety goggles must be used during cleaning and maintenance work.
- Have the machine checked for safe condition by an expert in accordance with the accident prevention regulations at appropriate intervals (we recommend at least once yearly).
- Spare parts must at least comply with the technical requirements specified by the manufacturer. This is guaranteed by original spare parts.
- Turn the machine off and disconnect the battery connector when cleaning and maintaining the machine and before replacing parts.
- To prevent unauthorised use of the machine, remove the ignition key.
- Cleaning the machine with a high-pressure cleaner or steam jet is not allowed.
- Application of aggressive and corrosive detergents is not allowed.
- After cleaning, let the machine air dry, e.g. over the weekend.
- Only put the machine into service when all the protective devices are attached and in protection position.
Pre-sweep suction unit
- Shaking the filter is only permitted with the dirt hopper inserted.
- Only tip out the contents of the dirt hopper from a low height in order to prevent the formation of dust.
- The dirt hopper must be cleaned at regular intervals to prevent the accumulation of bacteria.
1.5 Information about special risks
1.5.1 Electrical system
- If the electrical system is faulty, always turn off the machine, disconnect the battery and eliminate the fault.
- Work on the electrical system may be done only in accordance with electrical engineering standards by a specialist trained for this work.
- Regularly inspect/check the electrical system of the machine. Defects such as loose connections, loose nuts of electrified bolts, electrical components or damaged cables must be eliminated immediately.
- Only use original fuses with the specified current. If stronger fuses are used, the electrical system can be destroyed and fires may occur.
1.5.2 Batteries
Batteries and chargers: make sure your charger is compatible with your batteries, and set its charging algorithm to your battery pack before you use it.
- Observe the operating manuals and safety instructions provided by the battery manufacturer.
- Never connect or disconnect batteries when the machine is turned on.
- Make sure the batteries are never fully discharged; recharge them as quickly as possible.
- Only instructed maintenance personnel must handle and replace batteries.
- Only batteries approved by PowerBoss may be used at the intended position.
- Danger! Make sure that the insulation of the battery cables is not damaged. The battery cables should not rub against anything. If the insulation is defective, no longer use the machine and have the battery cables replaced by the PowerBoss customer service immediately.
- Caution! Always make sure that the batteries are clean and dry to avoid creeping currents and corrosion damage. Protect the batteries, in particular, against conductive contamination, e.g. metal dust.
- Risk of short circuits and spark formation! Never place tools or other electrically conductive objects on the battery!
- Do not remove insulating caps and covers, if necessary re-install them after carrying out work on the battery cables.
- Caution! Explosive gases can develop when charging the batteries.
Avoid smoking, fire or naked light in the vicinity of batteries. Ensure sufficient ventilation when charging the batteries.
1.5.3 Power connection and mains plug
- Only connect the machine to an electrical connection installed by an electrician in accordance with IEC 60364-1.
- We recommend connection to a fused socket with a residual current circuit breaker (max. 30 mA).
- We recommend use of splash water protected sockets according to DIN VDE 0620-1.
- Make sure the socket is dry!
- Only touch the mains plug and the mains cable with dry hands.
- Never insert the mains plug into the socket when the floor is wet or damp.
- Never dip the mains cable or mains plug in water or other liquids or clean it under running water.
- Damp mains plugs or mains plugs that have become wet must no longer be used. Water can enter the mains plug. Only qualified electricians must carry out recommissioning.
- Check the mains cable regularly for damage. If damage is detected, the machine must no longer be used. Have a qualified electrician replace the mains cable.
- Make sure that no water or liquid can come into contact with live parts of the machine. If water has still entered parts, immediately disconnect the mains plug and have the machine checked by the authorised PowerBoss service.
1.6 Environmental protection instructions and disposal
If the end of use of the machine or of its components is reached and this is handed over for scrapping, the components must be correctly disposed of. Further information about disposal is available through the competent local authorities and the authorised PowerBoss dealers.
 | Do not dispose of products with this symbol in domestic waste. Disposal takes place through local collecting points or the manufacturer. |
 | Recycle used materials with this symbol according to their labelling and do not dispose of them in domestic waste. |
- Observe the applicable laws and local regulations when disposing of dirt, waste water and detergents, also see the German Water Resources Law (WHG).
- Used batteries with the recycling symbol contain reusable commodities. In accordance with the symbol showing the crossed-out garbage bin, these batteries must not be disposed of in the domestic waste. Return and recycling have to be arranged with the authorised PowerBoss dealer as required in § 6 and § 8 of the German battery law (BattG)!
- Observe the local regulations when disposing of the AntiBac® tanks, e.g. take the AntiBac® tanks to a suitable disposal site or incineration plant.
1.7 Labels on the machine
The following safety and instruction labels are affixed to the machine in a clearly visible and legible manner.
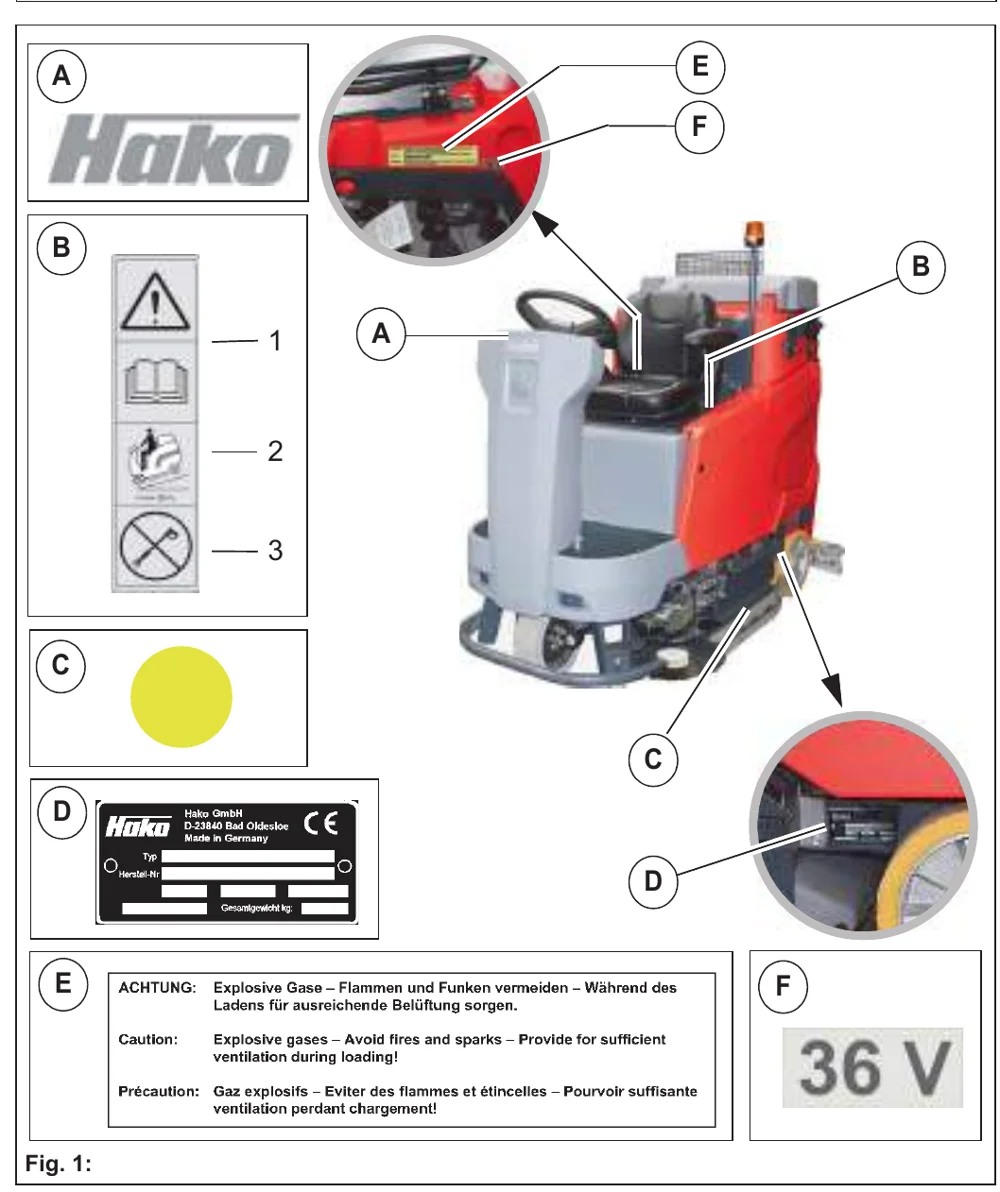
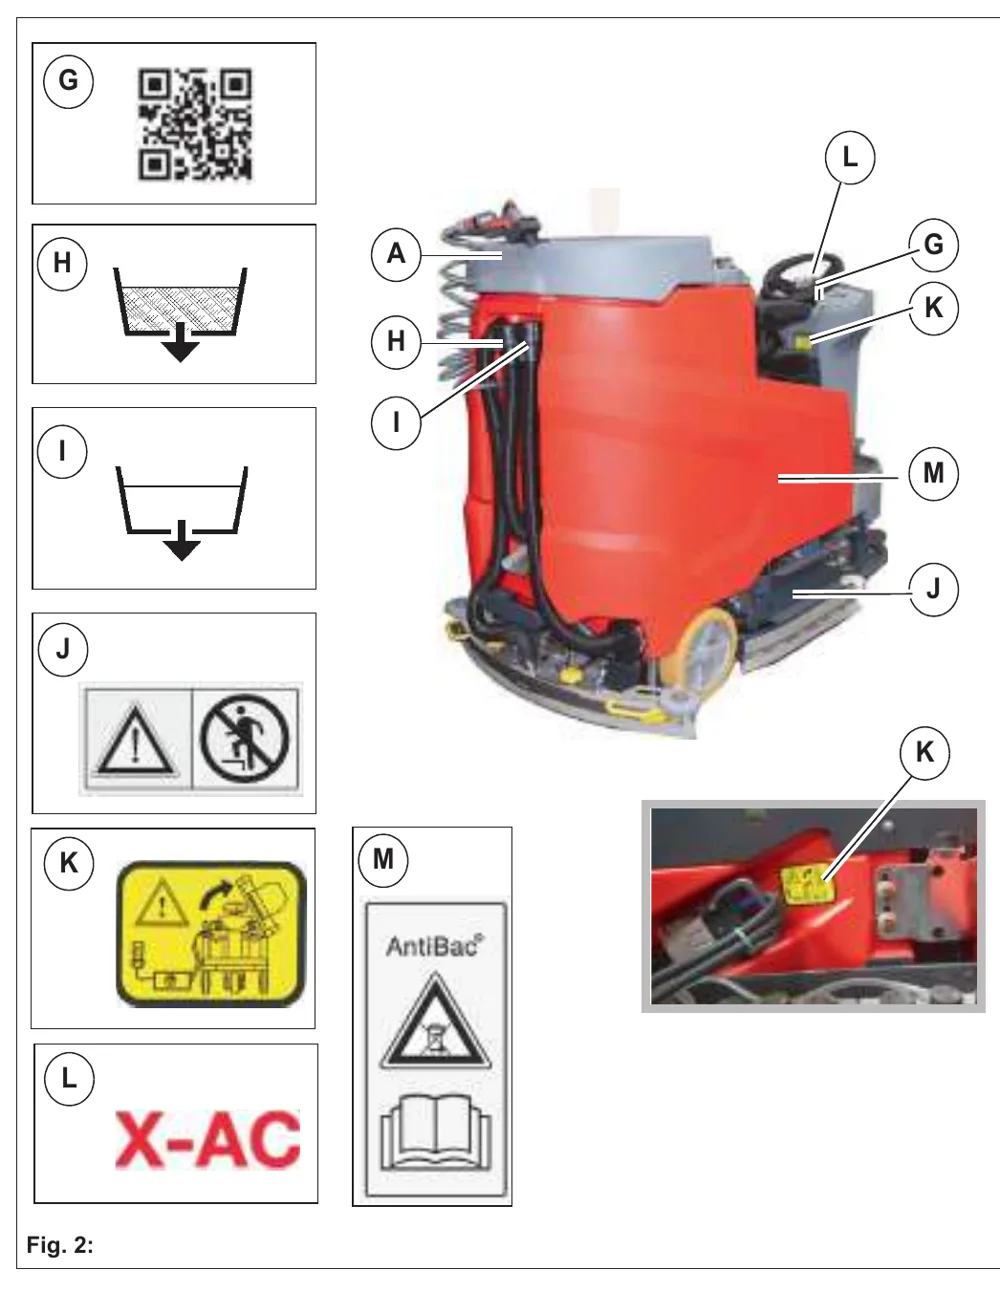
Label – Company logo Fig. 1/Fig. 2-A
The PowerBoss logo is located at the front on the steering column and at the rear on the hopper.
Label
- Read and observe the operating manual Fig. 1-B1
- Maximum permissible slope 6 % when cleaning Fig. 1-B2
- Never clean the machine with a high-pressure cleaner Fig. 1-B3
The label is located on the left hand side next to the driver's seat.
Label – Maintenance parts (yellow dot) Fig. 2-C
The yellow dot is located on the cover of the fresh water filter.
Type plate Fig. 2-D
The type plate is located in front of the left front wheel.
Label – Explosive gases Fig. 1-E
The label is in the battery compartment.
Label – 36 V Fig. 1-F
The label is in the battery compartment.
Label – QR code Fig. 2-G
The label is located on the control panel.
Label – Drain waste water Fig. 2-H
The label is located on the drain hose of the waste water tank.
Label – Drain fresh water Fig. 2-I
The label is located on the drain hose of the solution tank.
Label – Keep off! Fig. 2-J
The label is located on the rotating brush or roller brush unit.
Label – Leave seat console open during the charging procedure! Fig. 2-K
There is a label in the battery compartment. The second label is located on the mains plug storage compartment.
Label – X-AC-drive Fig. 2-L
For machines with X-AC-drives, the label is located on the control panel.
Printing – Do not dispose of AntiBac® tanks in the domestic waste! Fig. 2-M
The printing is located on the AntiBac® tanks.
1.8 Labels on the pre-sweep suction unit
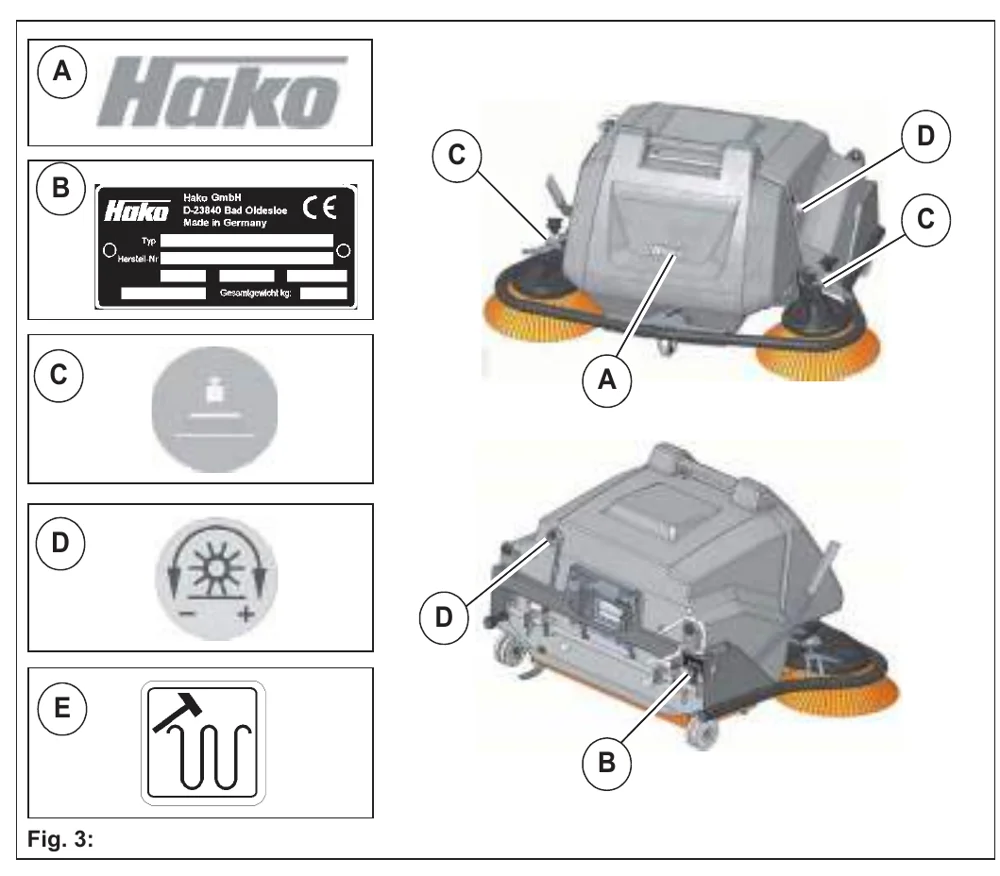
Label – Logo Fig. 3-A
The PowerBoss logo is located on the front of the dirt hopper.
Type plate Fig. 3-B
The type plate is located at the rear right-hand side of the pre-sweep suction unit.
Label – Side brush wear compensation Fig. 3-C
The labels are located on the right and left next to the side brush adjustment.
Label – Cylindrical brush wear compensation Fig. 3-D
The label is located on the cylindrical brush adjustment.
Label – Shaking system Fig. 3-E
The label is located on the left hand side of the shaking system.
2 Operation
2.1 Overviews
The description in chapter 2 contains information on the function and handling of the individual controls on the machine. The controls always have the same item number in all chapters.
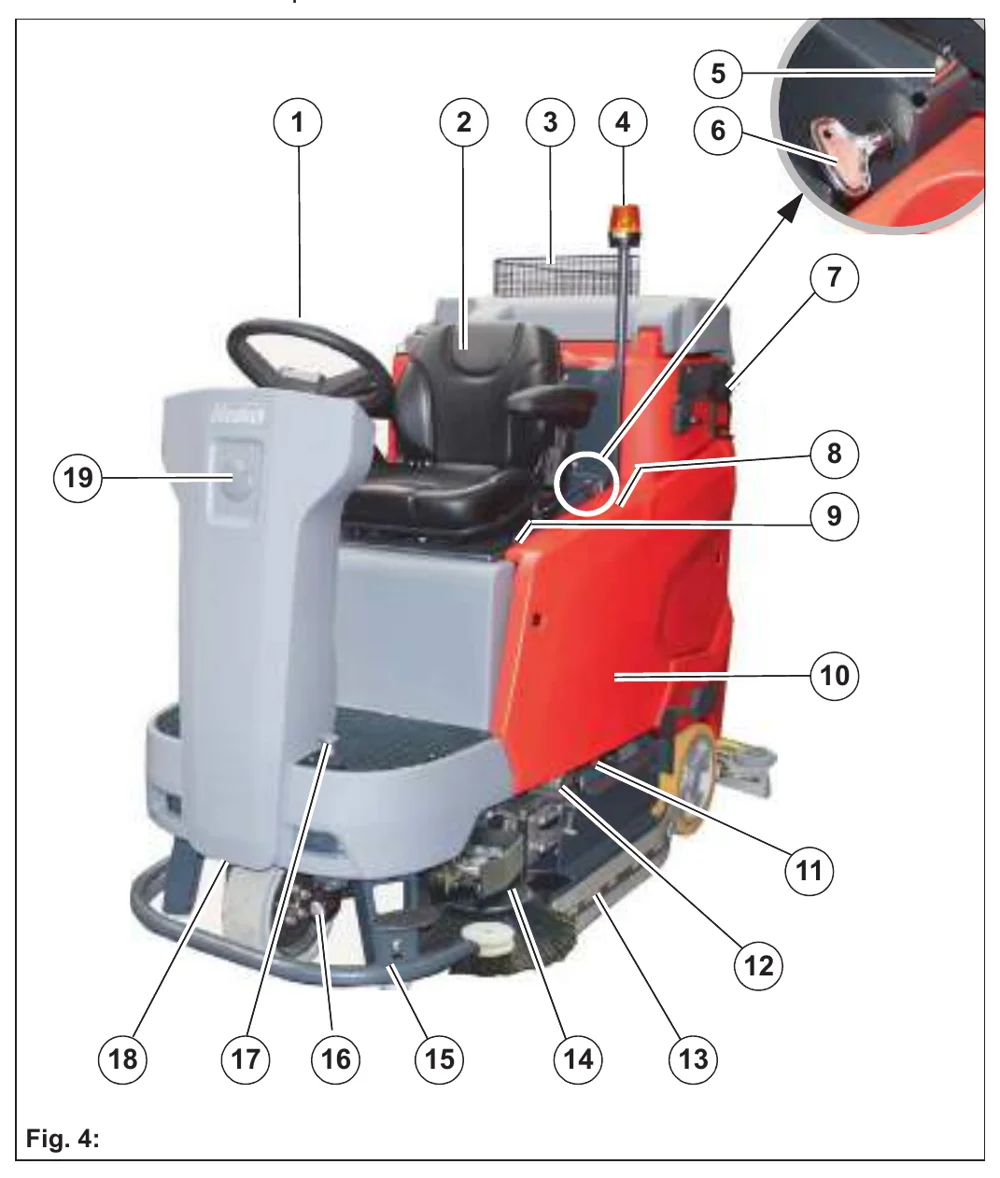
2.1.1 Front view
| Item | Designation |
|---|---|
| 1 | Steering wheel |
| 2 | Driver's seat |
| 3 | Tray |
| 4 | Flashlight on a pole |
| 5 | Key for electronic system cover |
| 6 | Key for side panelling |
| 7 | Holder for manual suction tool or manual spray suction tool |
| 8 | Drinks holder and storage compartment |
| 9 | Socket for USB connection |
| 10 | Side panelling |
| 11 | Ball cock |
| 12 | Fresh water filter |
| 13 | Wiper |
| 14 | Side brush unit |
| 15 | Collision protection |
| 16 | Working light |
| 17 | Operating brake |
| 18 | Travel drive |
| 19 | Warning device |
Operation
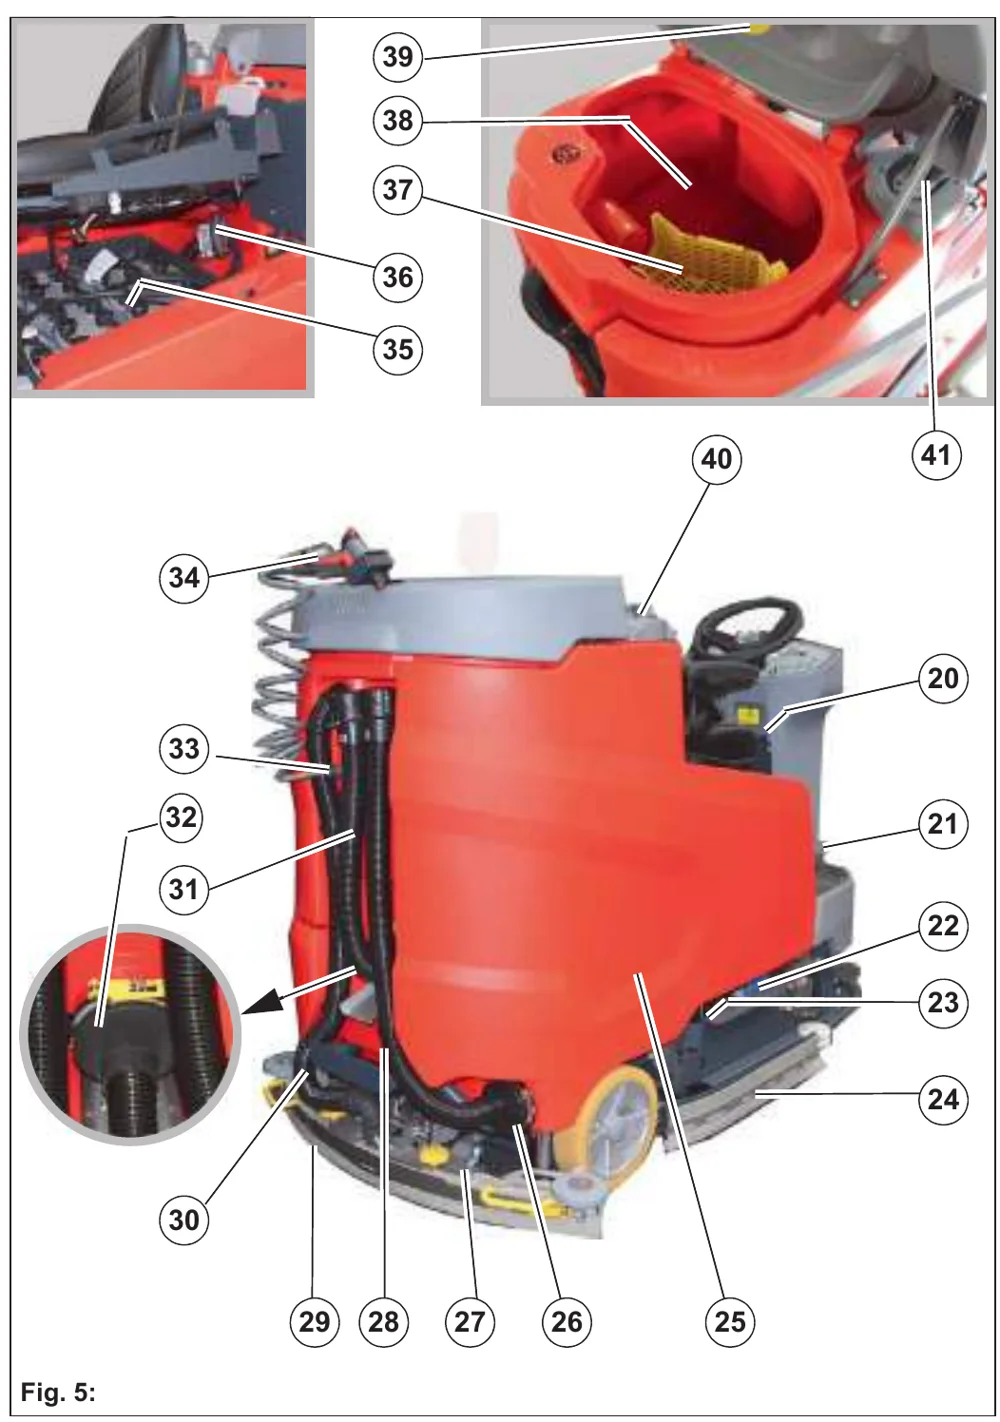
2.1.2 Rear view
| Item | Designation |
|---|---|
| 20 | Mains cable |
| 21 | Accelerator pedal |
| 22 | On-board dosing system |
| 23 | Brush unit |
| 24 | Wiper |
| 25 | Solution tank |
| 26 | Maintenance opening solution tank |
| 27 | Squeegee water connection |
| 28 | Fresh water drain hose |
| 29 | Squeegee |
| 30 | Suction hose |
| 31 | Drain hose waste water |
| 32 | Waste water tank maintenance opening |
| 33 | Water connection |
| 34 | Spray nozzle |
| 35 | Battery compartment |
| 36 | Battery connector |
| 37 | Coarse dirt sieve |
| 38 | Waste water tank |
| 39 | Intake sieve |
| 40 | Filling opening |
| 41 | Automatic filling unit |
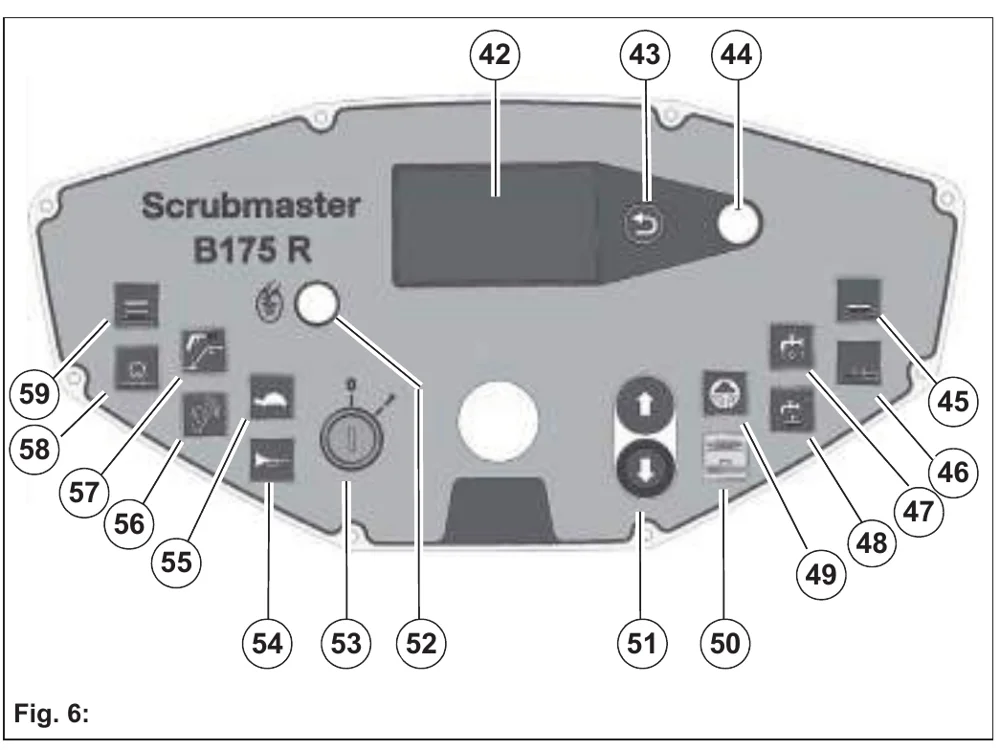
2.1.3 Control panel
| Item | Designation |
|---|---|
| 42 | Multifunction display (MFD) |
| 43 | Return button |
| 44 | Turn-push knob |
| 45 | Button – brush unit |
| 46 | Button – squeegee |
| 47 | Button – fresh water supply |
| 48 | Button – boost function |
| 49 | Button – on-board dosing system |
| 50 | Button – brush unit and squeegee |
| 51 | Button – driving direction selection |
| No. | Item |
|---|---|
| 52 | iButton Reader, standard Fleet-Recorder |
| 53 | Key switch |
| 54 | Button – signal horn |
| 55 | Button – speed reduction forwards gear |
| 56 | Button – silent operation |
| 57 | Button – tool operation |
| 58 | Button – pre-sweep suction unit |
| 59 | Button – side brush unit |
2.2 Controls and display elements
2.2.1 Control panel
The individual functions of the buttons on the control panel are described below. The respective activated functions are visible as corresponding symbols in the multifunction display (MFD).
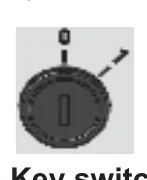
Key switch Fig. 6-53
The electrical system is switched on and off with the key switch.
- Position 0: The electrical system is switched off. The key can be pulled out.
- Position 1: The electrical system is switched on.
- The software version is displayed for approx. 1 second on the MFD, followed by the last service code for approx. 3 seconds if necessary. The operating hours meter is then displayed.
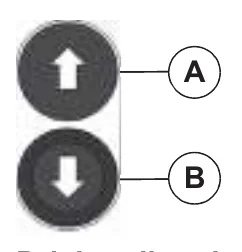
Driving direction selection button Fig. 6-51
The driving direction is selected with this button. The driving direction can be changed while driving.
- Push the button (A): Forwards gear
- Push the button (B): Reverse gear
Speed reduction button Fig. 6-55

The maximum speed when driving forwards is reduced by approx. 50 % with this button.
- Push the button: Speed reduction ON
- Push the button again: Speed reduction OFF
Signal horn button Fig. 6-54
The signal horn is switched on and off with this button.
- Push the button: Signal horn ON
- Release the button: Signal horn OFF
Fresh water supply button Fig. 6-47
The fresh water supply is switched on and off with this button.
- Push the button: Fresh water supply ON
- Push the button again: Fresh water supply OFF
Boost function button Fig. 6-48
In order to remove heavy contamination, it is possible to boost the scrubbing-vacuuming cleaning program (green button Fig. 6-50) and scrubbing (button Fig. 6-45) using the boost function.
- Push and hold the button: The highest level of fresh water dosing and the increased brush pressure are activated simultaneously.
- Release the button: The machine switches back to the operating mode it was in before the boost function.
Operation
Brush unit button Fig. 6-45
The brush unit is lowered and raised with this button.
- Push the button: The brush unit is lowered. When actuating the accelerator pedal, the brush drive and the water supply are switched on.
- Push the button again: The brush drive and the water supply are switched off. The brush unit is raised.
Squeegee button Fig. 6-46
The squeegee is lowered/raised and the suction turbine switched on and off with this button.
- Push the button: The squeegee is lowered and the suction turbine switched on.
- Push the button again: The squeegee is raised. After an after-run time of approx. 15 seconds, the suction turbine is switched off.
On-board dosing system button Fig. 6-49

The dosing system for the detergent is switched on and off with this button.
- Push the button: Dosing system ON
- Push the button again: Dosing system OFF
Brush unit and squeegee button Fig. 6-50
The brush and suction turbine drive are switched on and off simultaneously with this button.
- Push the button: The brush unit, the side brush unit and the squeegee are lowered, and the suction turbine is switched on. The brush drive and the water supply are switched on when the accelerator pedal is actuated.
- Push the button again: The brush unit and the side brush unit are raised. The brush drive and the water supply are switched off. The squeegee continues to run for approx. 15 seconds to absorb residual water.
Side brush unit button Fig. 6-59
The side brush unit is switched on and off with this button.
- Push the button: Side brush unit ON
- Push the button again: Side brush unit OFF
Pre-sweep suction unit button Fig. 6-58

The pre-sweep suction unit is switched on and off using the button.
- Push the button: Pre-sweep suction unit ON
- Push the button again: Pre-sweep suction unit OFF
Tool operation button Fig. 6-57
The following tools can be switched on and off using this button when the driver is not on the seat:
- Spray nozzle
- Manual suction or spray suction tool
If the machine does not have a particular tool, it is excluded from the switching order
- Push the button: Spray nozzle ON
- Push the button twice: Manual suction and spray suction tool ON
- Push the button again: Tool operation OFF
Silent operation button Fig. 6-56
The suction turbine is switched to silent operation with this button.
- Push the button: Silent operation ON
- Push the button again: Silent operation OFF
iButton Reader Fleet-Recorder Fig. 6-52
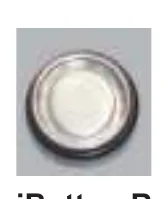
The iButton Reader is used to activate the functions.
Red illuminated LED or warning sound after switching on the machine request the activation of the operating data recording system via the iButton Key.
- Push the iButton-Key for approx. 2 seconds against the iButton-Reader.
The red LED goes out. The machine is ready for operation.
2.3 Multifunction display (MFD)
The functions and indicators of the machine are set and displayed with the multifunctional display. After the machine is switched on, the operating system and data are loaded and the start screen Fig. 7-A appears on the display. After several seconds the view changes, and the main menu Fig. 7-B appears. By selecting and confirming the soft key Menu selection Fig. 7-C you are taken to the sub-menu Fig. 7-D.
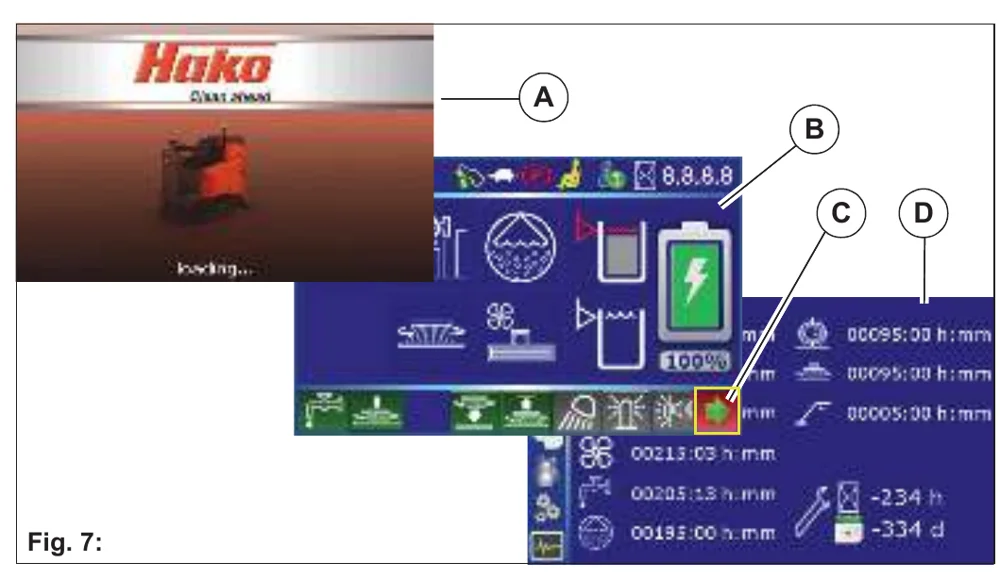
2.3.1 Menu guidance
The menu is operated with the turn-push knob Fig. 6-44.
Menus and sub-menus are selected in the multifunctional display and the individual menu item values are set or changed with the turn-push knob. The following basically applies:
- Turn to select a menu item. The selected menu item is displayed with a yellow border.
- Push to activate a menu item.
You can jump back to the previous menu using the return button Fig. 6-43.
2.3.2 Main menu
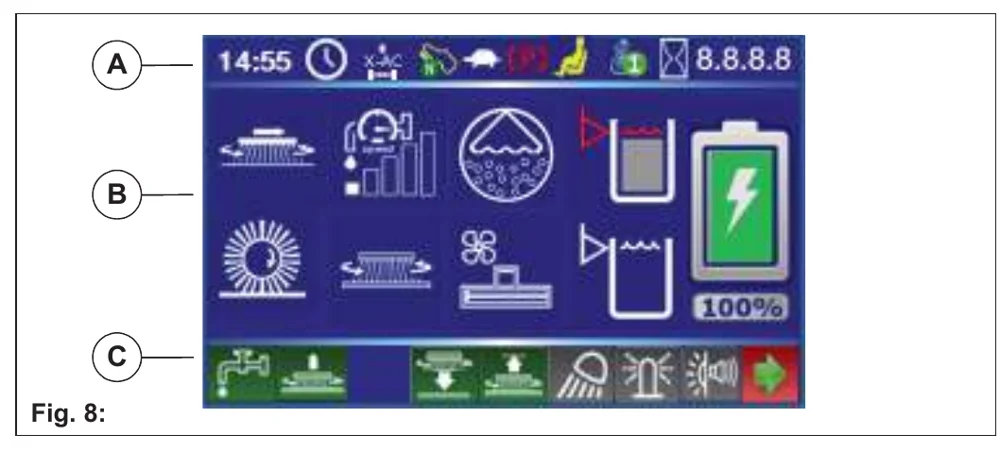
The main menu is divided up into three levels.
- Status level Fig. 8-A
- Function level Fig. 8-B
- Action level Fig. 8-C
Symbols at status level
| Symbol | Designation | Meaning |
|---|---|---|
| [clock symbol] | Time | The current time is displayed in hours and minutes. Changes can be made to the time in the sub-menu. |
| [red clock symbol] | Service alarm clock | If the service alarm clock Days has elapsed, this symbol is permanently visible. |
| [X-AC symbol] | X-AC drive | The symbol appears for two seconds if the X-AC drive is installed. |
| [arrow symbol] | Driving direction | The selected driving direction is shown as an appropriate symbol. Example: forwards drive. |
| [pedal symbol] | Accelerator pedal in neutral position | This symbol appears when the accelerator pedal is in the neutral position. |
| Symbol | Name | Meaning |
|---|---|---|
 | Speed reduction | The symbol is displayed when the machine is driving at reduced speed. |
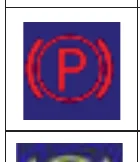 | Parking brake | The symbol is displayed when the parking brake is activated. |
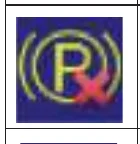 | Rear wheel parking brake is not operational | The symbol appears if the rear brake has been taken out of service mechanically. Driving is deactivated. |
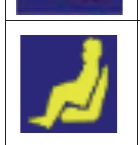 | Seat contact | The warning symbol lights up if the driver gets up from the driver's seat during operation. Main functions, e.g. scrubbing, vacuuming and driving, are no longer possible. |
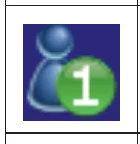 | User | The symbol indicates the currently set user profile. |
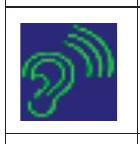 | Silent operation | The symbol appears when the machine is working in reduced-noise operation. The symbol also appears at the Squeegee symbol. |
 | Operating hours meter | The operating hours in work mode are displayed. The operating hours for the individual units can be called up in the sub-menu. |
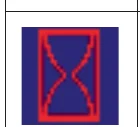 | Service alarm clock | If the service alarm clock Operating hours has elapsed, this symbol is permanently visible. |
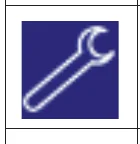 | Service indicator | The symbol appears if a service case occurred, but it had already been eliminated automatically or by operator intervention. |
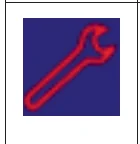 | Service indicator | The symbol appears if a service case occurs. An acoustic warning is also output and a four-digit service code appears on the right next to the symbol, see section 3.6. |
Symbols at function level
All active units are displayed as symbols at function level.
| Symbol | Designation | Meaning |
|---|---|---|
 | Side brush unit | Side brush unit active. |
 | Pre-sweep suction unit | Pre-sweep suction unit active. |
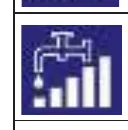 | Speed-independent water dosing | The selected water dosing is displayed in the bar diagram. |
 | Speed-dependent water dosing | The selected water dosing is displayed in the bar diagram. Water quantity adaptive to driving speed. |
 | On-board dosing system | On-board dosing system active. |
 | Brush unit | Brush unit active. |
 | Increased brush pressure | Brush unit operating with increased brush pressure. |
 | Squeegee | Squeegee and suction turbines active. |
  | Manual suction/ spray suction tool | Manual suction tool or spray suction tool active. The suction for the spray suction tool can be deactivated by pressing the squeegee button. |
 | Spray nozzle | Spray nozzle active. |
 | Solution tank full | The current filling level of the solution tank is shown descending in steps of 20 %. |
| Symbol | Designation | Meaning |
|---|---|---|
 | Warning symbol – solution tank empty | The symbol appears when the filling level of the solution tank is approximately 10 litres. A warning sound is additionally output. Fill the solution tank immediately, see section 5.3.1. |
 | Waste water tank full warning symbol | The symbol appears when the waste water tank is full. An acoustic warning is also output, and waste water collection is switched off. Empty the waste water tank immediately, see section 5.4.1. |
 | Battery charging state indicator | The current charge level of the battery is displayed in steps of 10 %, see section 5.2.1. |
Additional symbols
For more information there are additional symbols, which are explained in the following.
| Symbol | Designation | Meaning |
|---|---|---|
 | Warning symbol – red spanner | Faults in the functions are signalled by the red spanner. A 4-digit service code is also displayed at the same time. |
 | Warning symbol | If this symbol appears, the unit
|
 | Symbol OFF | If the symbol appears, the function is switched off. Example: The water supply is switched off. |
 | Function symbol displayed in yellow | Interrupted functions are shown in yellow, e.g. if the accelerator pedal is in the neutral position. Example: Function interrupted by brush unit. |
 | Symbol displayed in grey | If a symbol appears in grey, the function cannot be started because the prerequisites for starting have not been fulfilled. Example: Switch to sub-menu not possible. |
Action level
Settings can be made or actions performed in the action level using soft keys Fig. 9-A to G.
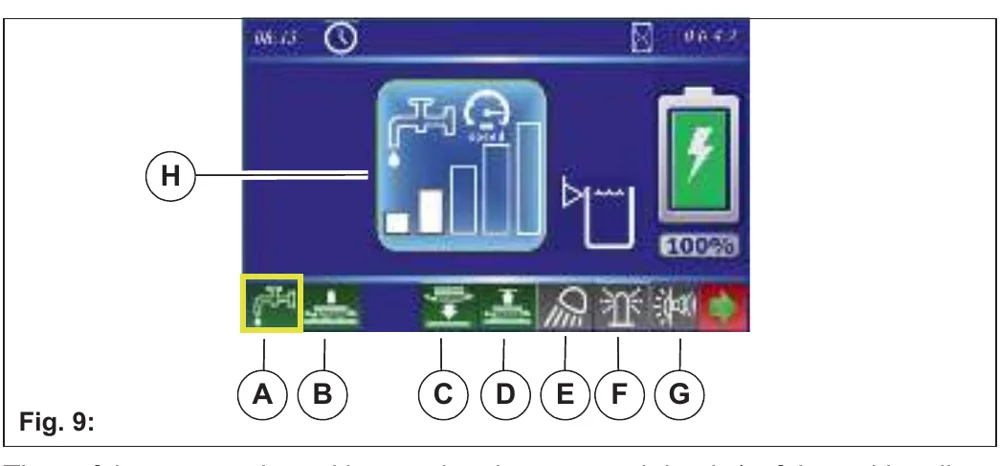
The soft keys are selected by rotating the turn-push knob (soft key with yellow border) and confirmed by pressing. An action window opens Fig. 9-H, in which the actions can be carried out using the turn-push knob.
The following actions are possible:
| Soft key | Action window/ soft key | Setting |
|---|---|---|
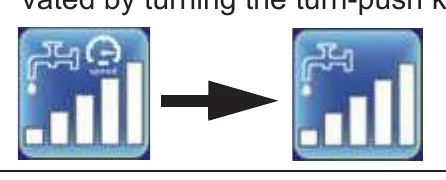
| A Water dosing |  | Depending on the presetting, the action window appears for speed-dependent or speed-independent water dosing.
 |
| B Brush pressure increase | 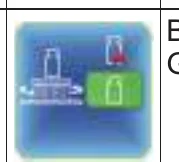 | Brush pressure increase ON/OFF Green background = active |
| Key | Symbol | Function |
|---|---|---|
| C Decoupling the brushes | 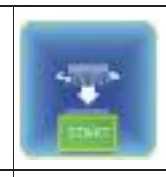 | Ejecting the brushes, see section 5.5.3. |
| D Coupling the brushes | 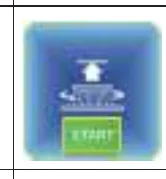 | Coupling the brushes, see section 5.5.4. |
| E Working light |  | Working light ON/OFF by means of direct selection using the soft key. If the working light is switched on, the colour of the soft key changes from white to green. |
| F Flashlight |  | Flashlight ON/OFF by means of direct selection using the soft key. If the flashlight is switched on, the colour of the soft key changes from white to green. |
| G Forward travel warning device |  | The following settings can be selected in the action window:
|
2.3.3 Sub-menu
Configuration can be carried out, operating data read off and the clock/calendar set in the sub-menu. Some sub-menus require additional access rights.
After calling up the sub-menu, the cursor automatically jumps to the operating hours menu.
To return to the main menu, press
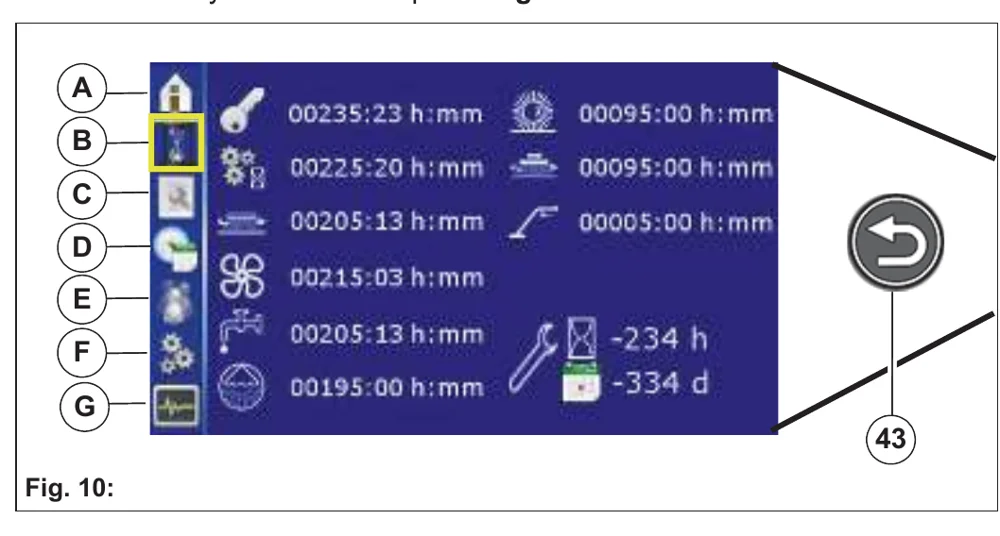
- the soft key Home Fig. 10-A or
- the return key on the control panel Fig. 10-43.
The following sub-menus can be selected:
Operating hours meter menu Fig. 10-B
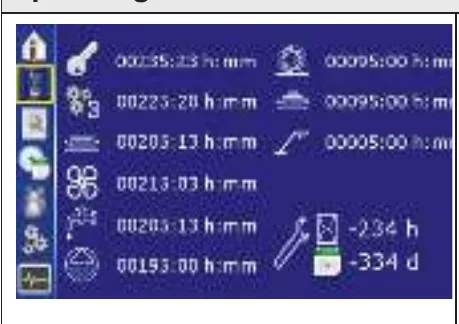
- As well as the machine activation time and work mode, the operating hours of the individual units are displayed.
- The remaining time until the next service is displayed in hours/days at the bottom right. If a service is required, the spanner appears in red.
Maintenance menu Fig. 10-C
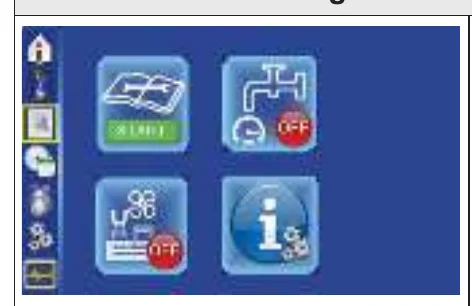
The maintenance menu contains the following menu items:
- The Maintenance instructions sub-menu.
- Activation/deactivation of speed-dependent water dosing.
- Activation/deactivation of automatic squeegee cleaning.
- The information menu contains information about software and hardware revisions.
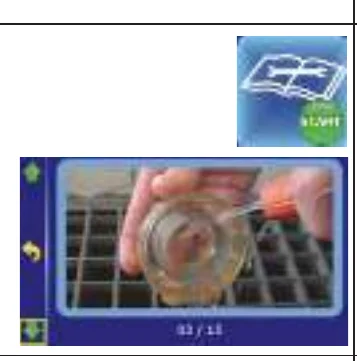
The Maintenance instructions sub-menu opens, in which pictures for daily cleaning and maintenance are stored.
Example: Cleaning the fresh water filter.
When this menu is exited, a diskette appears.
By selecting and confirming the Diskette symbol, you are confirming that you have carried out the maintenance.
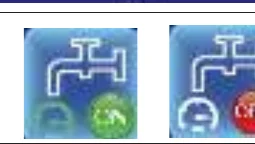
Speed-dependent water dosing ON/OFF
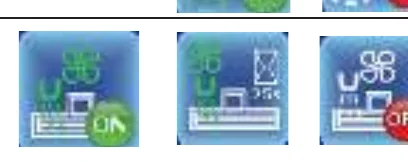
- Automatic squeegee cleaning ON.
- The time display in 5 second steps signals the time until shut-off.
- Automatic squeegee cleaning OFF.
see section 5.8.1
Operation
Time/date menu Fig. 10-D
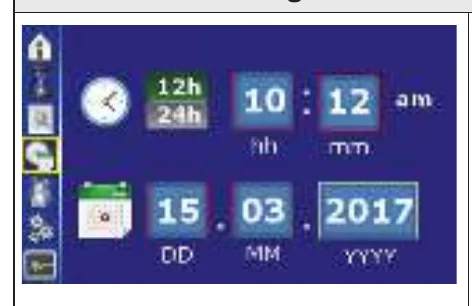
Time:
- Choice between 12 hour or 24 hour display.
- Set the clock in hours and minutes.
Date:
Set the date: day, month and year.
The set values are taken over when the menu is exited.
User settings menu Fig. 10-E
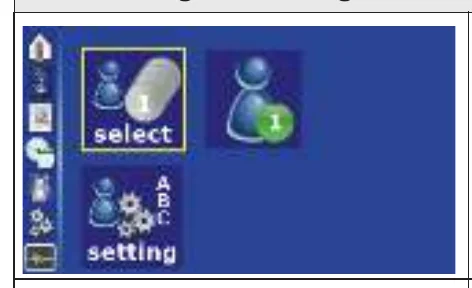
The user settings menu contains:
- Selection of:
- Specified settings (1-6)
- User-specific settings (A-C)
- Definition of:
User-specific settings (A-C)
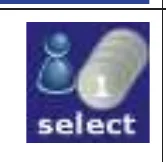
9 settings are available in the selection menu:
- The specified settings (1-6) contain predefined standard procedures.
- User-specific settings (A-C) contain user-defined function procedures and function restrictions.
The selected, active user profile is displayed as a number/letter with a green background.
3 programs (A, B, C) with user-specific settings can be stored in this configuration menu.
The modification of user profiles requires additional access rights.
Configuration menu Fig. 10-F
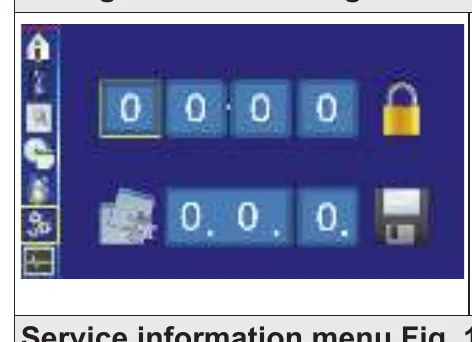
The following settings are made in the configuration menu:
- Activate/deactivate options.
- Setting of machine-specific parameters.
Making changes to the configuration menu requires additional access rights.
Service information menu Fig. 10-F
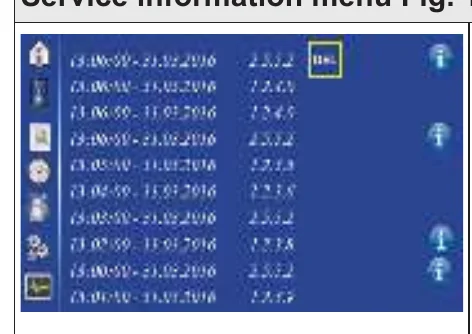
The last 10 items of service information are displayed in the service information menu. The operator can perform the following actions:
- Delete the last service information when the fault has been remedied.
- Obtaining detailed information.

Deletion of the last service information from the display:
Select the Delete symbol with the turn-push knob and press the turn-push knob for 3 seconds.
The Delete symbol is now no longer visible and the service code is no longer displayed after starting up the machine.

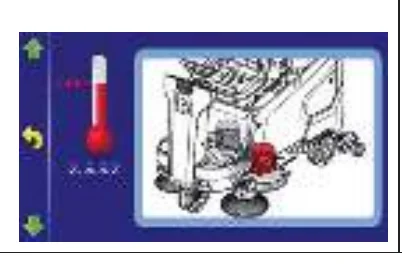
If the Information symbol appears next to the service code, detailed information can be requested.
Select the Information symbol with the turn-push knob and confirm. Another window opens in which detailed information is displayed.
Example: Brush motor overheating
2.3.4 Controls at the machine
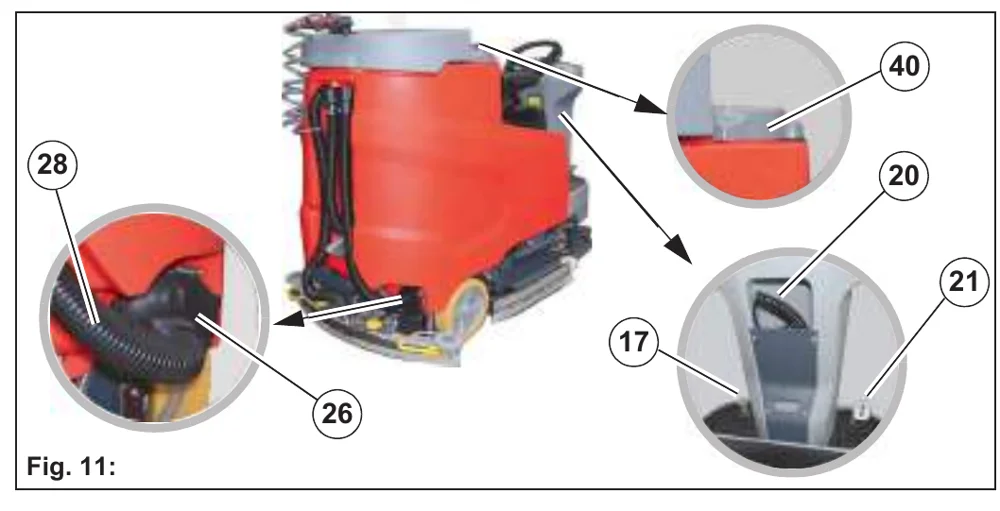
Mains cable Fig. 11-20
The mains connection supplies voltage to the on-board charger.
Operating brake Fig. 11-17
When the accelerator pedal is released, the machine comes to a stop due to the braking effect of the travel drive. If this braking effect is not sufficient, the operating brake can be applied in addition.
Accelerator pedal Fig. 11-21
The accelerator pedal is used to drive forwards or reverse and continuously adjust the speed at the same time.
If the accelerator pedal is not actuated, it automatically returns to the zero position and the machine stops.
Filling opening fresh water Fig. 11-40
The solution tank is filled via the filling opening. If the solution tank is filled using fast filling, the grey cover can be removed to increase the size of the filling opening.
Optionally, the solution tank can be filled via the automatic filling unit, see section 5.3.1.
Fresh water drain hose Fig. 11-28
The solution tank is drained using the drain hose.
Solution tank maintenance opening Fig. 11-26
The cleaning opening is used for cleaning the solution tank.
Side panelling Fig. 12-10
The trough batteries and the suction turbines are behind the side panelling. The side panelling can be easily removed using the provided wrench.
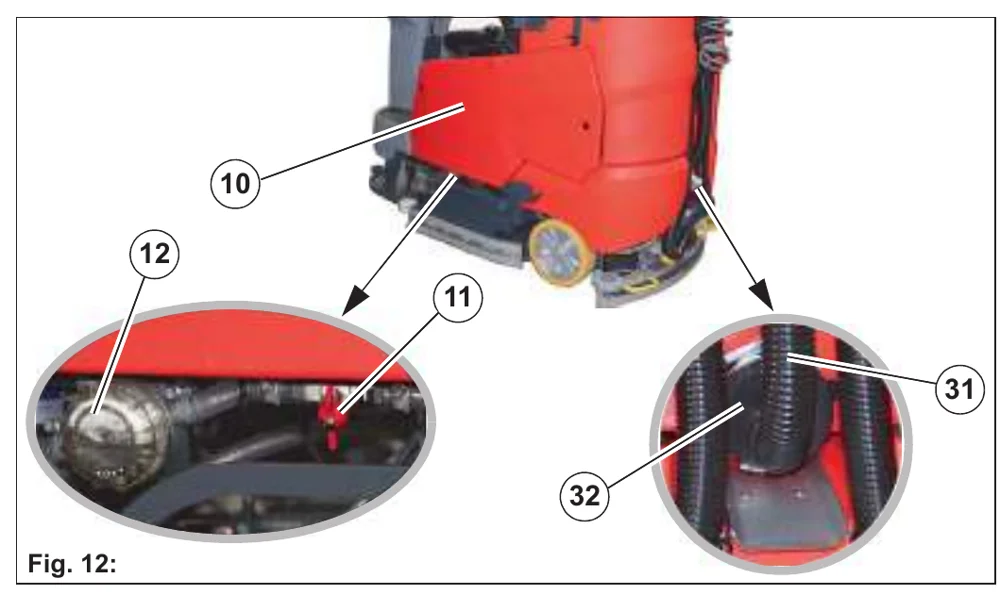
Waste water tank maintenance opening Fig. 12-32
The maintenance opening is used to drain the waste water and for cleaning the tank.
Fresh water filter Fig. 12-12
When supplying water from the solution tank to the brush unit, the fresh water is cleaned by the filter insert.
Ball cock Fig. 12-11
The ball cock is used to switch the water supply on and off manually in case the fresh water filter needs to be unscrewed.
Drain hose for waste water Fig. 12-31
The waste water that is collected is drained using the drain hose.
2.4 Functional description:
Scrubmaster B175 R is a ride-on scrubber-drier for wet cleaning hard floor surfaces. The Scrubmaster B175 R is intended for economical cleaning of large operational areas.
In cleaning mode, the cleaning solution is supplied from the solution tank to the rotating brushes in the brush unit. When the machine is moving forwards, the used waste water is absorbed by the squeegee and conveyed into the waste water tank.
A seat contact ensures that the machine can only be operated when the operator is sitting on the seat.
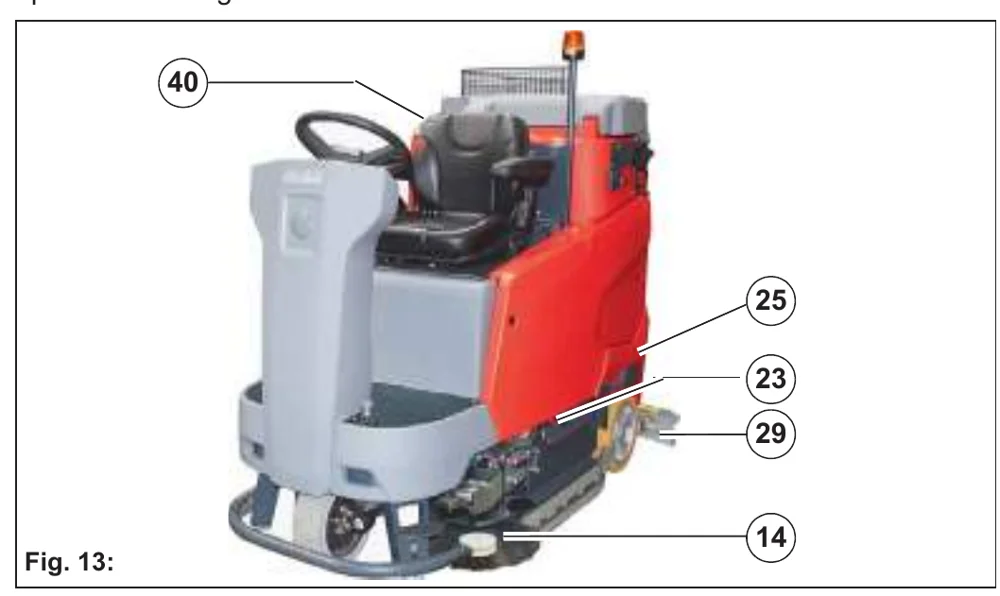
2.4.1 Solution tank
The solution tank Fig. 13-25 is filled via the filling opening Fig. 13-40. The solution tank has a capacity of 175 litres. The current filling level is shown in the multifunctional display. If the filling level is less than 10 litres in the tank, the Tank empty symbol appears in the display and an acoustic warning indicates that topping up is required.
2.4.2 Rotating brush and roller brush unit
The brushes in the brush unit Fig. 13-23 are driven by two electric motors. The brush unit is lowered using the brush unit Fig. 6-45 button. When actuating the accelerator pedal, the brush motors and the water supply are switched on. The floor is cleaned by the rotating brushes and the supply of cleaning solution. The brush pressure can be changed in the MFD.
There is an indicator on the brush desk showing the amount of brush wear. The brushes in the rotating brush unit can be ejected for maintenance purposes by pressing the Brush decoupler Fig. 9-C soft key in the MFD, see section 5.5.3.
2.4.3 Side brush unit
In order to brush up coarse dirt close to walls and beyond the squeegee, a side brush unit Fig. 13-14 with two side brushes can be fitted at the front.
2.4.4 Wiper
To the right and left of the brush unit there are two wipers which avoid spray water at the side in the working position and lead the waste water to the centre of the vehicle, where it is easier to vacuum up.
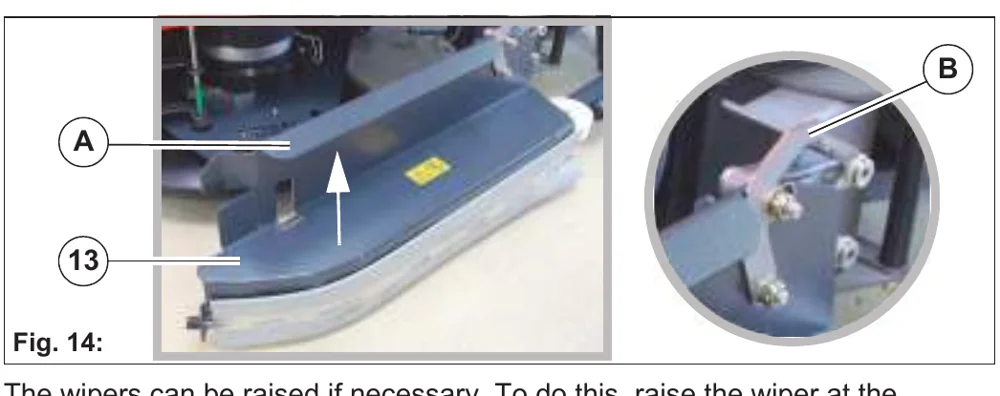
The wipers can be raised if necessary. To do this, raise the wiper at the handle Fig. 14-A and hook the locking hook Fig. 14-B into the bracket above it.
2.4.5 Squeegee
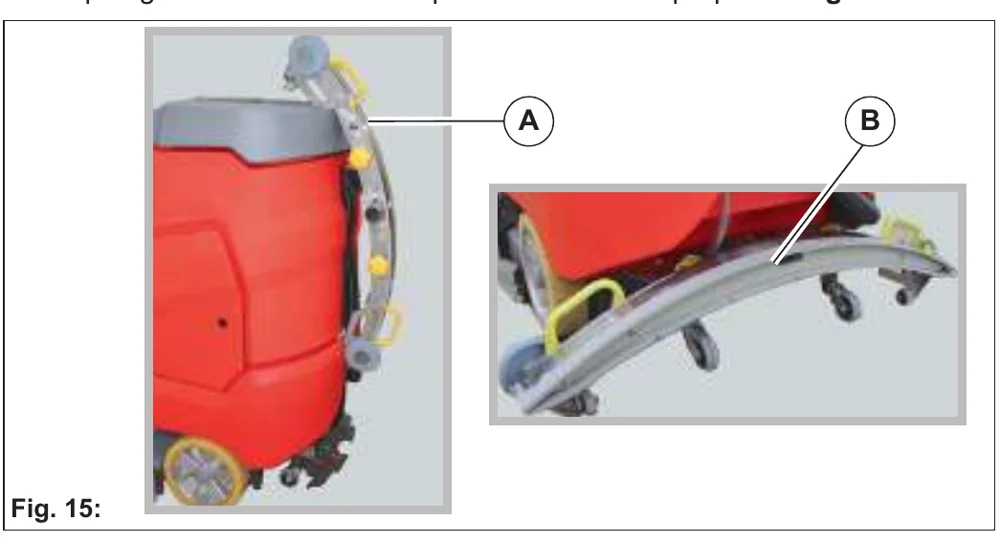
The movable, hinged squeegee Fig. 13-29 is lowered and switched on with the Squeegee button Fig. 6-46. The squeegee withdraws the waste water from the floor using a sealing strip. The suction turbine vacuums the waste water from the floor. If the machine passes through narrow sections, e.g. checkout areas, the squeegee can be removed by loosening the star-shaped handle and hooked into the cover Fig. 15-A of the waste water tank. The squeegee can be swivelled up for maintenance purposes Fig. 15-B.
2.4.6 Waste water tank
The waste water vacuumed by the squeegee is conveyed via a suction hose Fig. 15-30 from the squeegee into the waste water tank Fig. 15-38. A float switch inside the waste water tank automatically switches the suction turbine off when the maximum filling level is reached. In this case, a warning symbol illuminates in the MFD. An acoustic warning is output at the same time.
2.4.7 Suction turbine
The suction turbines are on the left-hand side of the machine and are accessible after removing the side panelling. The suction turbines are switched on and off automatically when the squeegee is lowered and raised.
2.4.8 Travel drive
Standard
The travel drive consists of an electric machine and a gearbox, and fulfils the functions of driving, braking and steering. Driving and braking are carried out using the electric machine. Steering is carried out using a connected steering rod. The gearbox does not require an oil change.
X-AC drive (option)
The X-AC drive is an electrical machine with a gearbox on the rear axle which acts as a drive and deceleration aid for the travel drive on the front axle.
2.4.9 Brakes
The operator slows down the machine by releasing the accelerator pedal. A greater braking effect is achieved by operating the brake. When the machine comes to a standstill, the parking brake is automatically applied.
2.4.10 Batteries
The machine variants are equipped with different maintenance-free battery types.
- Trough battery 36 V/320 Ah PzS, wet
- Trough battery 36 V/280 Ah PzV, maintenance-free
Battery management system (BMS)
The Scrubmaster B175 R is fitted with a BMS. The BMS ensures that the battery system is monitored. The BMS is responsible for:
- determining the battery charging state during operation
- switching off the cleaning functions when the discharge limit has been reached to protect the battery against total discharge
For more information, see section 5.2.1.
3 Operation
3.1 Instruction
Instruction is required before the first start-up. The first-time instruction of the machine must be provided only by a specialist of your authorized PowerBoss dealer. This person will be notified immediately after delivery of the machine from the factory and will contact you to make an instruction appointment.
3.2 Before putting into service
Batteries and chargers: make sure your charger is compatible with your batteries, and set its charging algorithm to your battery pack before you use it.
- Before initially starting up the machine, charge the used batteries fully and appropriately with commissioning charge. Please observe the instruction manual of the charging device and the instruction manual of the battery manufacturer. PowerBoss assumes no liability for battery damage resulting from insufficient commissioning charge.
- Before the machine is initially put into service, install the country-specific PowerBoss main cable.
- Check the machine for operating safety before every start-up! Eliminate faults immediately.
- Before starting work, the operator must familiarize himself with all equipment, operating and actuating elements as well as with their function.
3.3 Check list: Before machine start-up
| No. | Description |
|---|---|
| 1 | Checking the parking area for signs of leaks. Cables and tanks must not show any sign of leaks or damage. |
| 2 | Installing the mains cable, see section 3.3.1. |
| 3 | Mounting the brushes and squeegee, see chapter Maintenance. |
| 4 | Adjusting the driver's seat, if necessary, see section 3.3.2. |
| 5 | Adjusting the side mirror (optional), see section 3.3.3. |
| 6 | Checking the battery charge and recharge it as required, see section 5.2.2. |
| 7 | Emptying the waste water tank and clean it as required, see section 5.4. |
| 8 | Filling the solution tank (see chapter Maintenance) and add detergent according to the manufacturer's specifications. |
3.3.1 Installing the mains cable
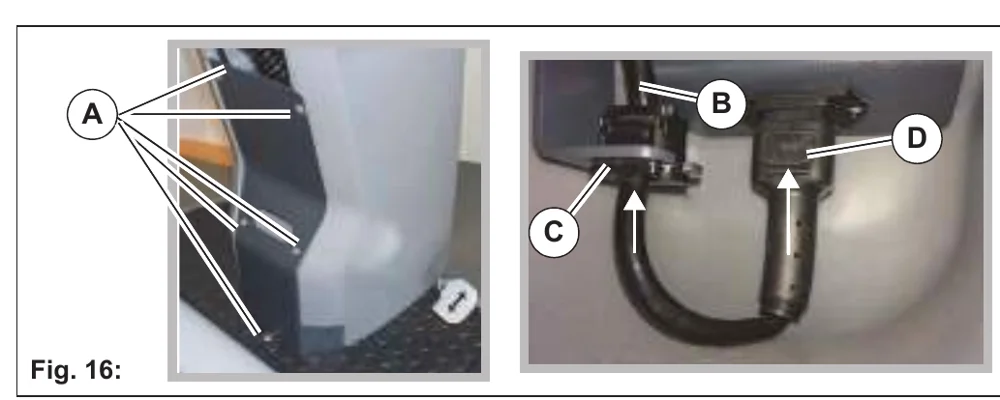
- Loosen the bolts of the cover Fig. 16-A using the supplied socket wrench and remove the cover.
- Route the cable of the mains plug Fig. 16-B through the opening in the bracket Fig. 16-C. Ensure that the side of the strain relief without a latch is facing the opening.
- Push strain relief into bracket from below until all latches have engaged.
- Plug the mains plug Fig. 16-D straight and firmly into the holder.
- Reinstall the cover using the available screws.
3.3.2 Driver's seat
Danger Do not adjust the driver’s seat while driving. Risk of accident!
- Only adjust the seat if the machine is stationary.
- The driver’s seat must audibly engage after adjustment.
Adjust the driver’s seat in such a way that all controls can be easily reached.
Adjusting the standard driver’s seat
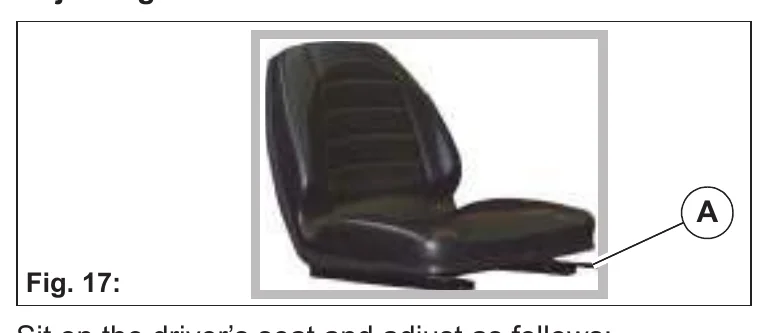
Sit on the driver’s seat and adjust as follows:
Adjust in longitudinal direction
- Push lever Fig. 17-A outwards.
- Move seat forwards or backwards.
- Release lever Fig. 17-A and let the driver's seat engage.
Adjusting the driver’s seat comfort
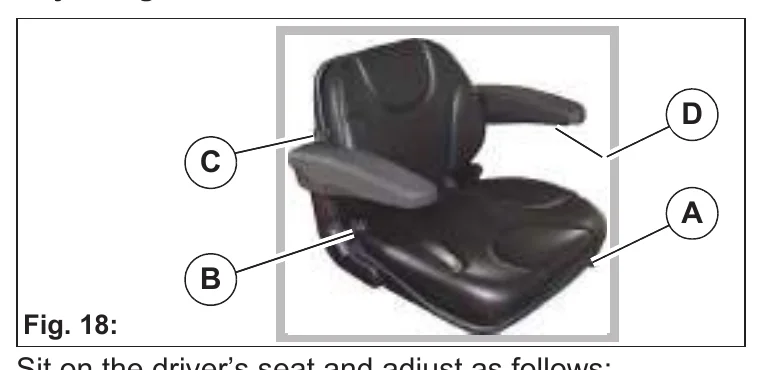
Sit on the driver’s seat and adjust as follows:
Adjust in longitudinal direction
- Push lever Fig. 18-A outwards.
- Move seat forwards or backwards.
- Release lever Fig. 18-A and let the driver's seat engage.
Adjusting the tilt of the backrest
Adjust the tilt of the backrest by turning the handwheel Fig. 18-B.
Adjusting the tilt of the armrests
Adjust the tilt of the armrests by turning the wheel Fig. 18-D.
The armrests can be folded up when not in use.
Adjusting the seat suspension
The seat suspension can be continuously adjusted to the weight of the driver (50–120 kg) by turning the handwheel Fig. 18-C.
- Drivers who weigh less turn the handwheel Fig. 18-C to the left.
- Drivers who weigh more turn the handwheel to the right.
3.3.3 Side mirror (optional) adjustment
- Only adjust the side mirror if the machine is stationary.
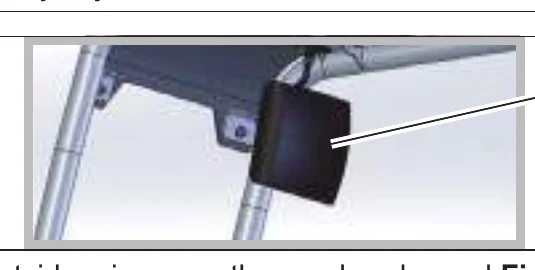
Adjust the outside mirrors on the overhead guard Fig. 19-A so that a full view of the rear working area is provided.
3.4 Cleaning
- Before operating the machine, read and observe the safety instructions in chapter 1.
- The machine can only be put into service when the driver is sitting on the driver's seat.
- The travel drive can only be started if the accelerator pedal is not being actuated when the machine is turned on.
| No. | Description | |
|---|---|---|
| 1 |  | Turn on the machine. |
| 2 |  | Activate authorization using the iButton key (optional). |
| 3 |  | Use the driving direction selection button to select the driving direction. |
| 4 |  | Select the cleaning programme. |
| 5 | Actuate the accelerator pedal. The brush unit and the water supply are switched on with the last selected setting. | |
| 6 |  | If necessary, switch on the fresh water supply. |
| 7 |  | Set the fresh water quantity in the MFD using soft key Fresh water dosing. |
| 8 |   | In the event of heavy soiling, increase the brush pressure using soft key Brush pressure in the MFD or press the Boost button for 1 minute. |
3.4.1 Fleet-Recorder (option)
The Fleet-Recorder records operating times and further operating conditions of the machine.
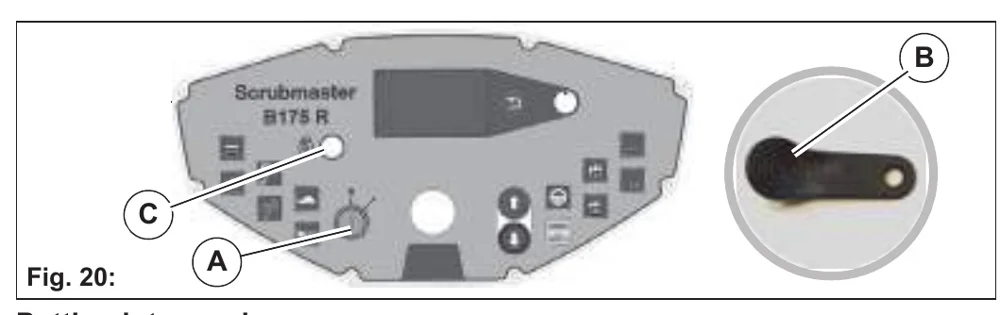
Putting into service
- Turn the machine on with the key switch Fig. 20-A.
- Red LED of the iButton Reader ON.
- Press the iButton Key Fig. 20-A against the iButton Reader Fig. 20-B for one to two seconds.
- Red LED OFF.
- Operating data recording system active.
If the machine is not registered with the iButton Key, the following condition arises according to the selected option:
| Option | Display LED | Machine function* | Data recording |
|---|---|---|---|
| 50EC001 | Red LED ON | Fully functional | The operating data recording is activated or fully suppressed according to the presetting. GPS data is recorded as standard. |
| 50EC002 | Red LED ON | Function of the working tools locked, transport possible | |
| 50EC003 | Red LED ON, a warning sound is additionally output after approx. 5 seconds | Fully functional |
*deviating machine functions depending on the respective customer configuration possible
Ending operation
Switch off the machine using the key switch.
3.4.2 On-board dosing system (option)
The on-board dosing system is used for optimum dosing of the detergent.
| Stage | Detergent | Mixing ratio |
|---|---|---|
| 1 | 0.1 % | 1:1000 |
| 2 | 0.2 % | 1:500 |
| 3 | 0.3 % | 1:333 |
| 4 | 0.4 % | 1:250 |
| 5 | 0.5 % | 1:200 |
| 6 | 0.6 % | 1:167 |
| 7 | 0.7 % | 1:143 |
| 8 | 0.8 % | 1:125 |
| 9 | 0.9 % | 1:111 |
| 10 | 1.0 % | 1:100 |
Putting into service
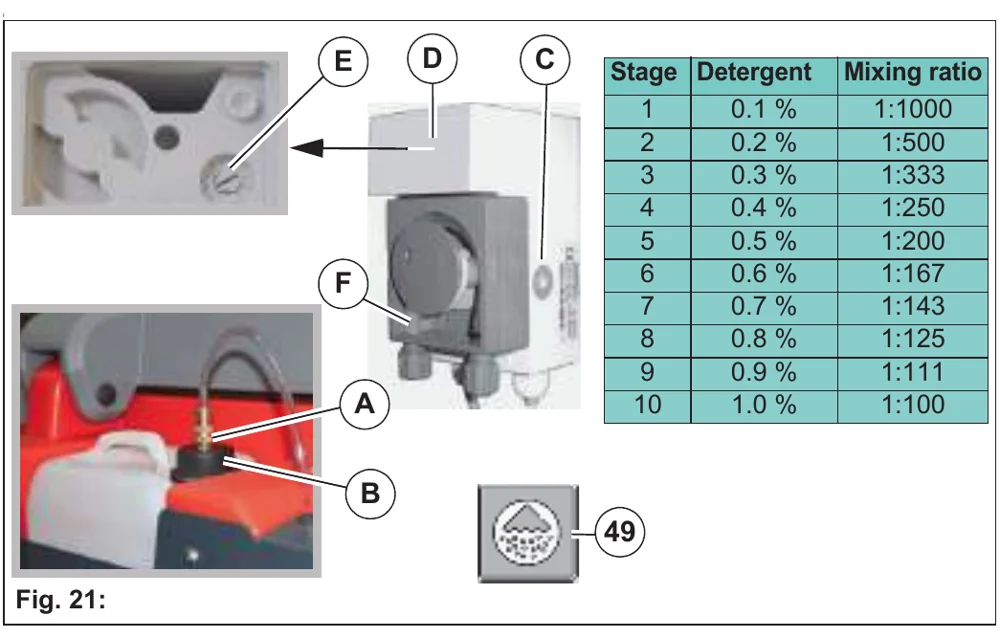
- Release quick coupler Fig. 21-A at canister lid by pulling the lower ring of the coupling upwards. Unscrew lid from filled canister. Screw on lid with integrated hose Fig. 21-B and fit quick coupling with hose.
- Turn the machine on with the key switch.
- Switch on the dosing system using the On-Board Dosing System Fig. 21-49 switch.
- Press the quick ventilation switch Fig. 21-C at the dosing pump until detergent is present at the non-return valve.
Setting the mixing ratio
- Remove the grey cover Fig. 21-D at the dosing pump.
- Set the mixing ratio according to the detergent being used.
- Basic setting = 1:700
Set the rotary knob Fig. 21-E between setting 1 and setting 2, see table.
Maintenance
Check the hose section Fig. 21-F in the hose pump (length approx. 23 mm) and replace if necessary.
3.4.3 Useful cleaning tips
Sweep the floor before carrying out wet cleaning. This not only enhances the cleaning effect but also reduces wear of the machine's working tools.
If the floors are really dirty or wax needs to be removed, treat the floor twice.
In the first step, scrub the floor with a detergent suitable for the degree of soiling; the squeegee remains raised for this.
Leave the detergent for approx. 5 to 10 minutes; subsequently scrub the floor again and work with a lowered squeegee.
- Only use detergents suitable for automatic machines (foam retarded). We recommend use of our detergents and care agents specifically developed for the machine. These products meet the requirements of the German Detergent and Cleaning Agent Act (WRMG).
- Observe correct dosing of the detergent. Correct dosing saves money and protects the environment. Strong foam formation is a sign of excessive dosing and impairs machine operation.
3.4.4 Handling and braking the vehicle
- Danger of tilting over when driving on excessively steep slopes
Transport journeys on slopes of up to 10 % must only take place for a limited period of time and with special caution. - Risk of skidding when driving on wet surfaces.
Drive very carefully into the bend when driving downhill.
Observe the following points when driving:
- Driving speed and braking of the machine are controlled via the accelerator pedal.
- The engine brake is automatically applied when the accelerator pedal is released. This also applies when ascending or descending.
- Stop the machine: Release the accelerator pedal. Operate the service brake for maximum deceleration.
- When the machine is at standstill, the parking brake is activated audibly. It is no longer possible to push the machine, see section 3.4.5.
Overload protection
In case of an overload, e.g. excessively steep slopes, the drive motor is switched off after a certain period of time.
- Let the machine cool down for approx. 15 minutes.
- Restart the machine.
3.4.5 Pushing the machine
Only push the machine on a level surface!
After pushing the machine, do not re-start until the lever(s) has (have) been positioned and the cover has been fitted.
If the machine stops on an uphill or downhill gradient, call the towing service or PowerBoss service!
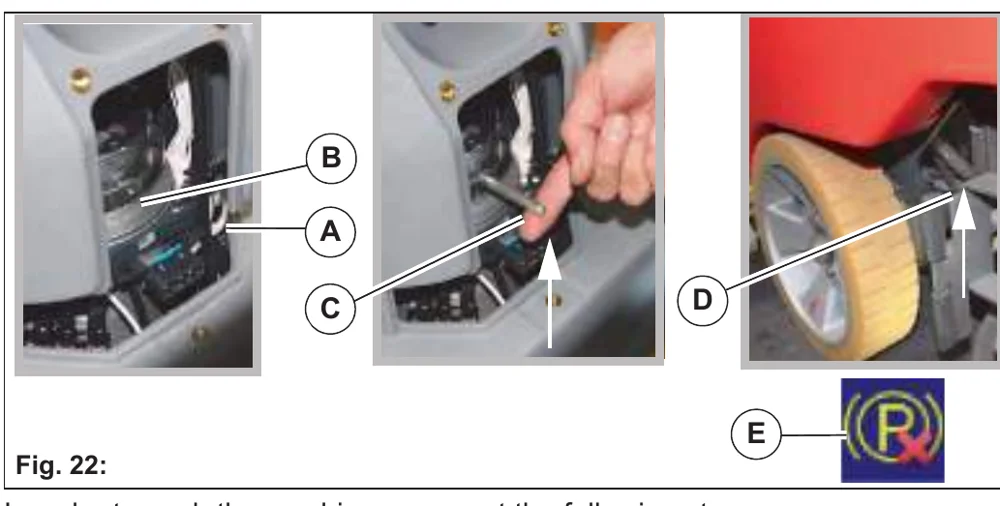
In order to push the machine, carry out the following steps:
- Loosen the bolts of the cover to the drive using the supplied socket wrench and remove the cover.
- Remove the pin Fig. 22-A from the holder and screw it into the ring Fig. 22-B.
- In order to unlock the parking brake, pull the pin upwards slightly Fig. 22-C and simultaneously push the machine.
If the machine has an X-AC drive, the rear wheel brake must also be unlocked. To do this, pull the lever on the right-hand side of the machine behind the rear wheel Fig. 22-D upwards until the lever engages.
Indication appears on the MFD Fig. 22-E when the rear wheel brake is taken out of service. The machine can no longer be driven!
Disassembly is in reverse order.
3.4.6 Turning off the machine
- Slowly bring the accelerator pedal to the zero position. The machine slows down to standstill. A better braking effect is achieved when the machine is slowed down by applying the brake.
- When the machine is at standstill, the parking brake is activated audibly.
- Switch off the cleaning functions.
- Switch off the machine using the key switch.
3.4.7 Check list: After cleaning
Batteries and chargers: make sure your charger is compatible with your batteries, and set its charging algorithm to your battery pack before you use it.
| No. | Description |
|---|---|
| 1 | Drive to a suitable maintenance location. |
| 2 | Switch the machine off and pull out the key. |
| 3 | Empty and clean the waste water tank, see section 5.4.2. |
| 4 | Check the fresh water filter, see section 5.4.6. |
| 5 | Check the sealing strips and suction hose, see chapter Maintenance and Servicing. |
| 6 | Check the functions and settings. |
| 7 | Charge the battery, see section 5.2.2. |
| 8 | Clean the machine. If the machine is not used over a longer period of time, the solution tank must be fully emptied. |
3.5 Loading and transporting
- When loading and subsequently transporting the machine to the work site, the squeegee and brush head must be raised.
- Risk of skidding! Drive very carefully and, if possible, only on dry ramps.
- To load the machine, reverse it up the ramp at idle speed (maximum slope 16 %).
Loading
When loading the machine, observe its weight, see Section 4 Technical data.
Transporting
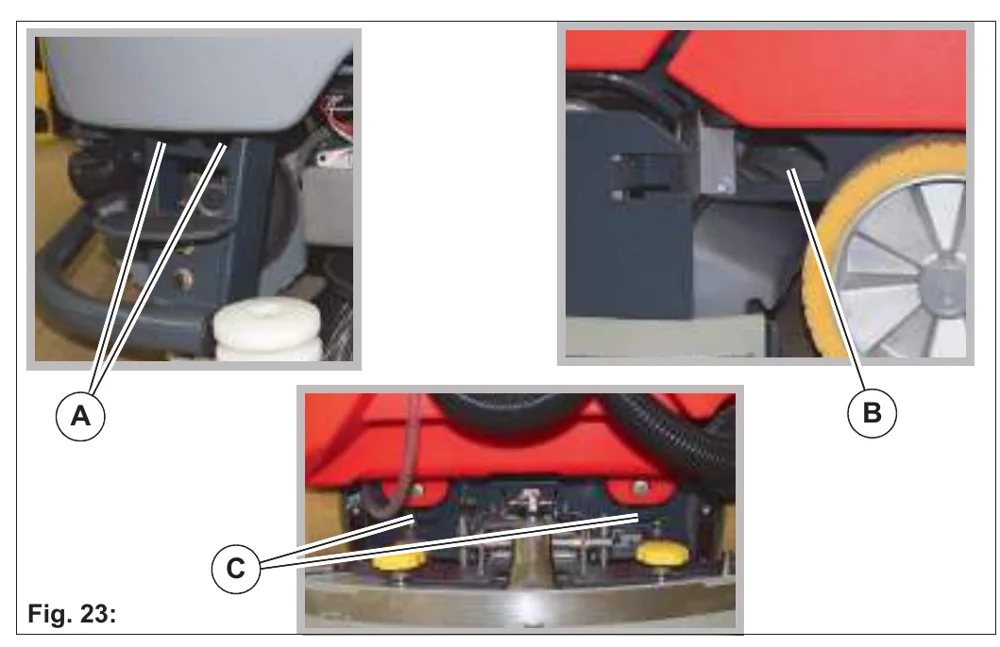
When transported on a vehicle or trailer, the machine must be secured against tilting and rolling away. To do this, securely lash the machine at both sides at the front Fig. 23-A, at the side Fig. 23-B and the rear Fig. 23-C with tension straps.
3.6 Service information
In case problems occur with the machine, a four-digit service code is output in the display panel in addition to the service indicator (tool key).
Eliminate the cause or note down the service code and inform your authorised PowerBoss service partner.
If the cause has been eliminated, the fault must be acknowledged via the key switch OFF/ON.
| Service code | Fault | Cause | Remedy |
|---|---|---|---|
| 1.2.2.1 | Brushes/Roller stop | Electrical defects | Notify service partner |
| 1.2.5.1/ 1.2.5.2 | Brushes stop | Foreign particles between brush and shaft | Inspect the brushes for foreign particles and remove them if necessary |
| 1.2.6.1/ 1.2.6.8 | Brushes stop | Foreign particles block the brush | Inspect the brushes for foreign particles and remove them if necessary |
| Brush not positioned correctly in the holder | Actuate the brush decoupling system, contact the service partner if necessary | ||
| 1.2.6.3 | Brush lift system, brush and suction turbine have been switched off | Foreign particles between brush head and machine | Inspect the brush head for foreign particles and remove them if necessary |
| Brush head stuck | Release brush head | ||
| 1.4.6.1 | Squeegee lift system stops | Overload due to foreign particles | Inspect for foreign particles and remove them if necessary |
| Foreign particles between squeegee and machine | Inspect the lift system for foreign particles and remove them if necessary | ||
| Squeegee jammed | Make the squeegee accessible | ||
| 1.4.6.3/ 1.4.6.4 | Suction turbine stops | Foreign particles in the suction turbine | Notify service partner |
| Faulty suction turbine |
| Code | Fault | Cause | Remedy |
|---|---|---|---|
| 1.5.5.1 | Fresh water level not displayed | Error in the electronics | Notify service partner |
| 2.2.5.1 | Rotating cylindrical brush stops | Foreign particles block the brush | Inspect the rotating cylindrical brush for foreign particles and remove them if necessary |
| 3.2.6.6 | Service code indicator when turning on the machine | Discharged capacity of the internal back-up battery of the machine control | Notify service partner |
| 3.3.1.1 | Service interval expired | See maintenance plan | |
| 3.4.1.2/ 3.4.1.3 | Driving not possible | Error in the drive control | Turn the machine OFF/ON, or contact a service partner if necessary |
| 3.4.5.1 | Cleaning function switches off | Drive wheel becomes sluggish due to foreign particles | Remove foreign particles |
| Drive motor overheats | Let the engine cool down | ||
| 3.6.6.4 | Driving and cleaning not possible | Seat permanently loaded | Relieve seat |
| 5.8.7.1 | Batteries are not being charged | Mains plug not inserted correctly | Insert the mains plug correctly |
| 5.8.7.2 | Batteries are not being charged | Cables on the battery poles loose or detached | Contact the customer service |
| Incorrect type of battery installed | Install correct battery | ||
| 7.1.5.1 | USB connection not working | Connected consumer overloaded | Check whether the consumer is drawing too much power or there is a short-circuit in the connected cable. |
| Internal controller defect | Notify service partner |
4 Technical data
Dimensions
| Name | Unit | Standard drive | X-AC drive | ||
|---|---|---|---|---|---|
| TB 900 | TB 1080 | WB 850 | TB 900 | ||
| Length of machine with squeegee without/with pre-sweep unit | mm | 1890/2670 | 1890/2670 | 1890 | 1890/2670 |
| Width of machine without/with squeegee | mm | 940/1130 | 1120/1290 | 940/1130 | 940/1130 |
| Height of machine without/with overhead guard | mm | 1450/2080 | |||
Working width
| Brush unit | mm | 900 | 1080 | 850 | 900 |
| Squeegee | mm | 1100 | 1260 | 1100 | 1100 |
Weights
| Weight (empty, without batteries) | kg | 450 | 455 | 440 | 480 |
| Total weight (ready for use) | kg | 1010 | 1015 | 1100 | 1040 |
| Permissible total weight | kg | 1310 | |||
Driving performance
| Driving speed transportation (forwards/reverse) | km/h | 8/4 | |||
| Climbing capacity when cleaning | % | 6 (2 min) | 15 (up to 5 min/ 4 km/h) | ||
| Climbing capacity during transport journey (ready for operation) | % | 10 (1 min) | 18 (3 min/ 4 km/h) | ||
| Ramp angle/Slope angle | % | 16 | |||
| Turning circle (with squeegee) | mm | 2960 | 2970 | 2960 | 2960 |
Technical data
Wheels
| Name | Unit | Standard drive | X-AC drive | ||
|---|---|---|---|---|---|
| TB 900 | TB 1080 | WB 850 | TB 900 | ||
| Wheel diameter | mm | 305 | |||
| Specific wheel contact pressure front/rear | N/mm2 | 0.66/0.65 | |||
Tank contents
| Solution tank | Litre | 175 | |||
| Waste water tank | Litre | 175 | |||
Brush head
| Unit | TB 900 | TB 1080 | WB 850 | TB 900 (X-AC) | |
|---|---|---|---|---|---|
| Brush speed | rpm | 210 | 210 | 850 | 210 |
| Min./Max. brush pressure | kg | 35/70 | 38/70 | 29/38 | 35/70 |
Vacuum system
| Unit | TB 900 | TB 1080 | WB 850 | TB 900 (X-AC) | |
|---|---|---|---|---|---|
| Air quantity 1/2 suction turbine | m3/h | 100/200 | 200 | 100/200 | 100/200 |
| Vacuum (maximum) | mbar | approx. 50 | |||
Electrical system
| Unit | TB 900 | TB 1080 | WB 850 | TB 900 (X-AC) | |
|---|---|---|---|---|---|
| Nominal voltage | V | 36 | |||
| Nominal output (max.) (P1) | W | 7470 | |||
| Power consumption drive motor (P1) S2-120 min | W | 2335 | 3365 | ||
| Power consumption of vacuum motor (P1) 1/2 suction turbine | W | 641/1282 | 1282 | 641/1282 | 641/1282 |
| Power consumption of brush motor (P1) with/without side brush | W | 2x936 | 2x936 | 2x918 + 2x115 | 2x936 |
| Power consumption water pump (P1) | W | approx. 67 | |||
| Type of protection | IPX 3 | ||||
| Protection class | III | ||||
Technical data
On-board charger
| Name | Unit | Standard drive | X-AC drive | ||
|---|---|---|---|---|---|
| TB 900 | TB 1080 | WB 850 | TB 900 | ||
| Rated input/output voltage | V | 230/36 | |||
| Nominal output | W | 1600 | |||
| Type of protection | IPX 3/P20 | ||||
| Protection class | I | ||||
Pre-sweep suction unit
| Name | Unit | |
|---|---|---|
| Machine length | mm | 800 |
| Height of machine | mm | 660 |
| Machine width (above swivel bracket) | mm | 1220 |
| Working width | mm | 1300 |
| Cylindrical brush width | mm | 670 |
| Cylindrical brush, minimum diameter | mm | 200 |
| Cylindrical brush speed | rpm | 500 |
| Sweeping level width | mm | 45±10 |
| Side brush diameter | mm | 400 |
| Side brush speed | rpm | 92 |
| Theoretical sweeping capacity | m²/h | 10400 |
| Dirt hopper volume (maximum load 20 kg) | Litres | 16 |
| Filter area | m² | 1.4 |
| Filter use category ZH 1/487 | KAT | U |
| Drive motor (P1) | W | 756 |
| Nominal voltage | V | 36 |
| Permissible total weight | kg | 115 |
Noise emission value
| Measurement | Unit | B175 R WZB | B175 R TB | ||
|---|---|---|---|---|---|
| Standard operation | Silent operation | Standard operation | Silent operation | ||
| The sound power level (LwAd) measured under the customary conditions of use according to DIN EN 60335-2-72 is: | dB (A) | 85 | 80 | 85 | 80 |
| The sound pressure level (LpA) (at the ear of the driver) measured under the customary conditions of use according to DIN EN 60335-2-72 is: | dB (A) | 68 | 64 | 68 | 64 |
| Measuring uncertainty (KpA) | dB (A) | 1.4 | 1.5 | 1.6 | 1.3 |
Vibration
| Under the customary conditions of use, the weighted effective value of the acceleration to which the upper limbs (hand-arm) are subjected to according to DIN EN ISO 5349 is: | m/s2 | ≤ 2.5 |
| Under the customary conditions of use, the weighted effective value of the acceleration to which the body (feet or seat surface) is subjected to DIN EN ISO 2631-1 is: | m/s2 | ≤ 0,5 |
5 Maintenance and Servicing
General
The operator is instructed fully on delivery of the machine.
Compliance with the maintenance work recommended by us gives you the certainty of always having an operational machine available.
Daily and weekly maintenance and repair work can be undertaken by a driver trained for this, all further PowerBoss system maintenance work may be undertaken only by trained and qualified personnel.
Please contact your nearest PowerBoss service centre or authorized PowerBoss dealer. Any warranty claim is null and void if this is not complied with and damage results.
Please always state the serial number in all enquiries and spare parts orders, see section 1.7 – type plate.
- Maintenance parts in the machine are marked with a yellow dot and yellow areas.
- The maintenance instructions can also be called up on the MFD in the form of pictures, see section 2.3.3 Maintenance menu.
5.1 Maintenance plan
PowerBoss system maintenance customer:
Work to be performed by the customer by reference to the servicing and maintenance instructions specified in the operating manual.
| Daily |
|---|
|
|
|
|
|
Pre-sweep suction unit (optional):
|
| Weekly |
|
|
|
|
|
|
|
|
|
|
|
|
|
5.2 Battery
5.2.1 Checking the charging state
Batteries and chargers: make sure your charger is compatible with your batteries, and set its charging algorithm to your battery pack before you use it.
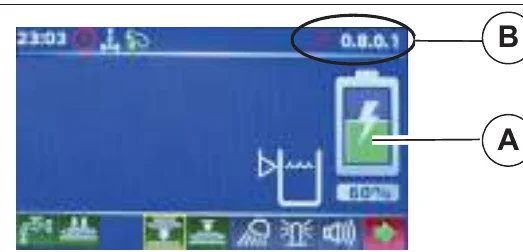
The charge condition of the battery is displayed on the MFD during operation. Depending on the charge condition, the following symbols appear:
| Symbols | Charging state | Notes |
|---|---|---|
| Symbol: full green battery, 100% | Battery is fully charged | |
| Symbols: battery at 90% to battery at 10% | Battery capacity is displayed in steps of 10 % | Battery can be charged. |
| Symbol: battery with red exclamation mark, 3 min | Battery capacity less than 10 % | Cleaning functions are switched off after 3 minutes. Charge the battery! |
| Symbol: empty battery, OFF | Battery is empty | Cleaning functions will be switched off. Only travel at half speed is possible. Battery must be fully charged immediately! |
| Symbol: battery with wrench | BMS service information. A four-digit service code appears at the same time Fig. 24-B | Service information, see section 3.6. |
5.2.2 Charge the battery
Batteries and chargers: make sure your charger is compatible with your batteries, and set its charging algorithm to your battery pack before you use it.
- Risk of explosion! Explosive gases can develop when charging the battery.
Avoid smoking, fire or naked light in the vicinity of batteries.
Ensure that there is sufficient ventilation when charging the battery. Do not inhale battery gases! - Danger of explosion due to short circuits and spark formation!
Never place tools or other electrically conductive objects on the battery!
- Before initially starting up the machine, the battery that is used must be fully and properly charged with commissioning charge. Please observe the instruction manual of the charging device and the instruction manual of the battery manufacturer. PowerBoss assumes no liability for battery damage resulting from insufficient commissioning charge.
- Never leave batteries discharged, always recharge them immediately.
- If possible, charge the batteries fully to ensure that the batteries have an optimum service life. The charger is designed as a continuous charger and retains the charging state of the battery (trickle charge) after completing the charging process.
- The battery should always be charged without being interrupted.
- During the charging process it is not possible to turn on the machine.
- Swivel up the seat console all the way before charging the battery.
The seat console must remain open when charging the battery!
Charging the battery with the on-board charger
Batteries and chargers: make sure your charger is compatible with your batteries, and set its charging algorithm to your battery pack before you use it.
The battery is charged via the integrated on-board charger. A battery charge is recommended when the charge condition is low, but no later than when the cleaning functions are shut off.
- Place the machine on a level surface and turn it off.
- Remove the mains plug Fig. 5-20 from the tray and plug it into a 230 V socket.
- The charging process now starts automatically.
Checking the charging process
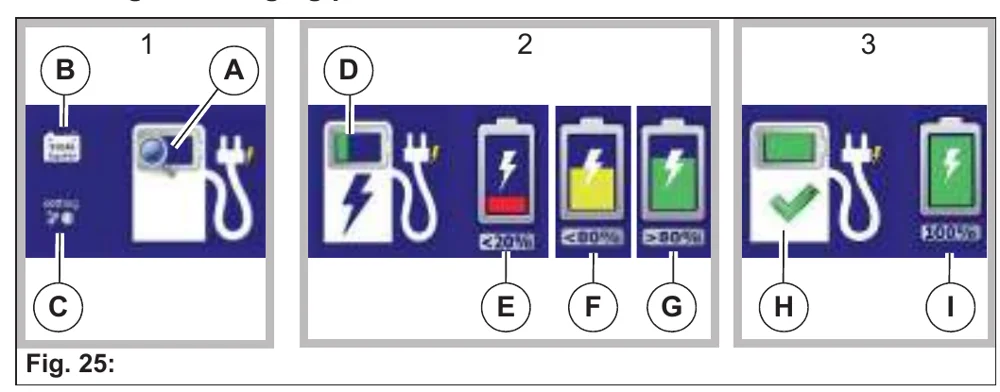
During the charging process, the progress of the charging is displayed in the MFD:
- Once the mains plug has been plugged in, the initialisation phase starts and the symbol Charger with surrounding magnifying glass Fig. 25-A is displayed. The information about the type of battery which has been installed
- appears to the left of this Fig. 25-B and
- the charge characteristic which has been set Fig. 25-C.
- Charging starts, and is indicated by a bar that is continuously filled Fig. 25-D. At the same time, the battery capacity that has already been stored appears to the right of this in three symbols:
- Symbol battery capacity less than 20 % Fig. 25-E
- Symbol battery capacity less than 80 % Fig. 25-F
- Symbol battery capacity more than 80 % Fig. 25-G
- The end of charging is indicated by the following symbols:
- Symbol charger with green tick and filled bar Fig. 25-H
- Symbol battery capacity 100 % Fig. 25-I
Warning symbols during the charging procedure
Batteries and chargers: make sure your charger is compatible with your batteries, and set its charging algorithm to your battery pack before you use it.
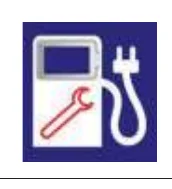
If a fault occurs during the charging procedure, the red service spanner appears in the toolbar with a 4-digit service code. An acoustic warning is also heard for approx. 30 seconds. A warning symbol appears in the MFD.
| Warning symbols/ service code | Possible cause | Remedy |
|---|---|---|
 | Wrong battery or no battery | Check battery |
| Battery connector not connected | Check battery connector | |
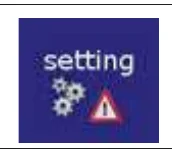 | Invalid charge characteristic | Contact the customer service |
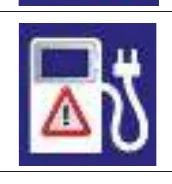 | Contact the customer service | |
 | Charger temperature too high e.g. due to sunshine | Disconnect the mains plug. Move the machine to a cooler, shaded location. Wait for 1/2 hour, then continue charging. |
| Air filter for cooling is soiled | Have air filter cleaned by PowerBoss service | |
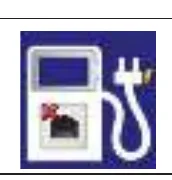 | Fault in communication connection | Contact the customer service |
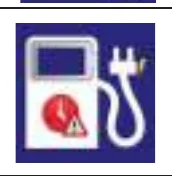 | Charging phase time exceeded | Disconnect mains plug and restart the machine. Insert the mains plug after a few seconds - the charging process restarts |
Charging the battery with a stationary charger
Batteries and chargers: make sure your charger is compatible with your batteries, and set its charging algorithm to your battery pack before you use it.
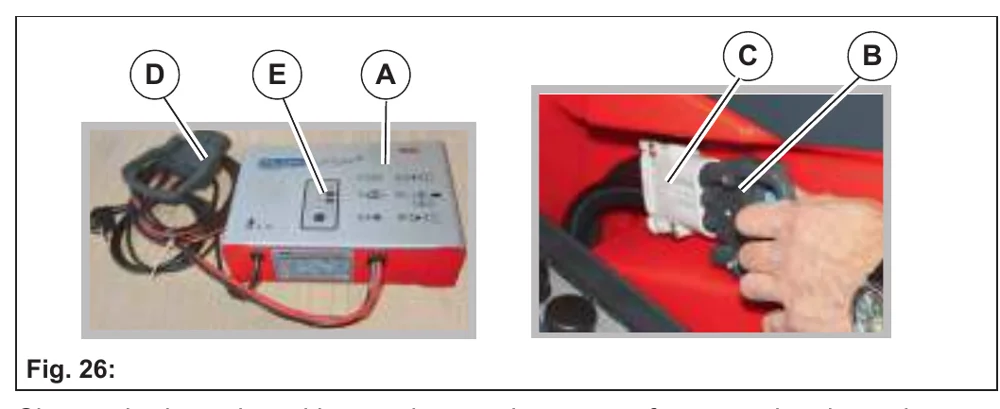
Charge the batteries with a stationary charger as, for example, shown in Fig. 26-A. The batteries can be charged if the battery capacity is less than 60 %.
- Place the machine on a level surface and turn it off.
- Disconnect the battery plug Fig. 26-B from the machine plug Fig. 26-C.
- Connect the battery plug to the plug of the charger Fig. 26-D.
- Switch on the charger.
- The progress of the charging process is displayed in the display Fig. 26-E of the charger. The charge control indicator in the MFD of the machine is not active during charging with the stationary charger!
- Once the battery is fully charged, terminate the charging process:
- Switch off the charger.
- Disconnect the battery plug from the plug of the charger and reconnect it to the plug of the machine Fig. 26-C.
5.2.3 Checking the acid level
Batteries and chargers: make sure your charger is compatible with your batteries, and set its charging algorithm to your battery pack before you use it.
Attention
- Observe the information in the operating manual of the battery manufacturer!
- Refilling must only take place once the battery charging process has been terminated.
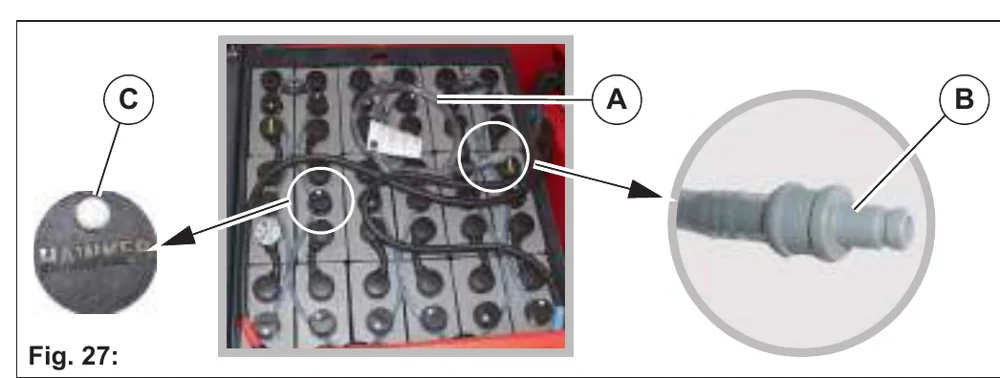
The customer has to check the acid level of the battery weekly, demineralised water (according to DIN 43530-4) must be refilled if necessary.
Checking the acid condition:
If the trough battery is equipped with an aquamatic system Fig. 27-A, each individual cell features a sealing plug with float indicator.
The white dot must be located at the top and must be clearly visible. If this is not the case, refill demineralised water.
Topping up with demineralised water:
Connect the end piece of the aquamatic system Fig. 27-B to a container with demineralised water. Observe sufficient gradient, ensuring the water can flow into the cells. Once the required filling level has been reached, the plugs automatically seal the cells and indicate "full" Fig. 27-C.
5.2.4 Replacing the battery
- Only use batteries approved by PowerBoss at the intended position!
- The battery should only be replaced by qualified service personnel!
- Wear safety shoes when changing the battery.
- Only change the battery using suitable lifting gear and crane gear with a sufficient load-bearing capacity.
- Lifting hooks may not cause damage to cells, connectors or connecting cables!
- When using other batteries which have been approved by PowerBoss, the BMS must be reset to protect the battery against total discharge. The settings of the BMS should only be carried out by a workshop authorised by PowerBoss!
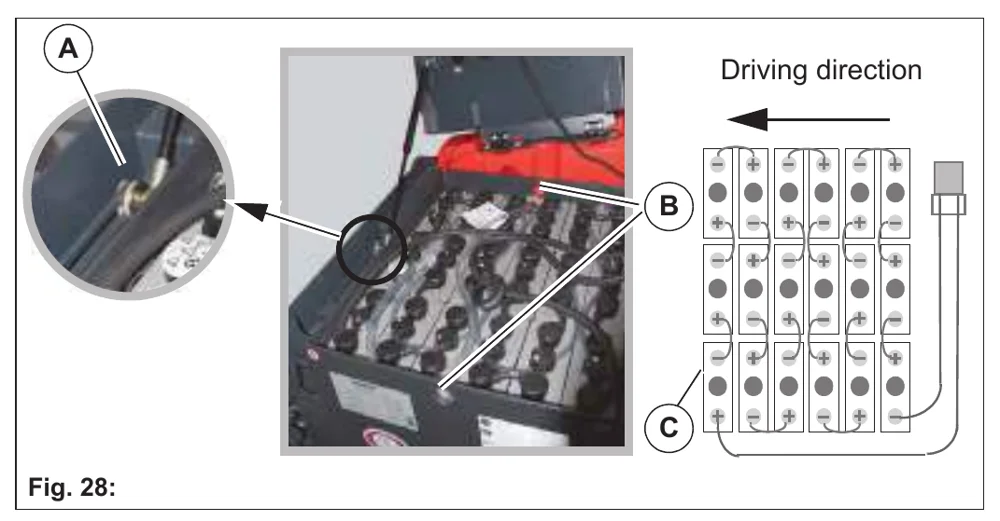
Removing the battery
- Place the machine on a level surface and turn it off.
- Undo the side panelling of the machine with the provided spanner and remove.
- Open the seat console all the way Fig. 28-A.
- Disconnect the battery plug.
- Attach crane gear to eyelets of the battery trough Fig. 28-B.
The crane gear must carry out a vertical pull so that the battery trough is not distorted.
6. Slowly lift the battery trough upwards and swivel out to the side.
Assembly is in reverse order.
5.2.5 Battery plug coding
When using other batteries which have been approved by PowerBoss, the plugs must be re-coded.
The plug connectors between the battery Fig. 29-A, the machine Fig. 29-B and the charger Fig. 29-C are coded with coloured coded pins (yellow, grey or green) Fig. 29-D depending on the type of battery and rated voltage.
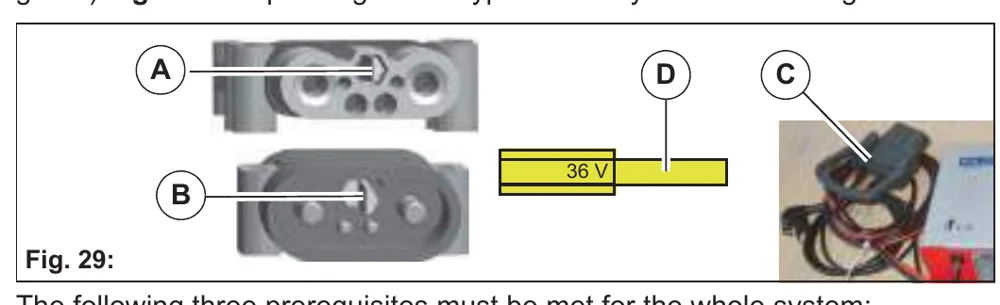
The following three prerequisites must be met for the whole system:
- Voltage coding (36 V) must be identical for all plugs and bushes.
- The colour of the coded pin in the connector housing of the machine is always yellow.
- The colour of the coded pin in the charger plug (machines without built-in charger) and in the bush housing of the battery must be identical:
- Grey for wet batteries
- Green for maintenance-free gel batteries
5.2.6 Maintaining drive batteries
For maintaining and servicing drive batteries, see PowerBoss supplementary sheet 88-60-2556 – information for drive batteries.
5.2.7 Taking the machine out of service for a long period
If the battery is not used for more than three months, the battery must be recharged.
5.2.8 Disposing of batteries
Used batteries with the recycling symbol contain reusable commodities. They must not be disposed of in domestic waste, see Section 1 Environmental protection instructions and disposal.
5.3 Solution tank
The filling level in the solution tank is measured continuously and shown in the MFD in steps of 20 %. If there are less than 10 litres in the tank, a warning symbol appears in the Fig. 30-A MFD. At the same time, an acoustic warning is heard and indicates that a top-up is required.
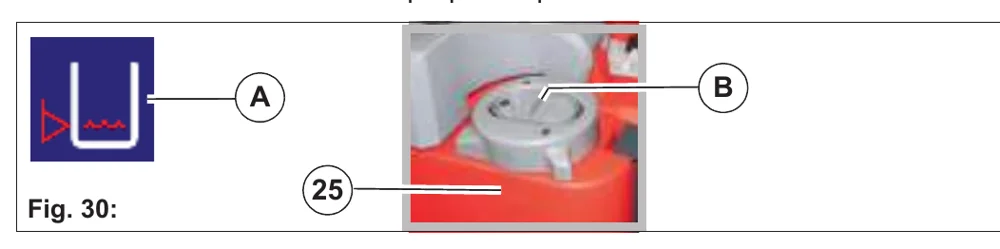
5.3.1 Filling the solution tank
Fill the solution tank Fig. 30-25 though the filling opening before commencing work or as required Fig. 30-B.
Filling the solution tank with a hose
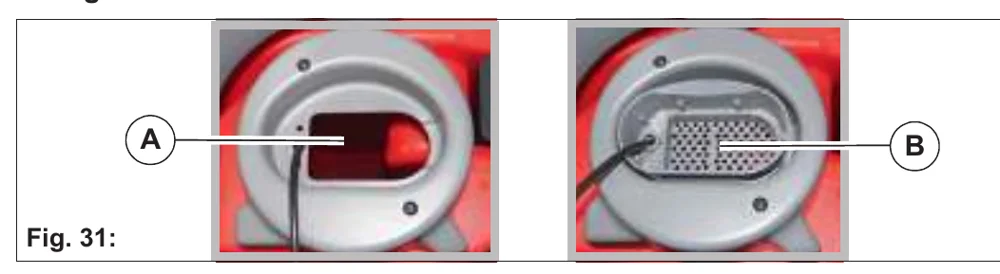
- Place the machine on a level surface.
- Remove insert in grey cover Fig. 31-A.
- Fill the solution tank up to approx. 15 cm below the maximum filling level (maximum water temperature 50 °C).
- Add detergent according to the manufacturer's regulations via the sieve insert Fig. 31-B.
Filling the solution tank with the fast fill station
The filling opening of the solution tank can be increased when filling with the fast fill station by unscrewing the grey cover Fig. 32-A and removing it Fig. 32-B.
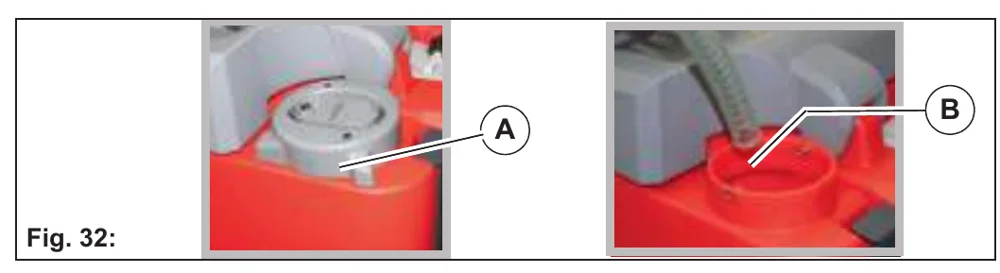
Filling the solution tank with the automatic filling unit
Optionally, the solution tank can be filled via the automatic filling unit.
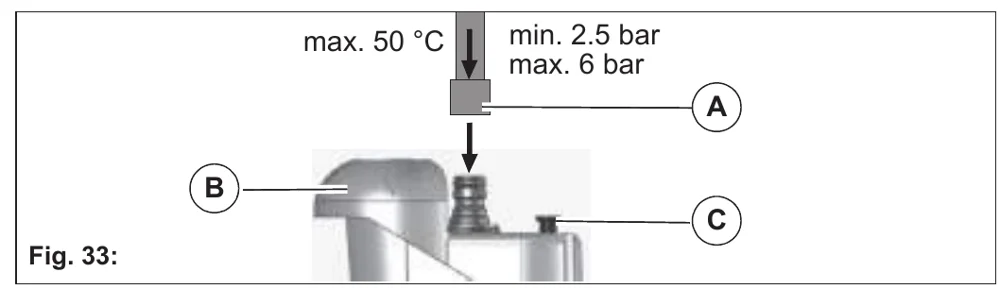
- Fit the hose with the quick coupler Fig. 33-A. Do not yet open the water supply!
- Push the operating button Fig. 33-B. The indicator knob Fig. 33-C protrudes.
- Open the water supply – water starts to flow.
- The filling unit switches off automatically when the tank is full. The indicator knob Fig. 33-C no longer protrudes.
- Close the water supply and remove the hose with the quick coupling.
Use a water line fitted with a stop valve!
5.3.2 Emptying the solution tank
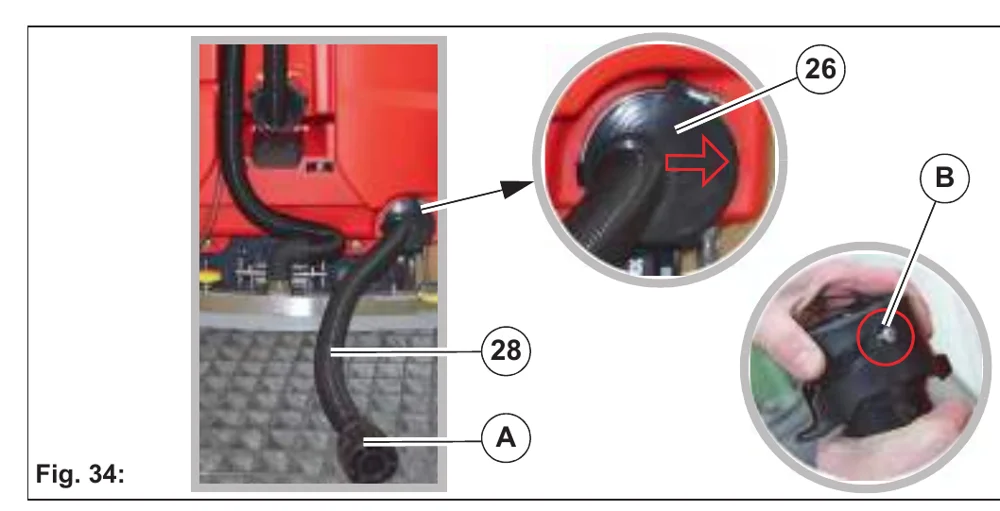
- Drive to a suitable disposal centre.
- Position the machine, ensuring the drain hose Fig. 34-28 reaches the drain in the ground.
- Turn off the machine.
- Remove the drain hose from the holder, open the drain valve Fig. 34-A and drain the waste water tank via the drain.
- Ensure that the drain hose closure is fully closed after draining Fig. 34-B!
5.3.3 Cleaning the solution tank
- Empty the solution tank, see section 5.3.2.
- Undo the screw clamp with a screwdriver and remove the drain hose Fig. 34-28.
- Lead the water hose through the maintenance opening Fig. 34-26 and clean the solution tank thoroughly.
- Position the drain hose onto the support of the maintenance opening (arrow must point to the right) and close again securely using the screw clamp.
5.4 Waste water tank
5.4.1 Emptying the waste water tank
Clean the waste water tank Fig. 36-38 daily or as required. When the symbol Waste water tank full Fig. 35-A appears in the display panel and an acoustic warning signal is output, the suction functions are switched off and the waste water tank should be drained immediately.
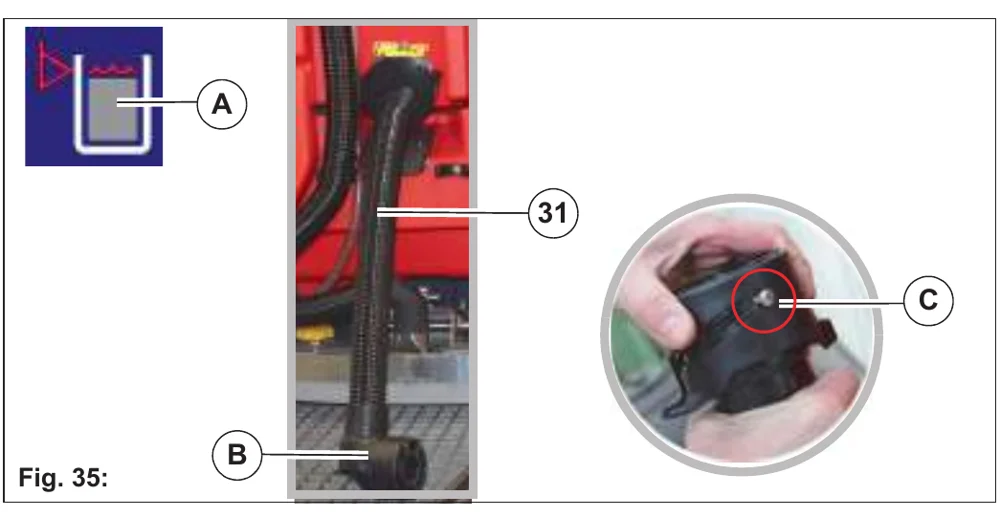
- Drive to a suitable disposal centre.
- Position the machine, ensuring the drain hose Fig. 35-31 reaches the drain in the ground.
- Turn off the machine.
- Remove the drain hose from the holder, open the drain valve Fig. 35-A and drain the waste water tank via the drain.
- Ensure that the drain hose closure is fully closed after draining!
5.4.2 Cleaning the waste water tank
Clean the waste water tank daily or as required.
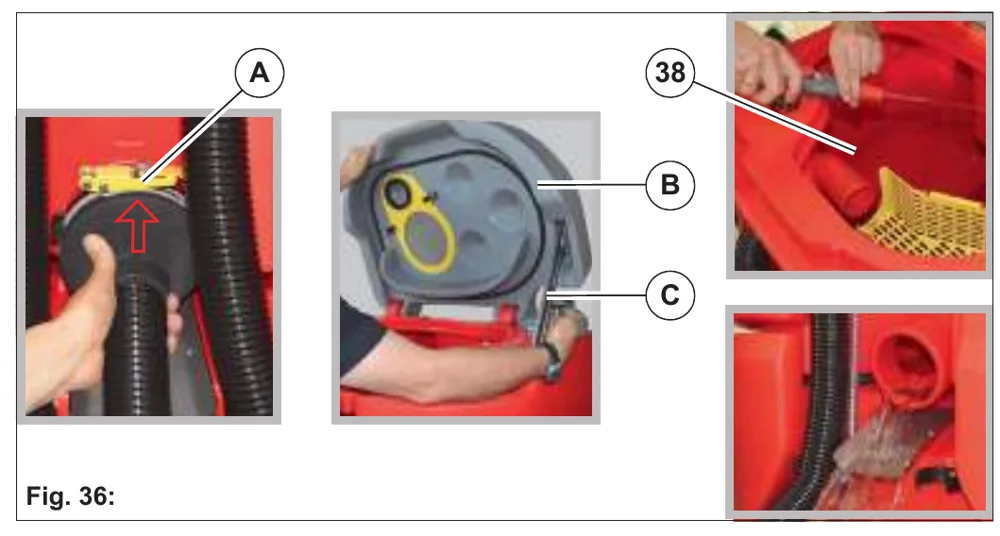
- Empty the waste water tank, see section 5.4.1.
- Open fastener at drain hose Fig. 36-A and remove hose.
- Open the tank cap Fig. 36-B of the waste water tank.
- Reach into the recessed grip of the tank cap with one hand.
- Open the tank cap until the support Fig. 36-C engages.
- Clean the waste water tank thoroughly with the water hose/spray nozzle Fig. 36-D.
- Also flush the drain hose.
- Close the tank cap:
- Reach into the recessed grip with one hand and open the tank cap a little further.
- Release the support Fig. 36-B with your right hand and close the tank cap.
- Position the drain hose on the neck of the maintenance opening (arrow must point upwards) and securely close using the fastener.
5.4.3 Cleaning the coarse dirt sieve
A coarse dirt sieve Fig. 37-37 is optionally located in the waste water tank.Clean the sieve daily and as required.
5.4.4 Cleaning the intake sieve
Check the function of the intake sieve Fig. 38-39 daily and clean it as required.
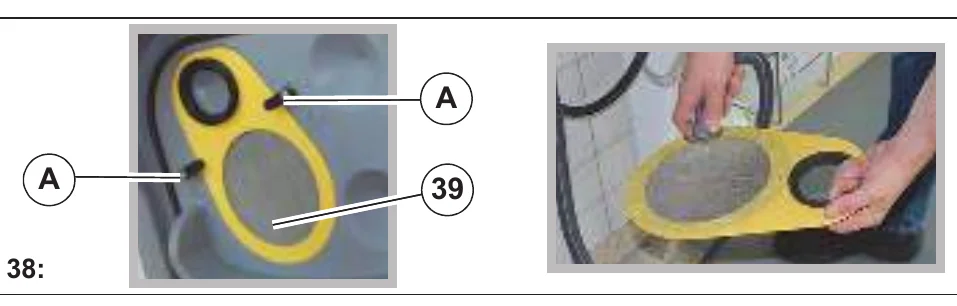
- Rotate the locks Fig. 38-A downwards and remove the intake sieve Fig. 38-39.
- Thoroughly clean the intake sieve under running water.
5.4.5 Checking the seal at the drain valve
Check the function of the seal in the drain valve Fig. 39-A daily, and replace it after no more than 125 operating hours.
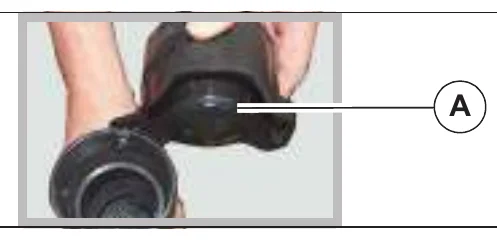
- Twist drain valve by 90° and swivel down from drain hose.
- Change the seal.
- Grease seal and cone with Molykote.
5.4.6 Cleaning the fresh water filter
Check the filter sieve Fig. 40-A of the fresh water filter Fig. 40-12 weekly and clean or replace it as required.
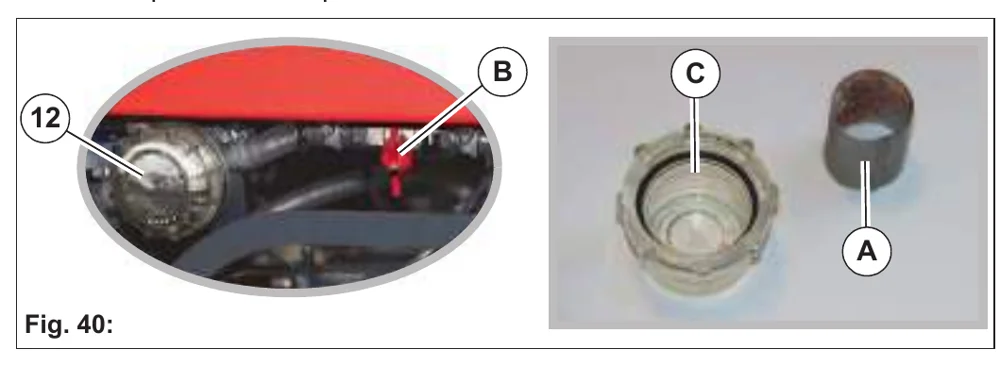
- Close the ball cock Fig. 40-B.
- Turn and remove the filter cover Fig. 40-C.
- Remove the filter sieve Fig. 40-A from the filter housing and clean it under running water. Replace the filter sieve as required.
- Reinsert the filter sieve and filter cover and open the ball cock.
5.4.7 Checking the seal in the tank cap
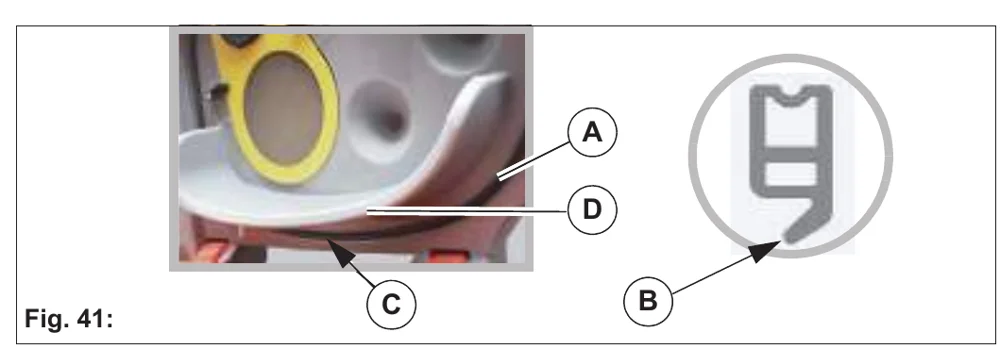
Check the function of the seal in the tank cap Fig. 41-A daily and replace it if damaged.
When replacing the seal:
- pay attention to correct installation position – sealing lip Fig. 41-B must be facing outwards,
- ensure that the disconnection point of the seal finishes edge to edge – the disconnection point Fig. 41-C must be below the dripping edge of the cover Fig. 41-D,
- ensure that the seal is pressed fully into the groove.
5.5 Rotating brush unit
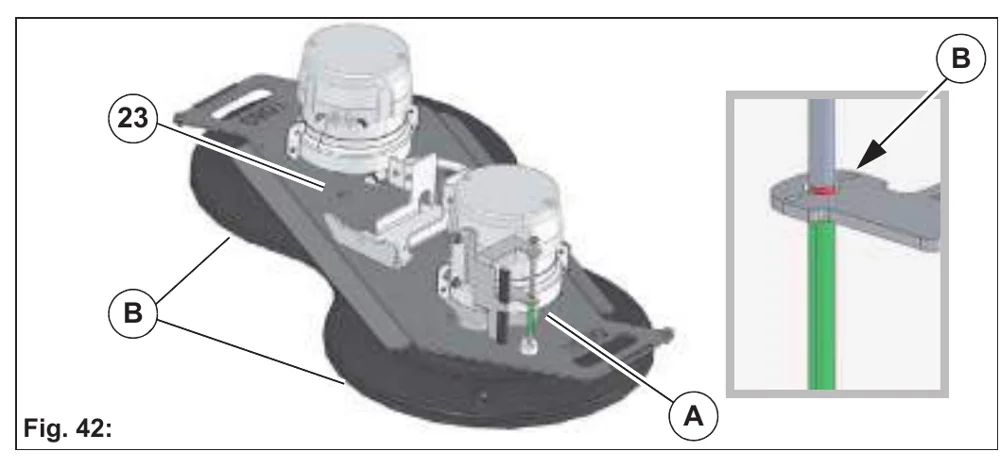
5.5.1 Replacing the brushes/pads
Use the indicator Fig. 42-A on the rotating brush unit to:
- determine the wear of the brushes/pads (the rotating brush unit must be lowered),
- determine whether the brushes/pads have been assembled.
The brushes/pads must be changed when the pointer Fig. 42-B is in the red zone at the latest.
- Ejecting the brushes/pads, see section 5.5.3
- Inserting new brushes/pads, see section 5.5.4
5.5.2 Cleaning the brushes
Clean the brushes Fig. 42-B in the rotating brush unit Fig. 42-23 daily or as required.
- Ejecting the brushes, see section 5.5.3.
- Thoroughly clean the brushes under running water.
- Coupling the brushes, see section 5.5.4.
5.5.3 Ejecting the brushes/pads
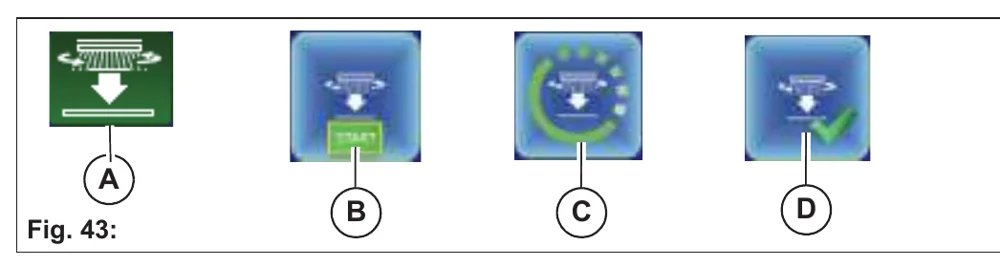
- Make sure that the rotating brush unit has been raised and the machine is stationary.
- Select soft key Eject brushes Fig. 43-A using the turn-push knob and confirm. The action window Fig. 43-B opens. Confirm the start with the turn-push knob.
The procedure starts and symbols Fig. 43-C, D appear on the MFD one after the other. Only now is the procedure complete. - Swivel down the wiper see section 5.9.1 and remove the brushes/pads.
5.5.4 Coupling the brushes/pads
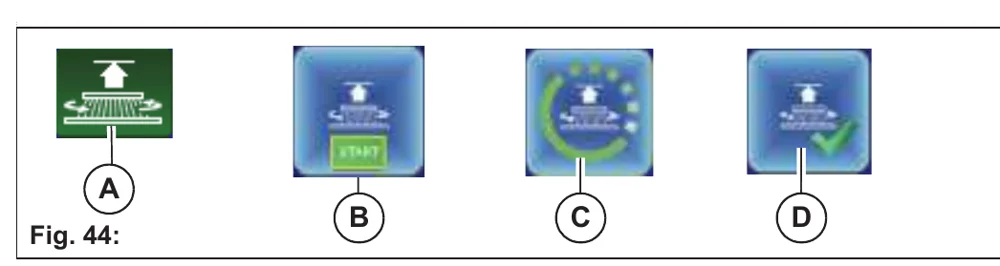
- Make sure that the rotating brush unit has been raised and the machine is stationary.
- Place the brushes/pads in a central position underneath the brush head holder.
- Close the side wiper.
- Sit on the seat and switch on the machine.
- Select soft key Insert brushes Fig. 44-A with the turn-push knob and confirm. The action window Fig. 44-B opens. Confirm the start with the turn-push knob.
The procedure starts and symbols Fig. 44-C, D appear on the MFD one after the other. Only now is the procedure complete.
5.6 Roller brush unit
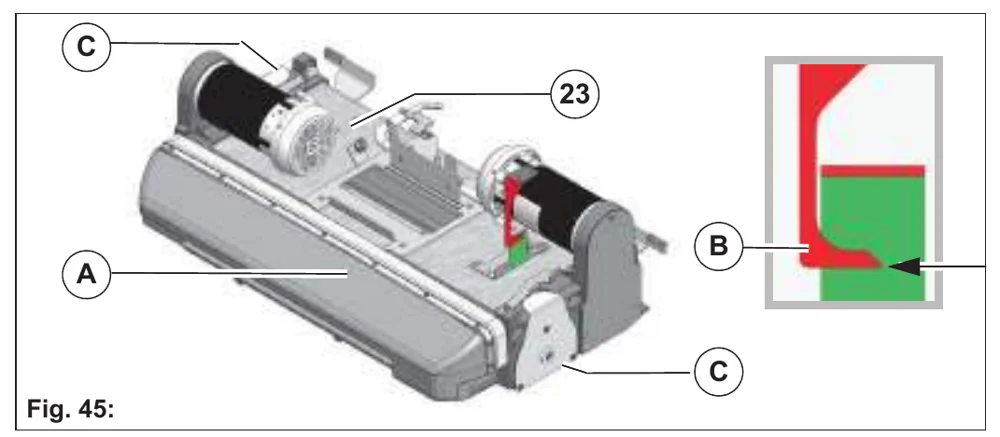
5.6.1 Emptying the dirt hopper
Empty the dirt hopper Fig. 45-A daily or as required.
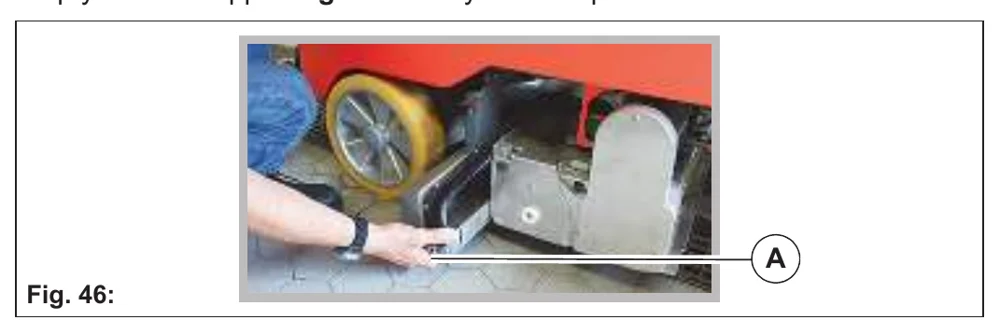
- Turn off the machine.
- Swing down the wiper on the right-hand side of the machine.
- Reach into the recessed grip below the dirt hopper with one hand and remove the dirt hopper Fig. 46-A.
- Empty the dirt hopper.
- Assembly is in reverse order.
5.6.2 Replacing the brushes
The brushes must be changed when the pointer in the indicator Fig. 45-B is in the red zone at the latest.
- Disassemble the brushes, see section 5.6.4.
- Install the brushes, see section 5.6.5.
5.6.3 Cleaning the brushes
Clean the brushes Fig. 45-C in the roller brush unit Fig. 45-23 daily or as required.
- Disassemble the brushes, see section 5.6.4.
- Thoroughly clean the brushes under running water.
- Install the brushes, see section 5.6.5.
5.6.4 Disassembling the brushes
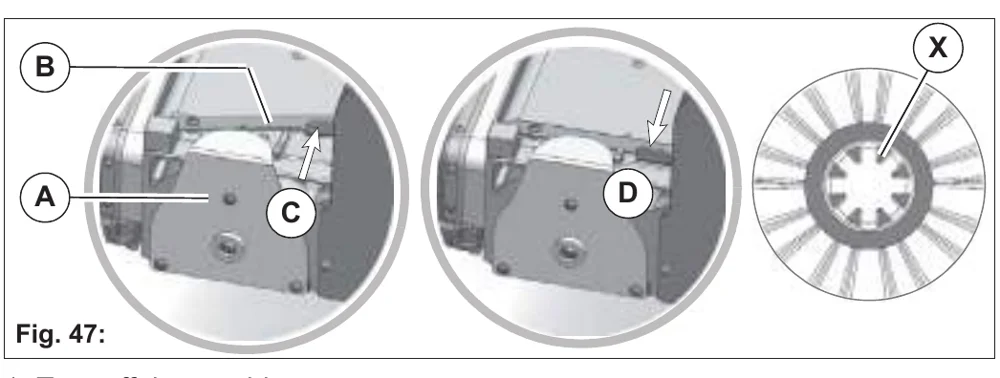
- Turn off the machine.
- Swing down the wiper, see section 5.9.1.
- Unlock the brush holder Fig. 47-A:
Press the locking lever Fig. 47-B into position C and remove the brush holder. - Pull out the brush.
5.6.5 Installing the brushes
- Push the brush into the housing (teeth X must point to the outside) and let the catch on the opposite side engage audibly.
- Press the locking lever Fig. 47-B into position C and install the brush holder.
- Lock the brush holder:
Push the locking lever into position D. - Close the wiper, see section 5.9.1.
5.7 Side brush unit (optional)
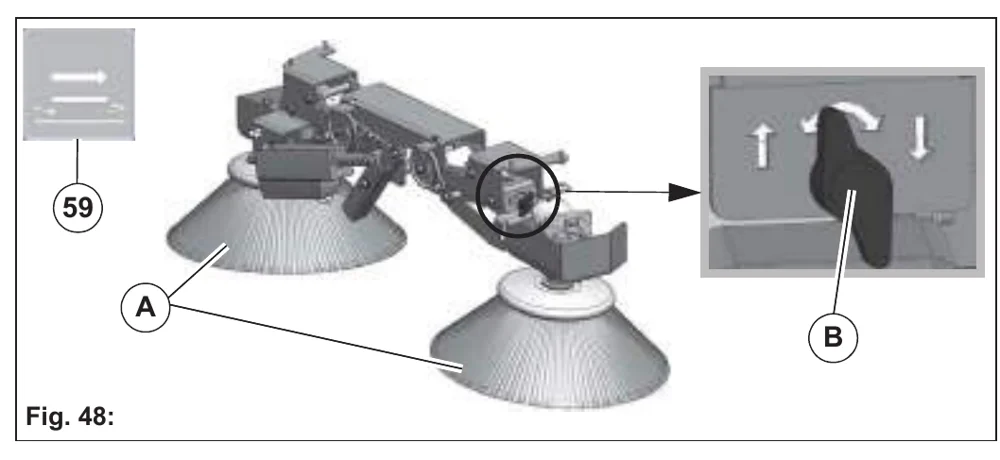
5.7.1 Adjusting the side brush
Side brush tilt
The tilt of the side brush Fig. 48-A is preset in the factory and cannot be changed.
Readjusting the side brush position
Check side brush weekly for wear. In the event of wear or after changing the side brush, adjust as follows:
- Place the machine on a level surface.
- Lower the side brush unit with key Side brush unit Fig. 48-59.
- Turn wing nuts Fig. 48-B clockwise at both sides until 1/3 of the area of the side brush is touching the floor.
5.7.2 Changing the side brush
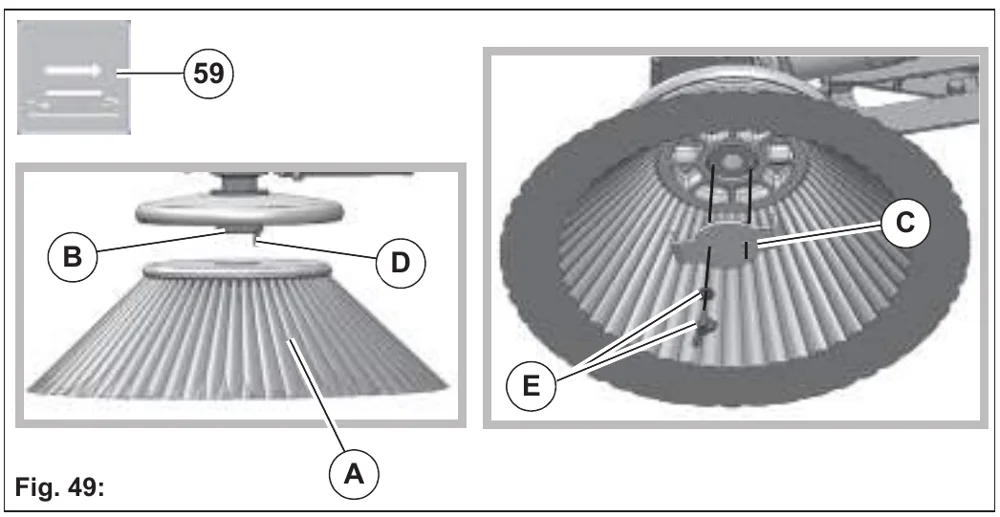
Assembling the side brush
- Place the machine on a level surface.
- Raise the side brush unit with key Side brush unit Fig. 48-59.
- Fit the side brush Fig. 49-A to the hub Fig. 49-B.
- Position the carrier plate Fig. 49-C in such a way that the pin of the hub Fig. 49-D goes through the hole of the carrier plate and the carrier plate is sitting firmly in the holder.
- Secure carrier plate to hub with washer and wing bolt Fig. 49-E.
The side brush is dismantled in the reverse order.
5.8 Squeegee
Optimum vacuuming is achieved through:
- clean and undamaged or not worn sealing strips.
- correctly set inclination angle and correct height adjustment of the sealing strips.
5.8.1 Cleaning the squeegee
Check the squeegee Fig. 51-29 daily for soiling and foreign particles and clean it as required.
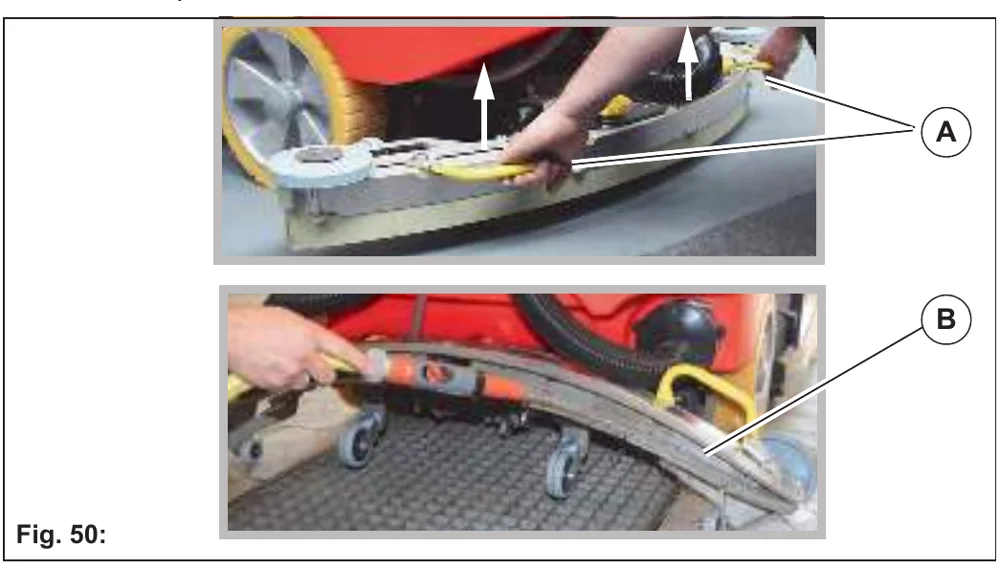
Daily cleaning in the event of heavy soiling
- Drive machine to a suitable location with drain in floor.
- Switch off machine and ensure that the squeegee is in the raised position.
- Pull off the suction hose Fig. 51-E.
- Fold over the squeegee:
Get hold of handles Fig. 50-A with both hands. Pull squeegee vertically upwards with a jerk until the flap mechanism activates. Then fold over by 90° as far as possible Fig. 50-B. - Remove coarse dirt and clean squeegee thoroughly using the hose.
- Move squeegee to starting position:
Move handles against the direction of travel until the flap mechanism is activated. Then fold over squeegee to starting position.
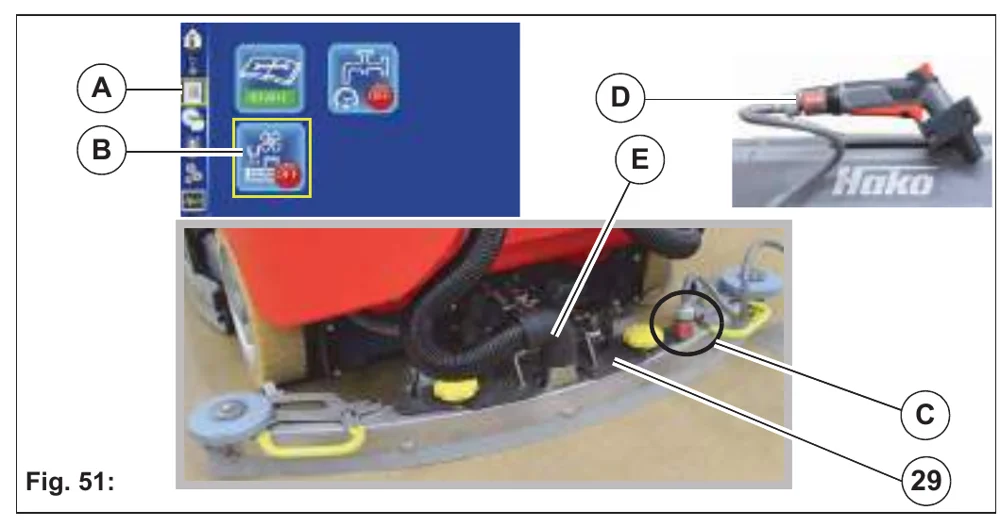
Daily cleaning in the event of light soiling
External water connection:
- Sit on the seat of the machine and switch on the machine.
- In the sub-menu, call up menu item Maintenance page Fig. 51-A. Select soft key Squeegee cleaning Fig. 51-B with the turn-push knob and activate. The squeegee is lowered and the suction is switched on. The remaining squeegee cleaning time is displayed in 5 second intervals.
- Move the machine forward a little so that the sealing lips are tilted back.
- Connect hose to the connection of the squeegee Fig. 51-C using the 1/2” quick coupling, and to the water tap of the service connection.
- Open the water tap all the way.
Squeegee is cleaned by the internal spray nozzles. - After the program has ended, close the water tap and remove the hose.
On-board water connection:
Follow point 1-3 of section External water connection.
- Disconnect hose from the spray nozzle Fig. 51-D and attach to the squeegee connection Fig. 51-C.
- The squeegee is cleaned by the internal nozzles.
- After the program has ended, remove the hose from the squeegee during the after-run time of the suction turbine and reconnect to the spray nozzle.
5.8.2 Changing the sealing / slot strip
Check the sealing strip Fig. 52-A and the slot strip Fig. 52-B at the squeegee weekly for wear and damage. If the used sealing edge of the strip is worn or damaged, turn or replace the strip. Each strip can be used four times before it needs replacing.
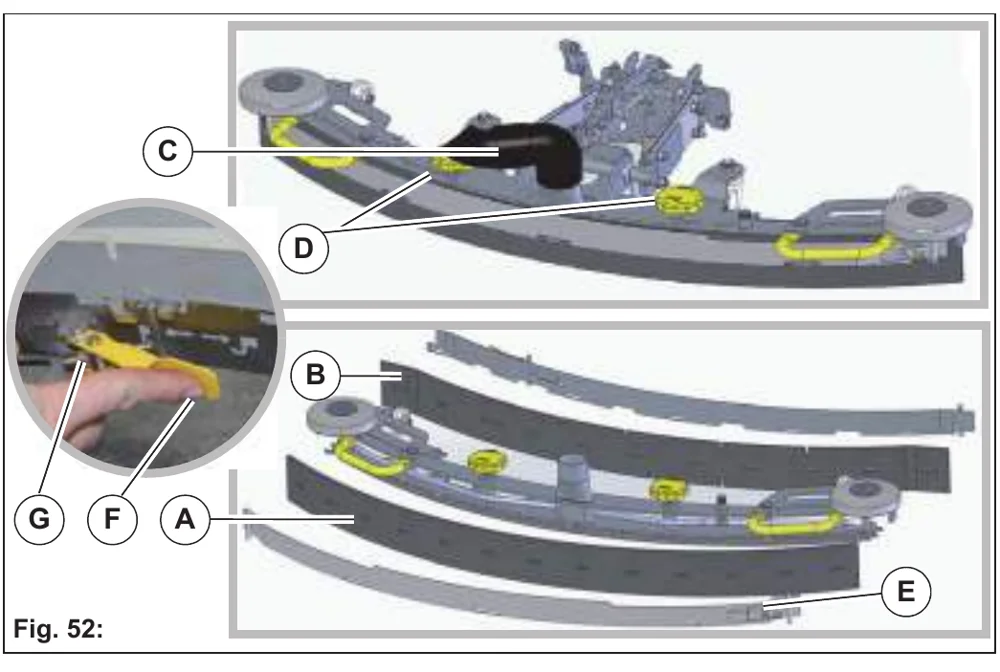
- Pull off the suction hose Fig. 52-C.
- Loosen the star-shaped handles Fig. 52-D and remove the squeegee.
- Replacing the sealing strip:
Release the tension strap Fig. 52-E and remove.
Replacing the slot strip:
Fold over the turnbuckle Fig. 52-F all the way when releasing so that the tension strap is easier to remove. - Remove strip from squeegee body.
- Before turning or replacing the strips, thoroughly clean the squeegee body!
Assembly is in reverse order.
5.8.3 Adjusting the sealing strips
Inclination adjustment
The correct inclination adjustment is decisive for:
- ensuring that the sealing strips of the squeegee rest evenly with the complete contact surface on the ground.
- ensuring that the squeegee runs smoothly and evenly during the suction process.
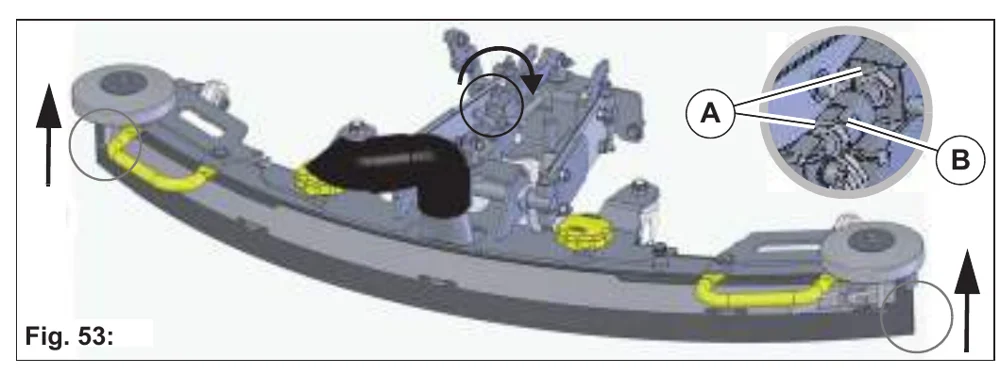
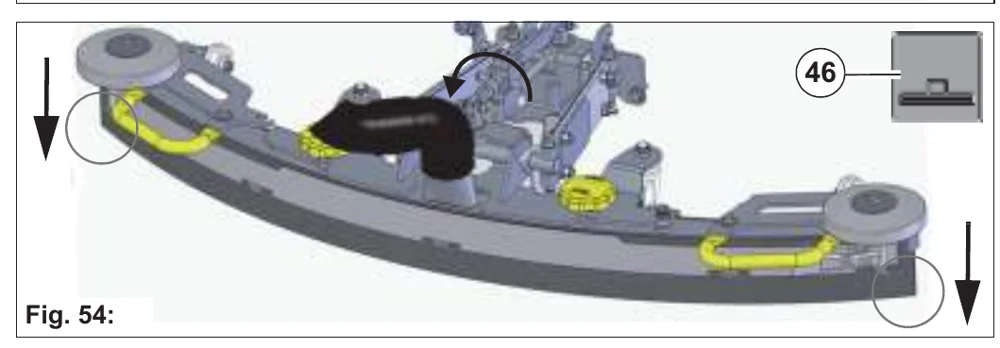
- Place the machine on a level surface and lower the squeegee with the squeegee key Fig. 54-46.
- Loosen the lock nuts Fig. 53-A and turn the adjusting bushing Fig. 53-B to adjust the squeegee so that the ends of the sealing strips barely have contact with the ground.
Turning the adjusting bushing clockwise:
The distance of the sealing strip to the ground increases at the ends Fig. 53.
Turning the adjusting bushing counter-clockwise:
The distance of the sealing strip to the ground decreases at the ends Fig. 54. - Turn on the machine and check the suction pattern. When driving, the sealing strips must be turn over evenly everywhere (centre and outside).
- Tighten the lock nuts.
Height adjustment
The height adjustment (X) of the supporting rollers Fig. 55-A has been set to 7 mm in the factory. If striping still occurs despite optimum inclination adjustment, readjust the distance between the supporting rollers and the lower edge of the sealing strip.
| Distance from floor (X) | Use |
|---|---|
| <7 mm | Very smooth floor surfaces, e.g. coated screed, PVC, linoleum |
| 7 mm | Standard setting |
| >7 mm | Very uneven floor surfaces, e.g. poorly laid tiles (water does not drain off) |
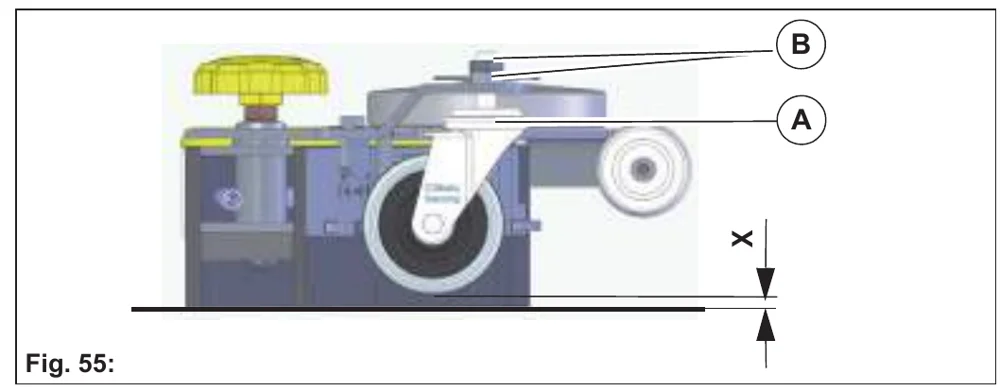
- Place the machine on a level surface.
- Lower the squeegee. The sealing strips must now be resting vertically onto the floor.
- Loosen nuts Fig. 55-B and adjust distance between supporting roller and ground as per the table.
- Tighten nuts.
5.9 Wiper
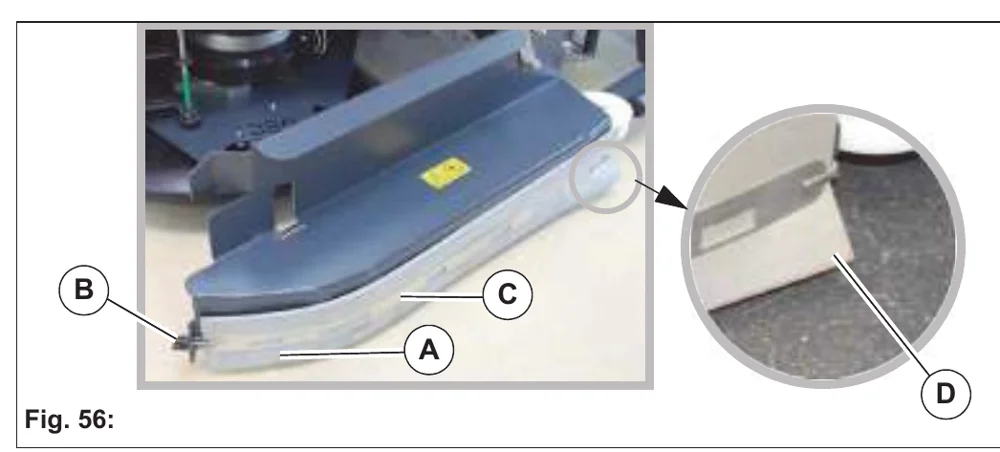
5.9.1 Changing the wiper rubber
Check the rubber of the wiper Fig. 56-A weekly for wear, turn or replace the rubber if necessary.
- Loosen the wing nut Fig. 56-B.
- Remove the clamping band Fig. 56-C. Turn the rubber of the wiper (can be used 4 times) or replace it.
Assembly is in reverse order.
5.10 Pre-sweep suction unit (optional)
5.10.1 Emptying the dirt hopper
Check the fill level of the dirt hopper at regular intervals (max. load 20 kg) and empty if necessary.
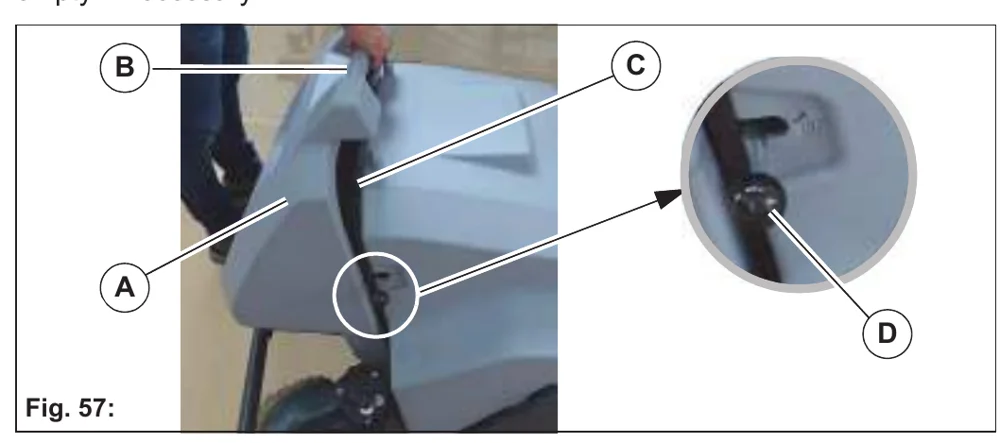
- Turn off the machine.
- Pull the dirt hopper Fig. 57-A upwards using the handle Fig. 57-B and dispose of the contents in an environmentally friendly way.
- Reinsert the dirt hopper.
5.10.2 Dirt hopper seal
Inspect the dirt hopper seal Fig. 57-C weekly and replace if wear is present.
- Turn off the machine.
- Remove the dirt hopper.
- Remove the damaged seal.
- Press the new seal onto the edges.
5.10.3 Shaking the filter
Clean the filter Fig. 58-B several times per day using the shaking system Fig. 57-D.
To clean the filter, pull out the lever of the shaking system several times and slide back in again.
5.10.4 Cleaning the filter
Do not inhale the dust!
Wear a suitable dust mask.
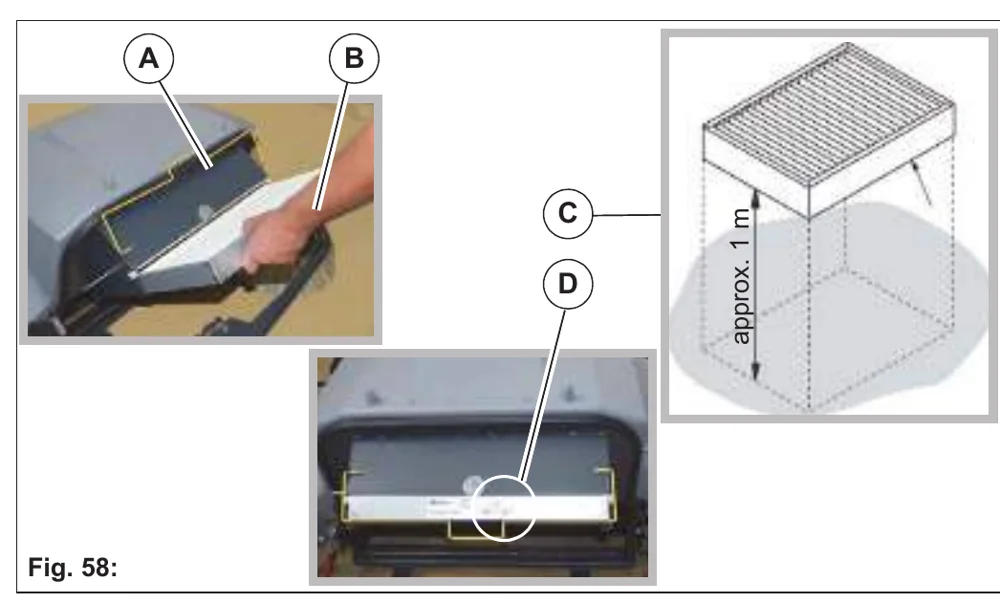
- Switch off the machine and remove the dirt hopper.
- Swivel the yellow handle Fig. 58-A upwards and pull the filter Fig. 58-B out of the frame.
- Allow the filter to fall horizontally onto a smooth floor from a height of approx. 1 m.
The dirty side must be facing the floor Fig. 58-C! - The filter is installed in the reverse order.
Markings can be found on the frame of the filter.
5.10.5 Cleaning the cylindrical brush and the cylindrical
Inspect the cylindrical brush Fig. 59-A and the cylindrical brush compartment for soiling daily and clean if necessary.
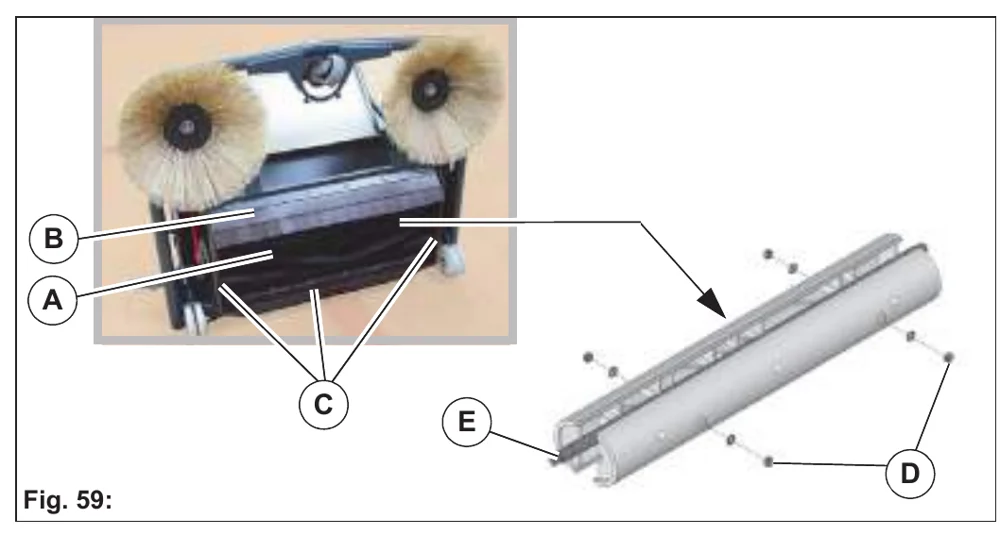
- Disconnect the pre-sweep suction unit from the machine.
- Remove the dirt hopper Fig. 57-A.
- Tilt the pre-sweep suction unit backwards (see fig.).
- Remove rolled-up bands from the cylindrical brush.
- Inspect the front apron Fig. 59-B and the sealing strips Fig. 59-C for soiling daily and clean if necessary.
5.10.6 Changing the cylindrical brush
Inspect the cylindrical brush once per week and replace if wear is present. Follow instructions 1 - 3 in chapter 5.10.5 Cleaning the cylindrical brush and the cylindrical.
- Loosen the nuts and washers Fig. 59-D and remove the first half shell.
- Manually rotate the cylindrical brush shaft 180° by hand and remove the second half shell.
- Attach the new half shells in the reverse order.
- The sweeping level must be readjusted after replacing the cylindrical brush.
5.10.7 Adjusting the sweeping level
In the event of bristle wear and after replacing the cylindrical brush, the sweeping level Fig. 59-A must be readjusted.
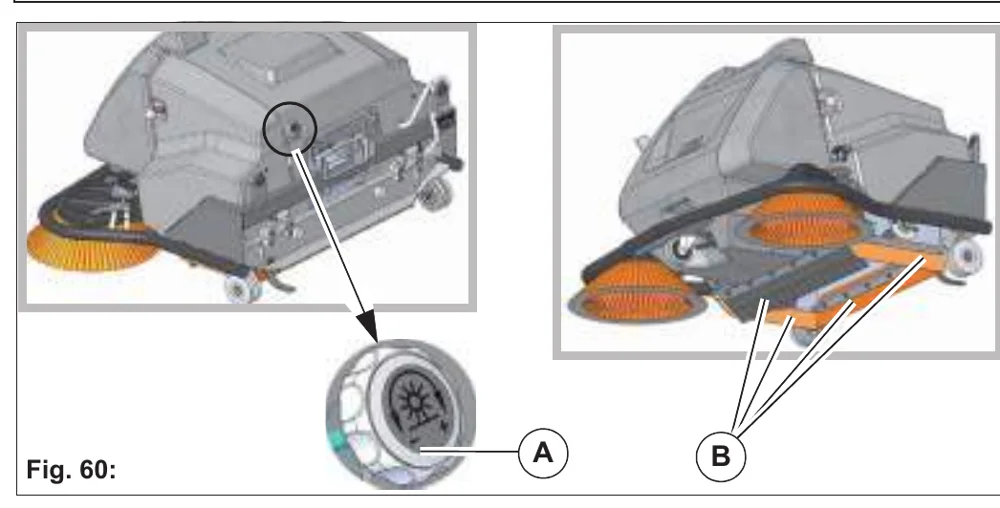
- Switch off the machine using the key switch.
- Rotate the adjustment dial Fig. 60-A until the cylindrical brush is touching the floor.
- Switch on the machine and let the cylindrical brush rotate briefly while stationary.
- If the setting is correct, a parallel-running sweeping level of approx. 45 +/- 10 mm must be marked on the ground.
- If necessary, repeat the process until the setting is correct.
5.10.8 Replacing the sealing strips of the cylindrical
The sealing strips must be in perfect condition for the pre-sweep suction unit to operate efficiently. Inspect the sealing strip of the cylindrical brush compartment Fig. 60-B for wear and check for damage at regular intervals.
Replace defective sealing strips as follows:
Follow instructions 1 - 3 in chapter 5.10.5 Cleaning the cylindrical brush and the cylindrical.
- Remove the mushroom-head screws, washers, nuts and terminal strip of the defective sealing strip.
- Install the new sealing strip in the reverse order.
The lateral sealing strips are adjustable (elongated holes in the sealing strips). Adjustment dimension: approx. 1 mm from floor.
5.10.9 Changing the side brush
Inspect the side brushes once per week and replace if wear is present.
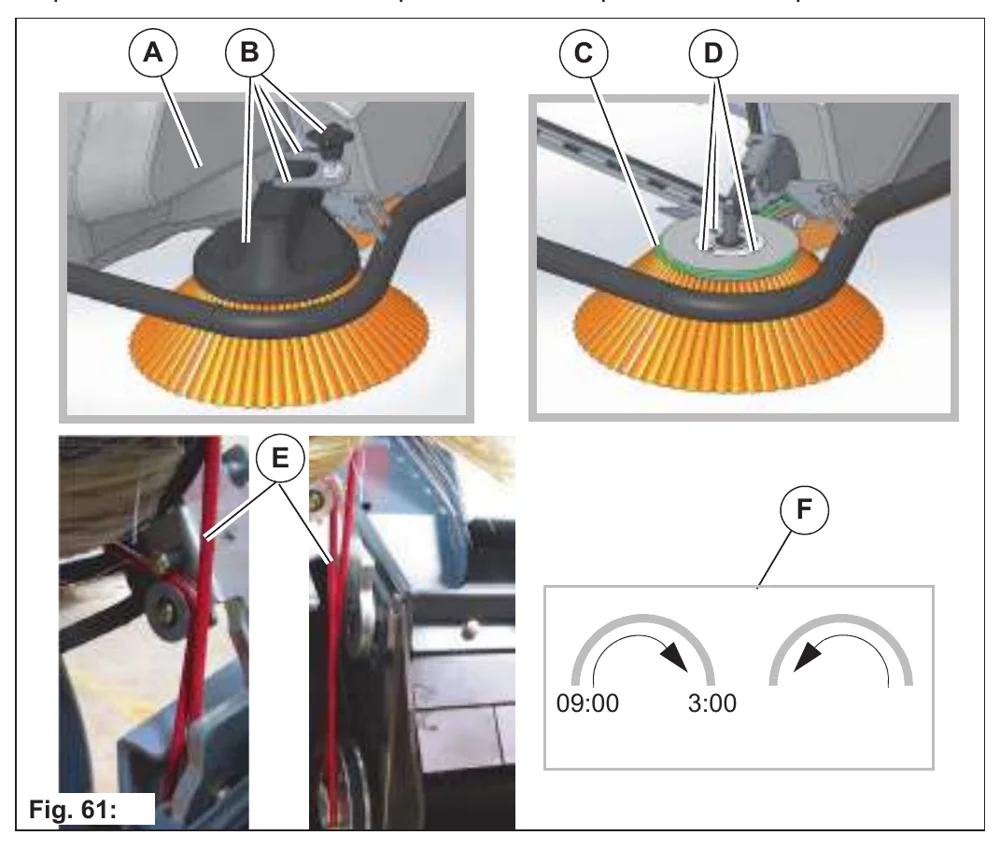
6 Attachments/options
6.1 Spray suction tool
The spray suction tool Fig. 62-A is used for manually cleaning difficult-to-reach points.
- The spray suction tool is used to suck up dust.
Only suck with the addition of water! - Do not use the spray suction tool while driving!
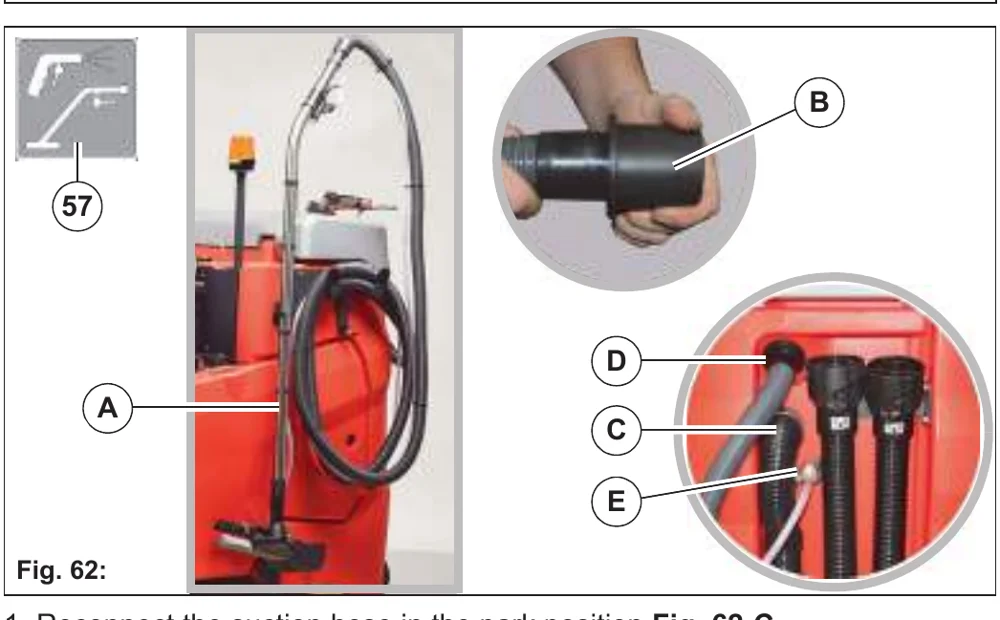
- Reconnect the suction hose in the park position Fig. 62-C.
- Insert the hose of the tool into the opening of the vacuum system Fig. 62-D.
- Connect the hose to the water connection of the machine Fig. 62-E.
- Use the tool operation button Fig. 62-57 on the control panel to switch the tool on and off. The operator must not be sitting on the seat.
Push the button twice: Spray suction tool ON.
Push the button again: Spray suction tool OFF.
6.2 Manual suction tool
The manual suction tool Fig. 63-A is used for manually cleaning difficult-to-reach points.
- The manual suction tool is not used to suck up dust.
Only suck up water! - Do not use the manual suction tool while driving!
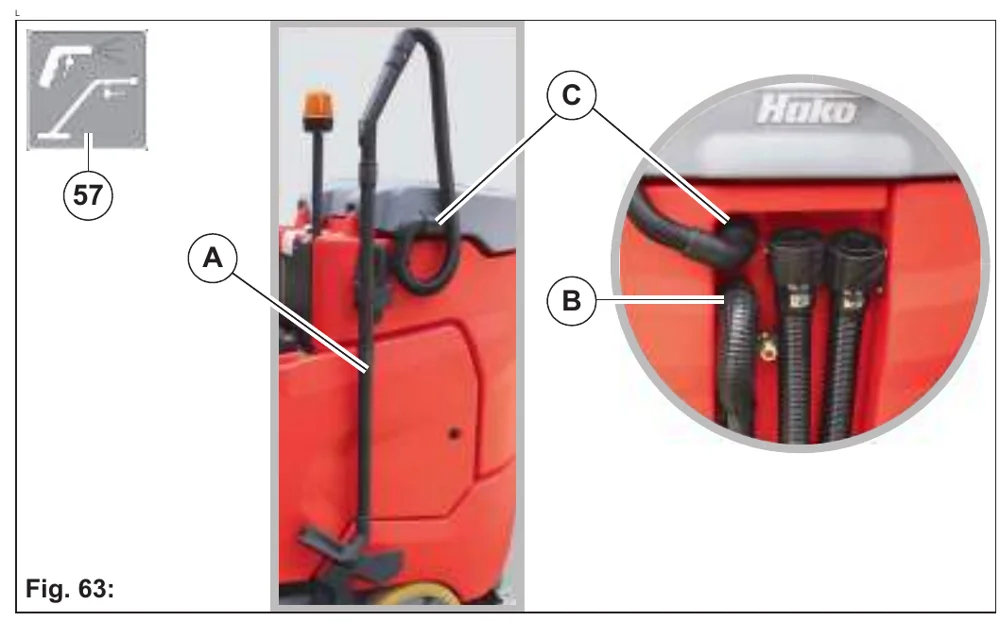
- Reconnect the suction hose in the park position Fig. 63-B.
- Insert the hose of the tool into the opening of the vacuum system Fig. 63-C.
- Use the tool operation button Fig. 63-57 on the control panel to switch the tool on and off. The operator must not be sitting on the seat.
Push the button twice: Manual suction tool ON
Push the button again: Manual suction tool OFF
6.3 Spray nozzle
The spray nozzle Fig. 64-34 is used to flush the solution tank and waste water tank.
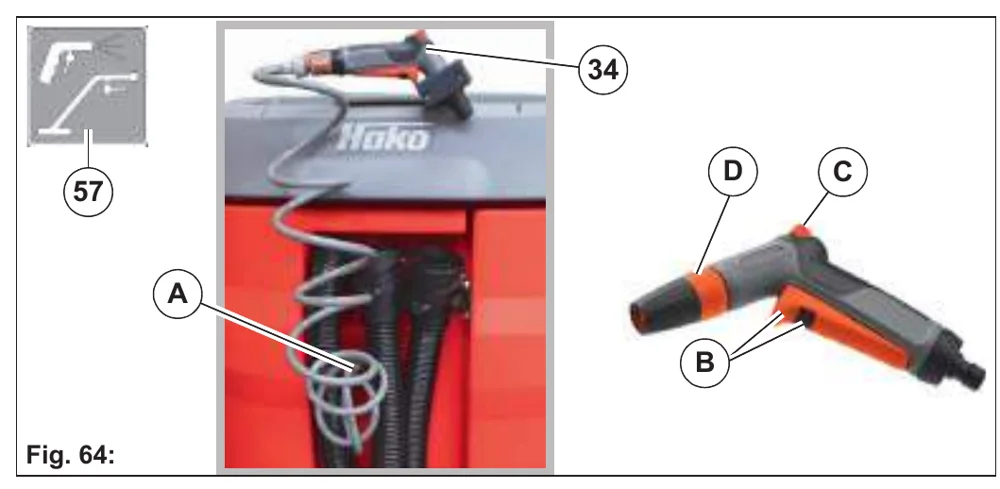
- Connect the hose to the water connection of the machine Fig. 64-A.
- Use the Tool operation button Fig. 64-57 on the control panel to turn the water supply on and off. The operator must not be sitting on the seat.
Push the button: Spray nozzle water supply ON
Push the button again: Spray nozzle water supply OFF - Spray nozzle operation:
B = operating handle with locking mechanism for turning the water supply on and off.
C = adjusting lever for water dosing.
D = setting the type of water jet.
6.4 Pre-sweep suction unit
The pre-sweep suction unit picks up dirt in the dry area in front of the scrubbing unit. The two side brushes brush the dirt directly into the path of the cylindrical brush. The cylindrical brush then sweeps the dirt forwards into the dirt hopper. The fine dust that is swirled up by the cylindrical brush is transported against the filter element by the suction fan.
6.4.1 Pre-sweep suction unit installation
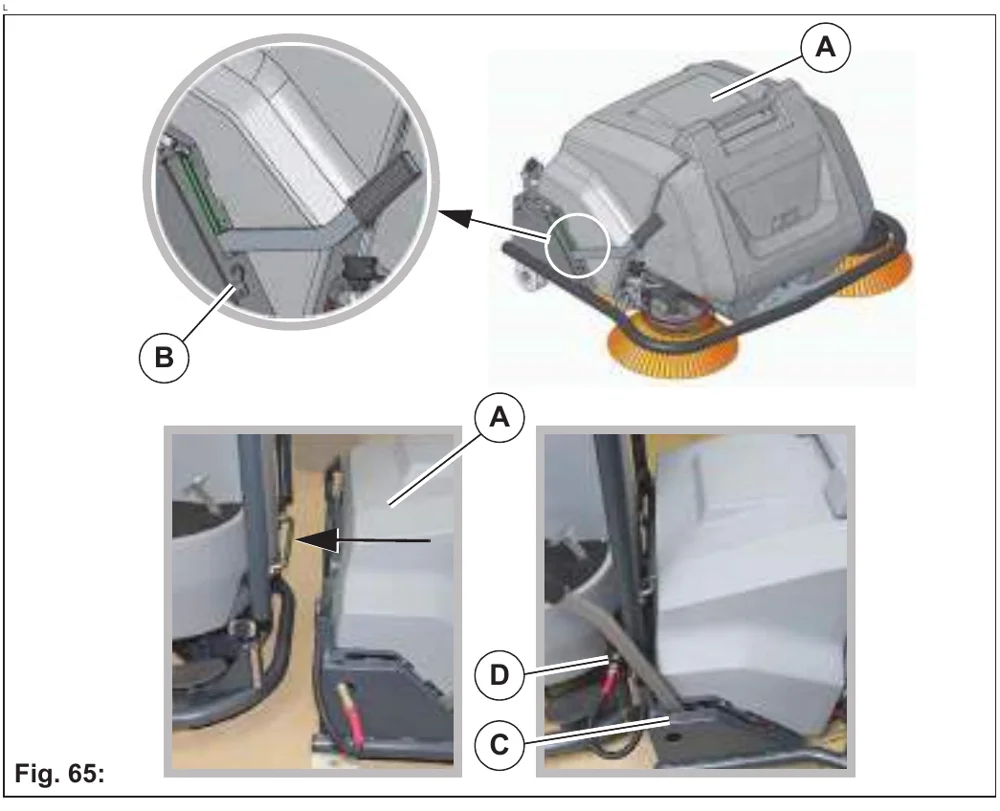
- Slide the pre-sweep suction unit Fig. 65-A as far as the swivel bracket on the machine in a central position. The lever is in the change position Fig. 65-B.
- Move lever to position P Fig. 65-C.
- Insert the plug into the socket at the front right of the machine and secure with the knurled nut Fig. 65-D.
The pre-sweep suction unit is now attached to the machine.
6.4.2 Check and correct settings
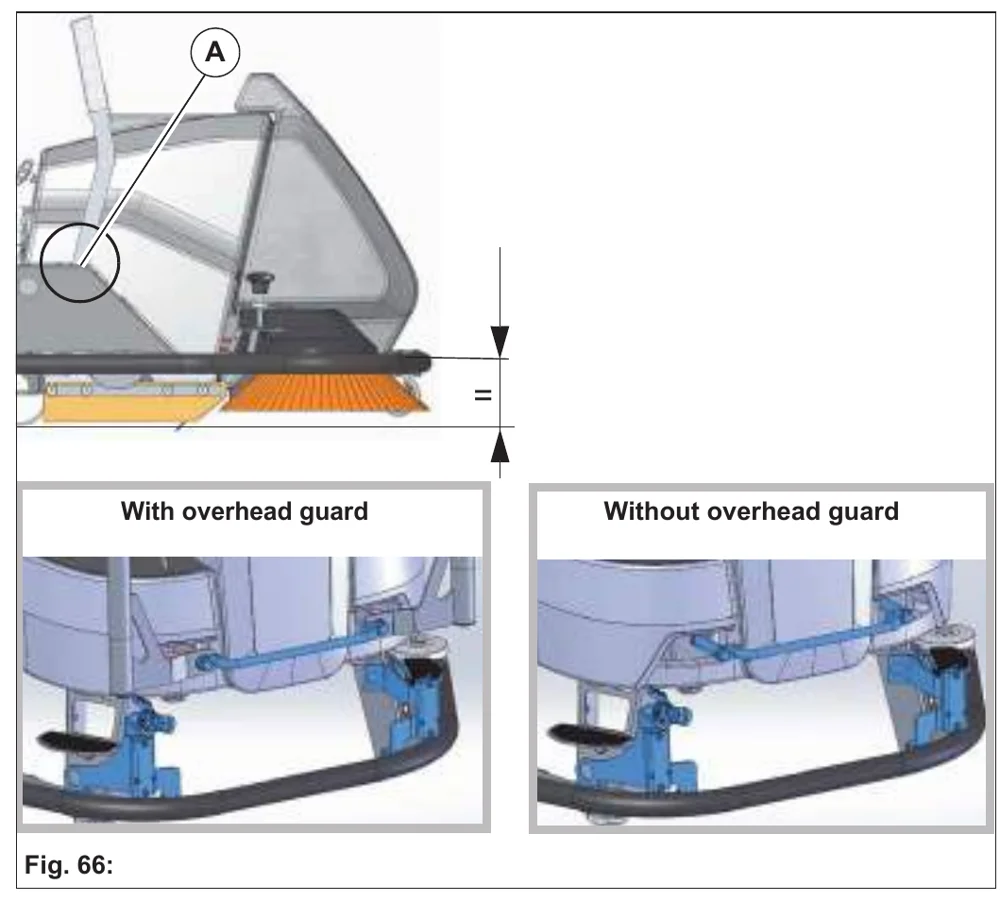
If the pre-sweep suction unit is attached to the machine and the lever is in the sweeping position (Pos. 1) Fig. 65-A, the frame must be aligned parallel to the floor.
If this is not the case, the following steps must be taken:
- Disconnect the pre-sweep suction unit.
- Unscrew the swivel bracket Fig. 65-B from the machine. The tilt angle of the frame is determined by adding or removing the washers Fig. 65-C. The following applies: the more the washers are used, the more the frame will tilt downwards at the front.
6.4.3 Sweeping operation
- Do not use the pre-sweep suction unit unless the dirt hopper is attached!
- Sweeping up dust that is hazardous to health is not permitted!
- Ensure that there is sufficient ventilation when performing sweeping tasks in enclosed rooms!
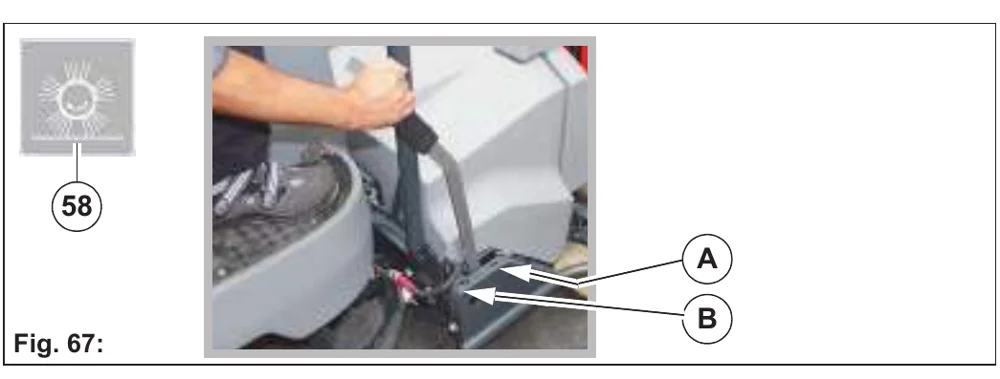
- Switch the machine on and press the Pre-sweep suction unit Fig. 67-58 button on the control panel.
- Move the lever of the pre-sweep unit from pos. P to pos. 1 Fig. 67-A and set off.
6.4.4 Stop sweeping operation
- Press the Pre-sweep suction unit Fig. 67-58 button on the control panel.
- Move the lever of the pre-sweep unit from pos. 1 to pos. P Fig. 67-B.
6.4.5 After sweeping
- Risk of electric shock!
Do not clean the electrical components using water!
- Make sure that the dust filter is not wet.
- Insert the dirt hopper before cleaning.
- Cleaning the machine with a high-pressure cleaner or steam jet is not permitted!
- Drive to a suitable maintenance location.
- Operate the shaking system.
- Empty the dirt hopper.
- Check the cylindrical brush compartment for contamination and remove if necessary.
- Clean the pre-sweep suction unit if necessary.
6.4.6 Parking the pre-sweep suction unit
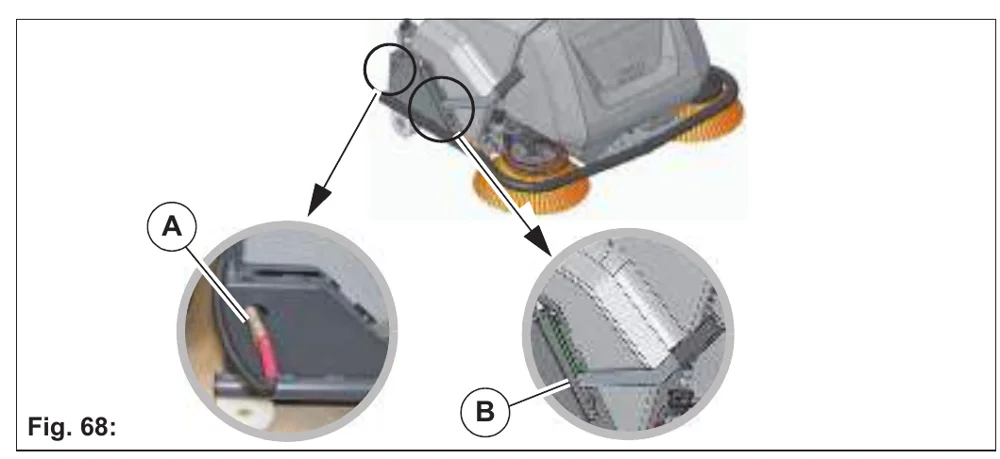
- Unplug the plug at the machine side and plug into the retaining hole Fig. 68-A.
- Move the lever to the change/parking position Fig. 68-B.
- Park the pre-sweep suction unit on a solid surface and in a dry, clean location.
6.5 Overhead guard
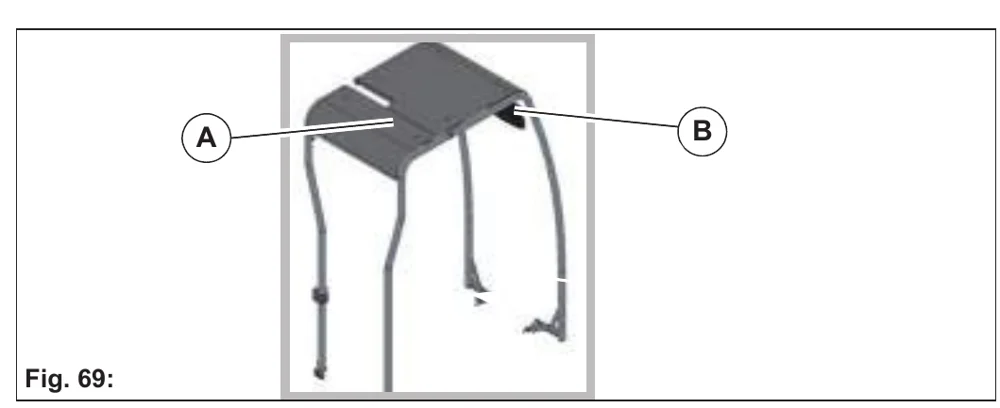
The overhead guard Fig. 69-A is used to protect the driver from falling parts in the high bay warehouse, for example.
An optional side mirror Fig. 69-B is available.
EC Declaration of Conformity
Hako GmbH
Hamburger Str. 209-239
23843 Bad Oldesloe, Germany
declare in sole responsibility that the following products
Scrubmaster B175 R model: 7180
and
Pre-sweep suction unit model: 7180.50
to which this declaration relates correspond with the relevant basic safety and health requirements of EC Directive 2006/42/EC as well as the requirements according to 2014/30/EC and 2014/53/EC.
The following standard(s) and technical specifications was/were referred to for the correct implementation of the safety and health requirements named in the EC Directive:
EN 60335-2-72
EN 55012
EN 61000-6-2
Name of the authorised person who compiles the technical documents for Hako:
Ludger Lüttel
Bad Oldesloe, 25.10.2018
Ricardo Ruiz Porath
Product line manager – cleaning technology
“The Power of Clean”
PowerBoss® is a Full Line Manufacturer of Sweepers and Scrubbers, for Industrial Facilities.
PowerBoss®, Minuteman International, Inc. 14N845 U.S. Route 20
Pingree Grove, Illinois 60140
Phone: 800-323-9420 www.PowerBoss.com Email: [email protected]
A Member of the Hako Group
ScrubMaster B175R
88103115 Rev A 04/19
Minuteman and PowerBoss are trademarks of Minuteman International, Inc. Southeastern Equipment & Supply is an independent dealer.